|
|
Post by OnlyMark on Jan 11, 2012 11:03:22 GMT 2
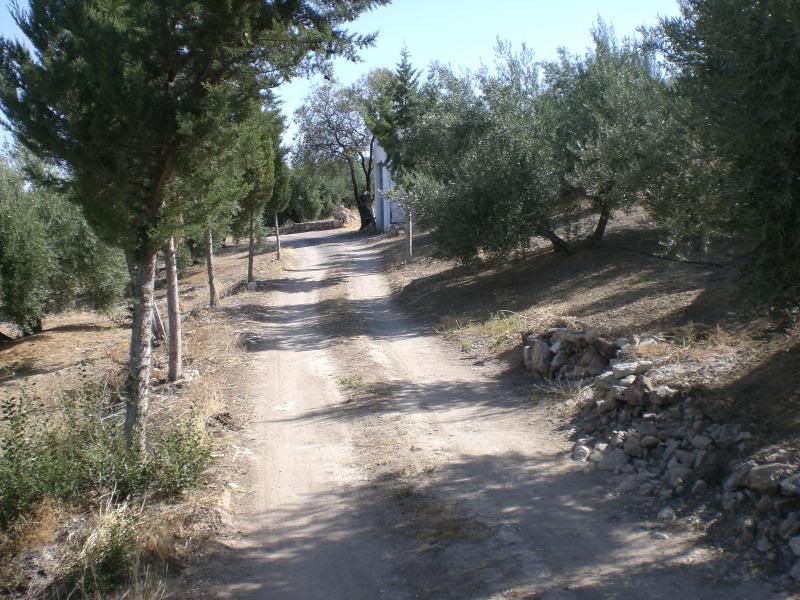
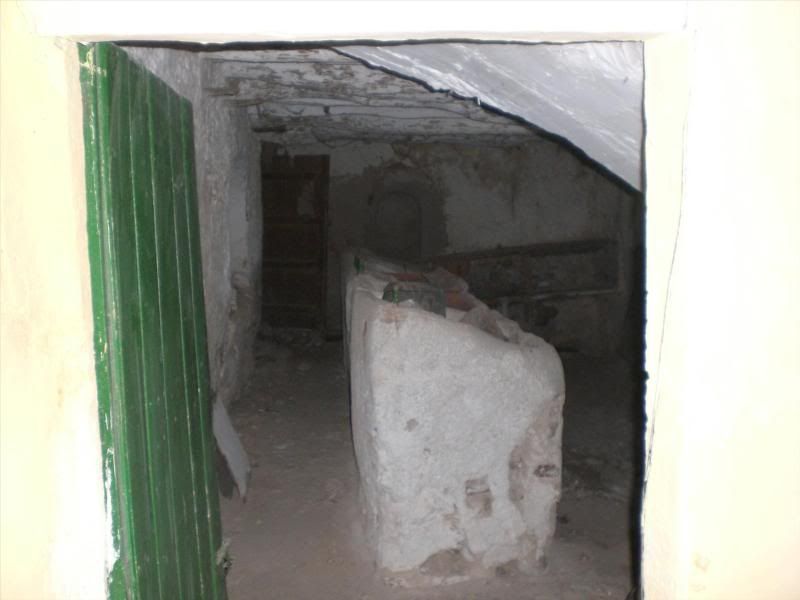
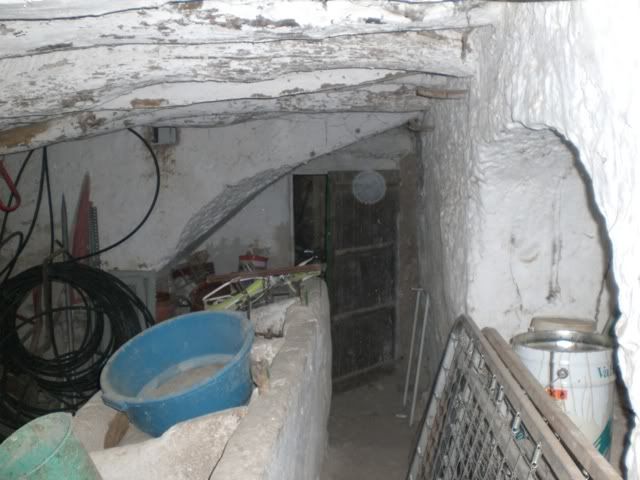
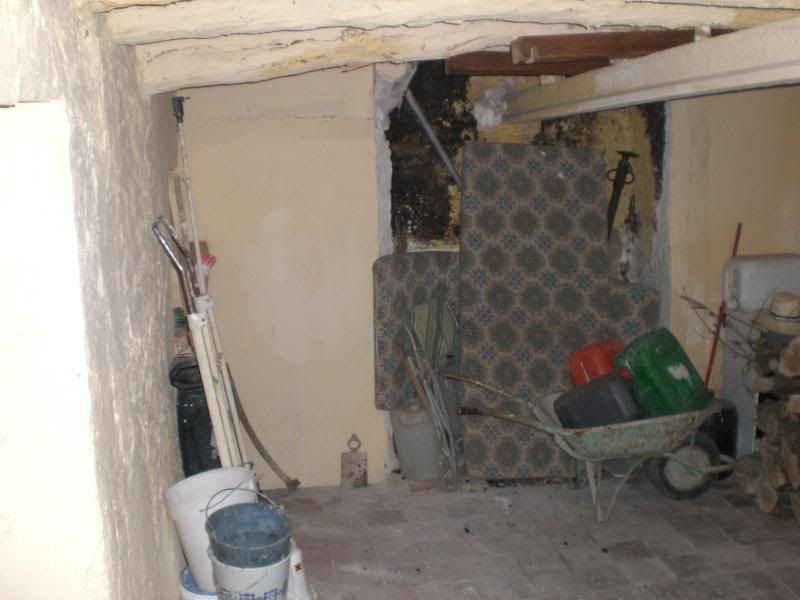
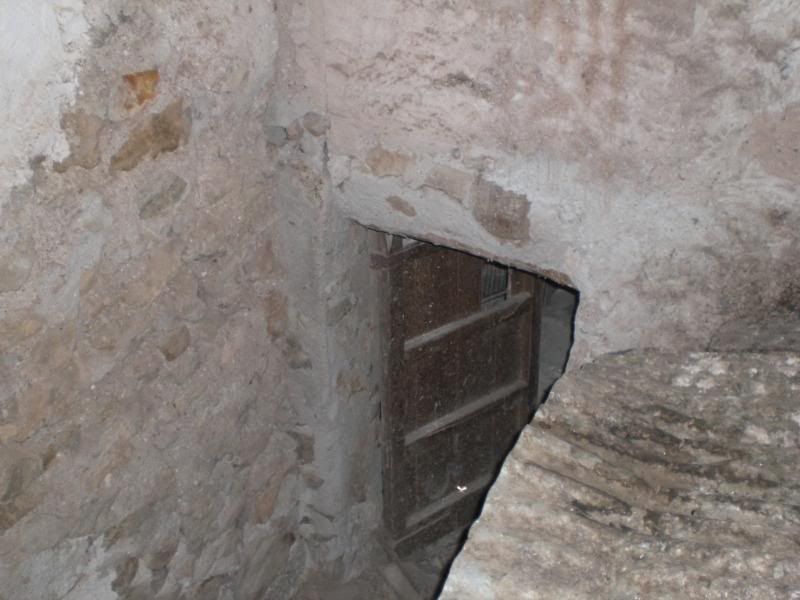
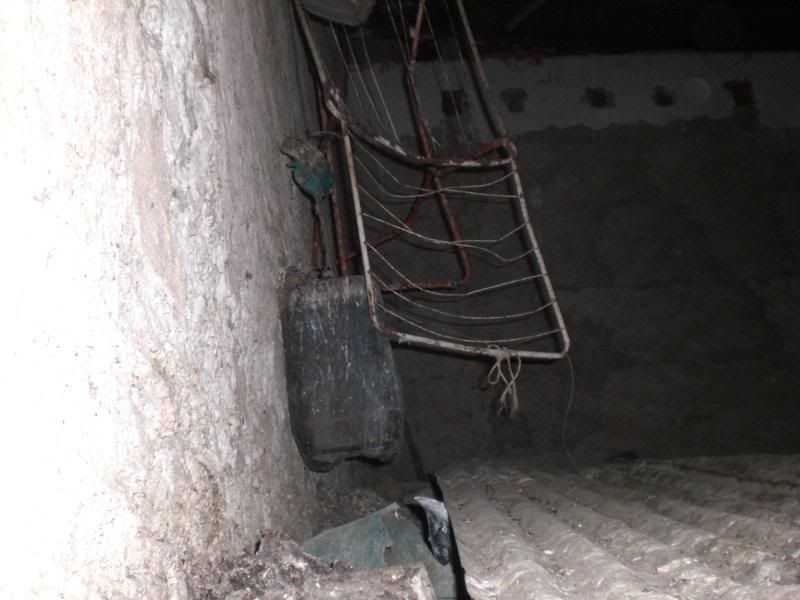
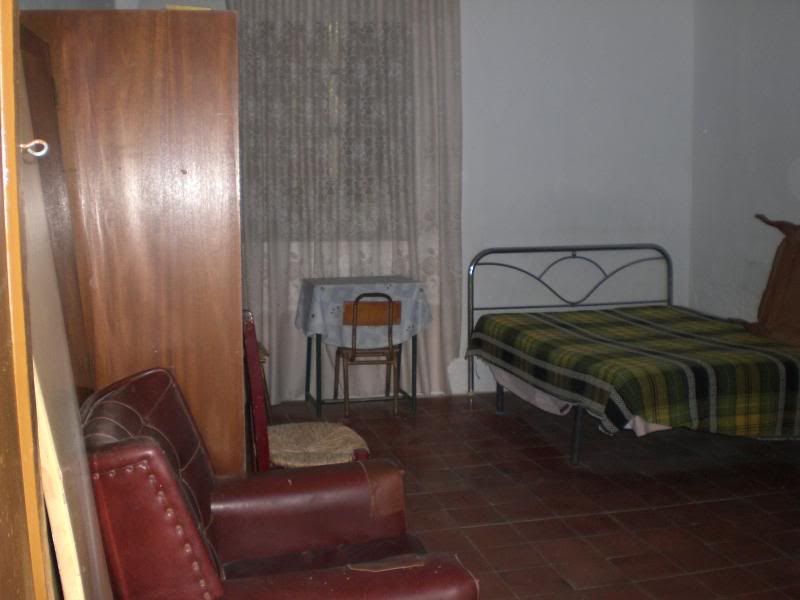
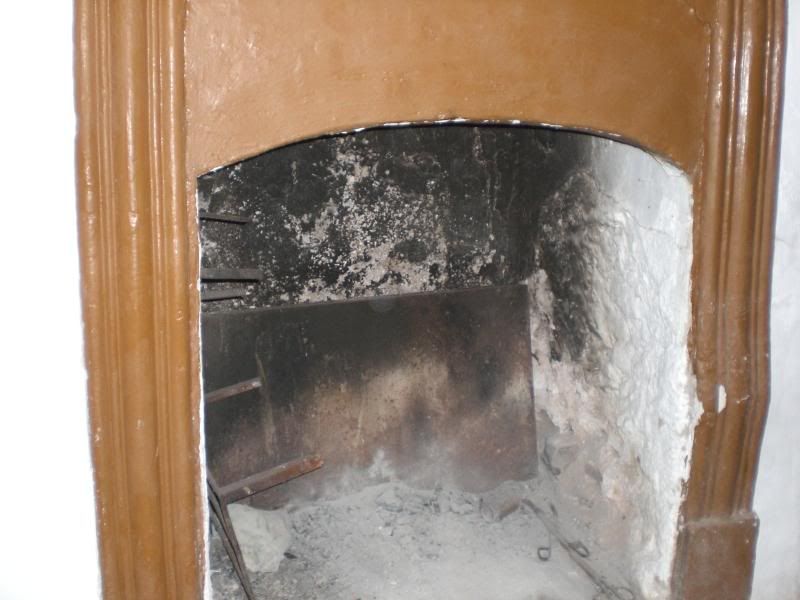
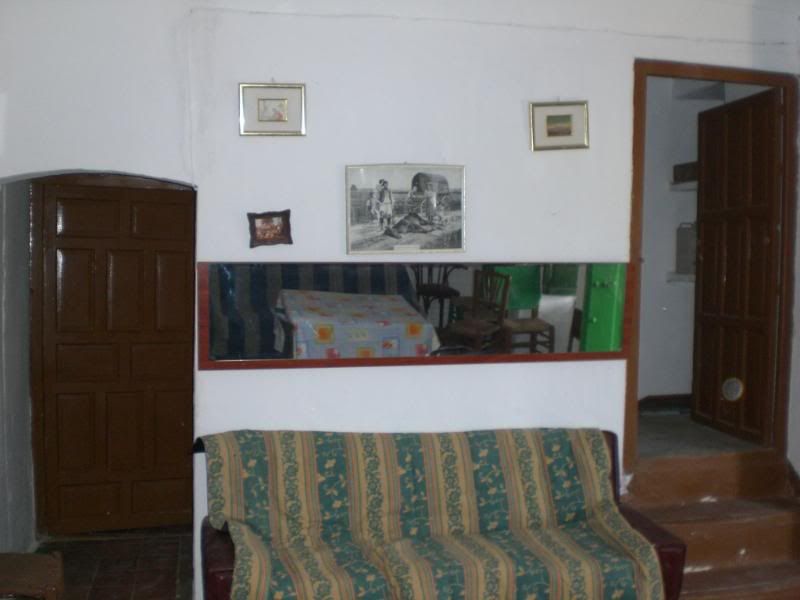
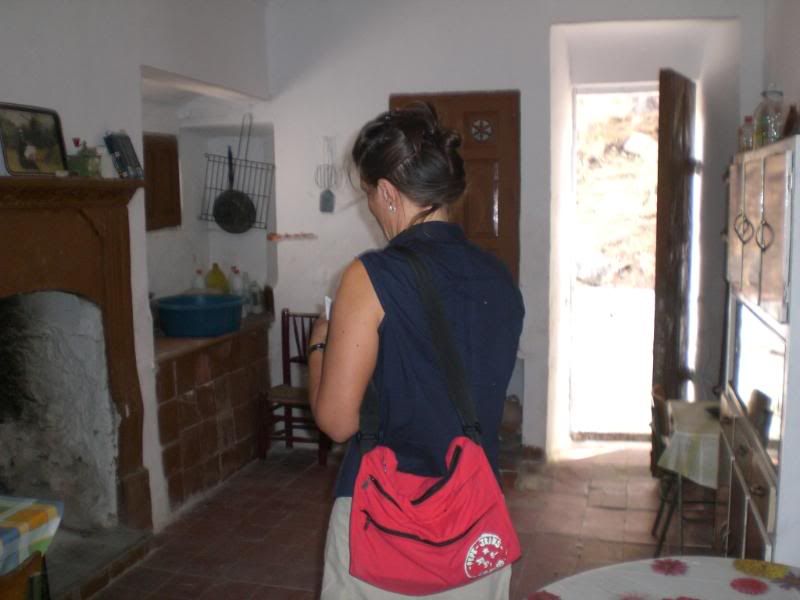
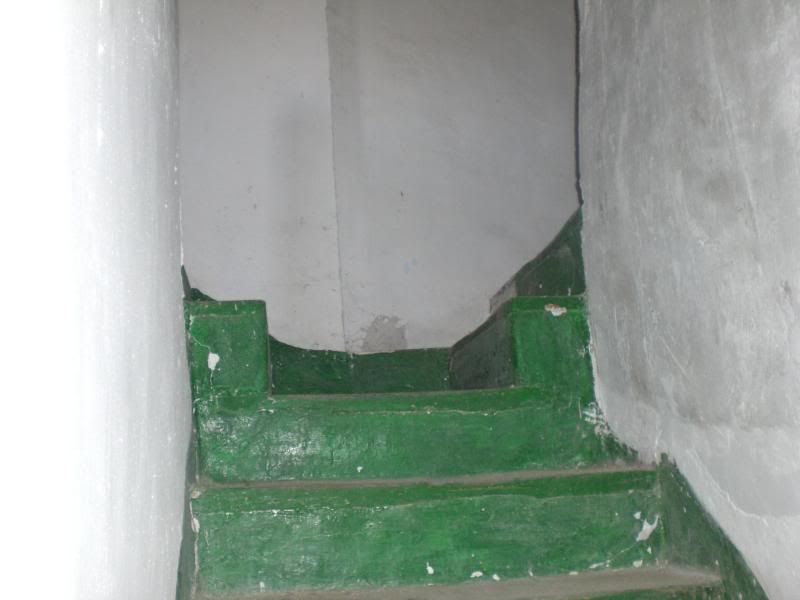
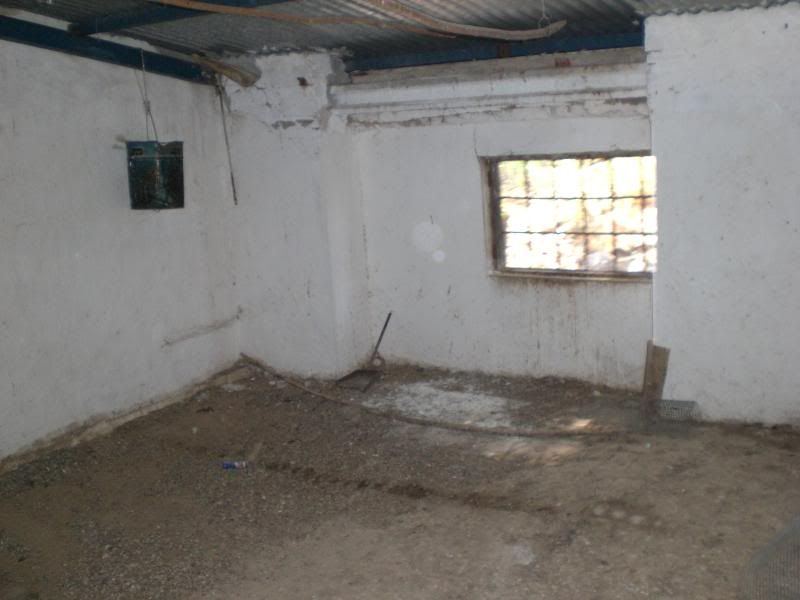
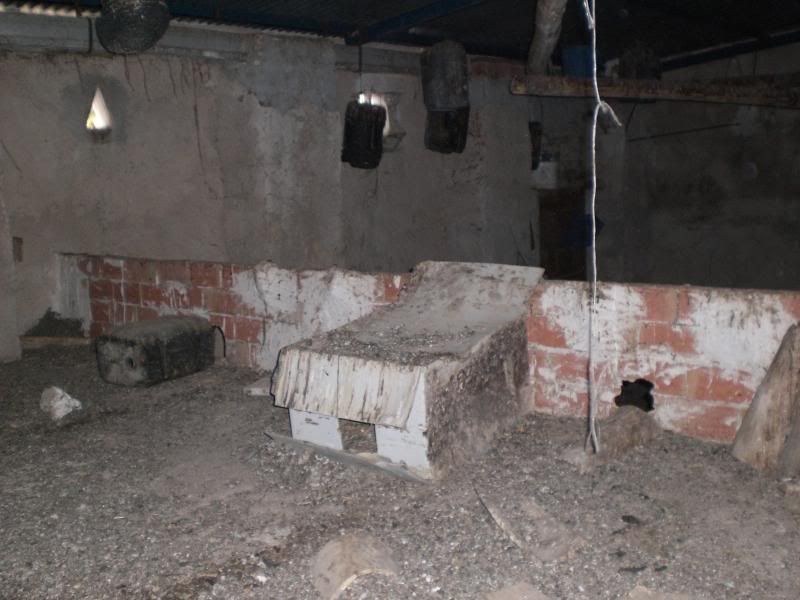
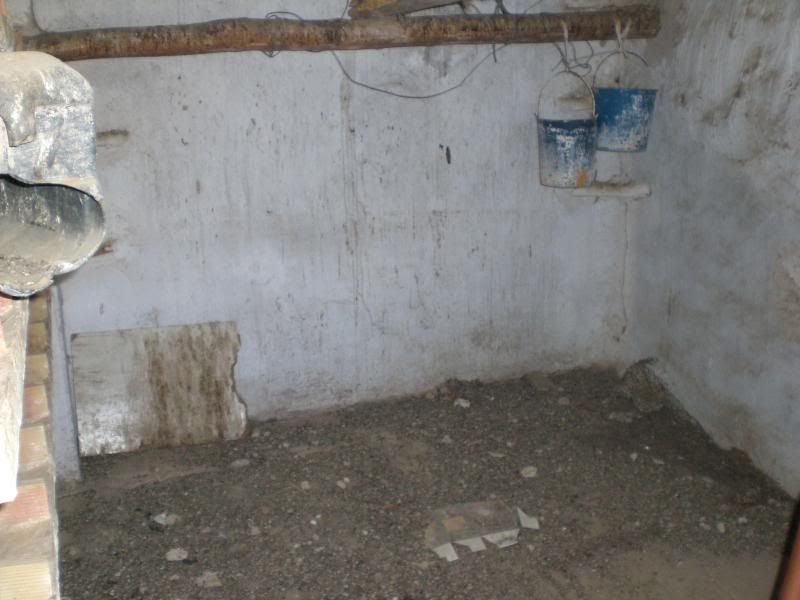
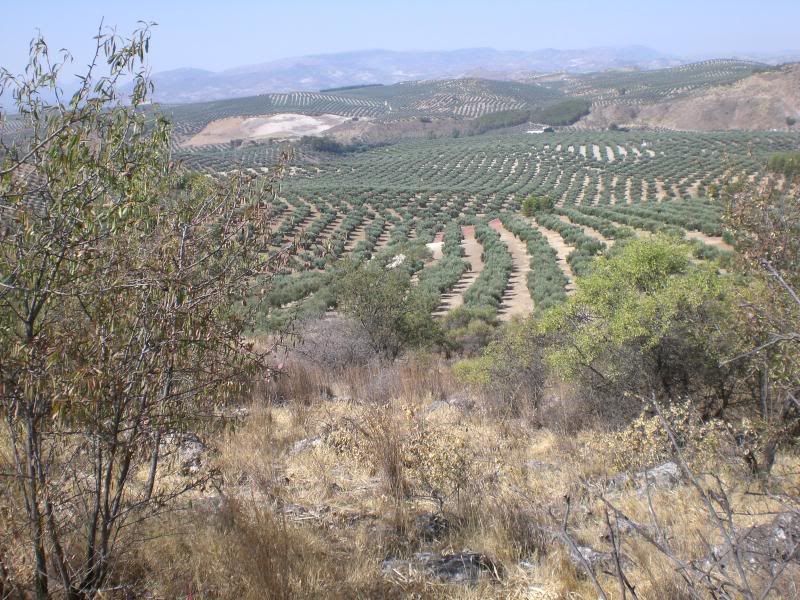
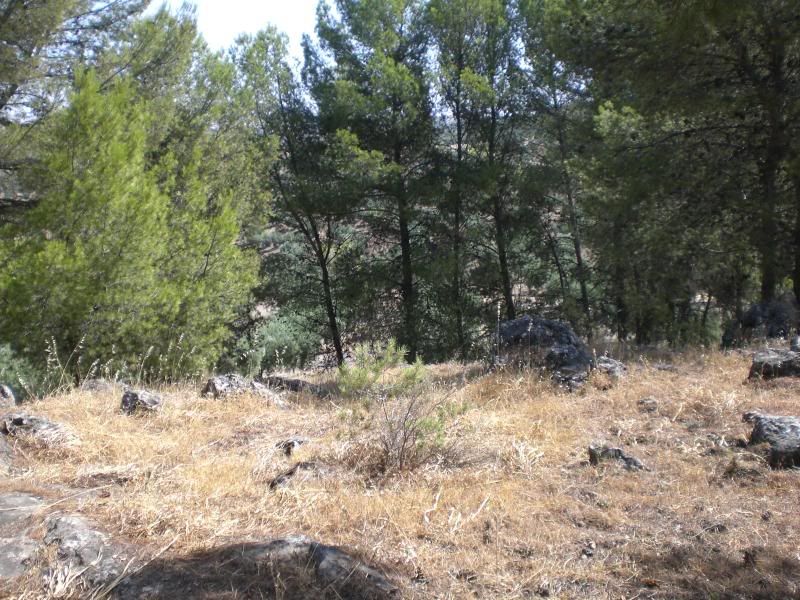
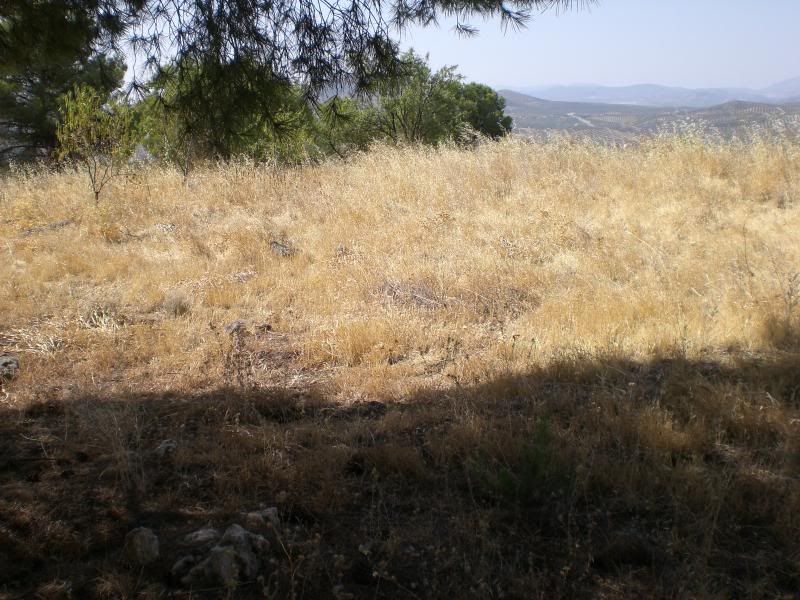
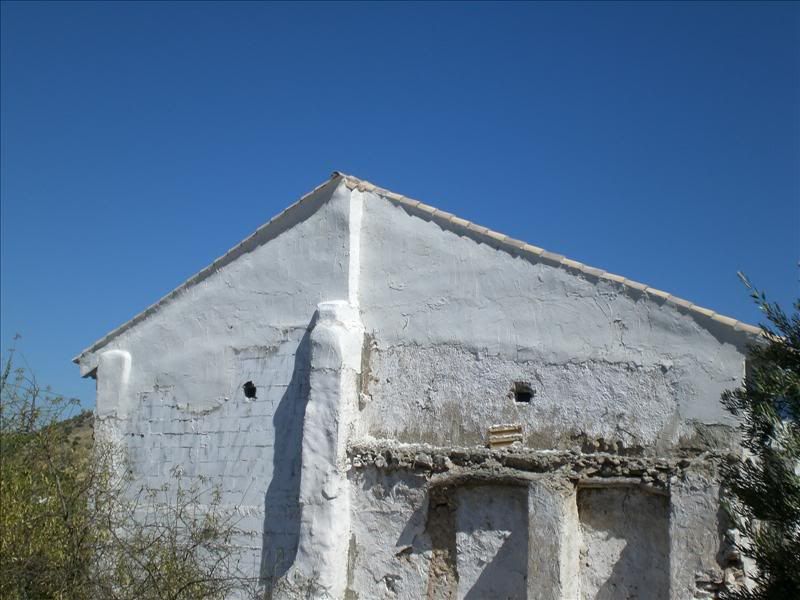
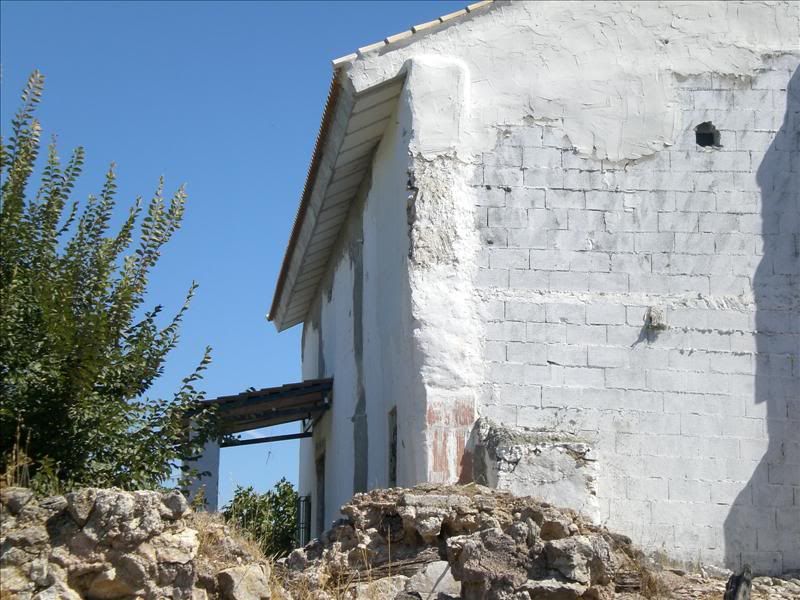
It's all about me, me me, and I wish to focus your attention on the house we have in Spain. On the other hand I could just feel it is about time to share with you while it's quiet and now I've refined it elsewhere a more fuller account of the renovations to the house. It should tie in a few posts I've made over the last couple of years so there will be bits you know about and bits you don't. Skip anything as necessary. Also I'm sympathising with happyt about her situation in that we were in the same position for many years, i.e. renting places and paying a lot of money but never owning anywhere. I was prompted by my wife to make a full account of this for us in our old age and for our kids who will eventually get the house so they feel a little more connected to it. I'll probably get one of those self publishing web sites to make it into a hard copy book for us. It all started quite a few years ago, as these things do, with a conversation. Previous to having our children we would go on holiday to far flung places and travel round. As soon as we had them we realised this was not the easiest thing to do so we looked for somewhere we could go for several weeks, have a base or two and do day trips. As my brother and cousin lived in Spain the idea cropped up of going there, plus there are plenty of reasonable places to stay and many activities. So we did. We rented an out of the way house in a fairly remote village (no mains electric or water) for a month and settled in. Both of us had travelled and both had worked abroad from our home countries. Neither of us felt a particular tie to ‘home’ and neither of us felt we needed to have a ‘root’ somewhere. The kids obviously changed this, plus we began to think about where we would be upon retirement. This led to the conversation mentioned whereby we mooted various countries we would stay long term. For a number of reasons we decided on Spain, not least being the weather, the way of life, the cost, the health services, the location within Europe, the language – in fact the whole package. One benefit was the very depressed housing market of which we aimed to take advantage. So we set about deciding the parameters of what and where. We ruled out most everywhere apart from the south of Spain, Andalucia. We ruled out new build or off plan houses or apartments (we ruled out apartments all together). We wanted somewhere that was on the outskirts of a village, somewhere within easy range of a larger town, a place with land, within easy enough distance from a couple of airports, no more than an hour and a half from where my brother and family were living, needed work doing to it and..... and..... and......... etc. We then approached buying a place from two angles – decide approx where and look in depth just there and/or look at what was available and fitted what we wanted then see where they were. Over the next couple of years with a number of visits to Spain and many days following agents around or knocking on doors ourselves, we decided on a place. It fitted nearly all of our criteria being an old farm house but was advertised as having mains water and electric – which it didn’t. This was not insurmountable but it needed some tough negotiation to make the place financially attractive. At one point the agent involved offered to have built at their expense a generator plant for the electric. This we refused and eventually we came to an agreement as regards solar power, a refund of 6000 Euros and payment for a mains water connection from the nearby village plus keeping quiet that their lawyer was not (as we found out) legally trained or had papers to prove so and the forged signature he did on one of the contracts – all this reduced the price to an acceptable level. So we bought it. What though, did we buy? This is where the house is (southern Spain, Andalucia) within easy travel of Jaen, Granada and Cordoba and a little bit further to Malaga, Seville and Almeria – 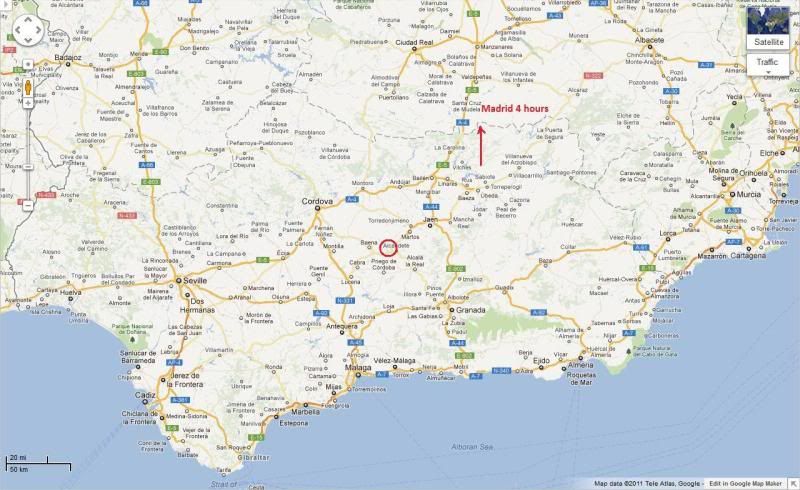 This is how it’s situated – 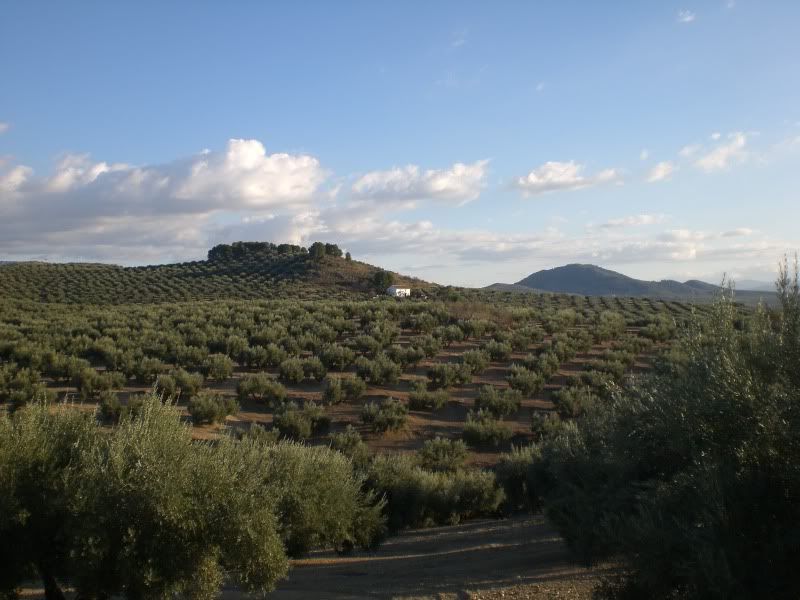 Hidden in a dip in the foreground is the road to the village. The house is about 150 metres up a track and is about 420 sq.m build with about somewhere between 15,000 to 20,000 sq.m of land, chiefly the hill to the rear. We actually own only half a dozen of the olive trees to the front and side of us. When we first took the place over it was in a bit of a state to say the least. The previous owner had only used part of the middle floor; the rest was used for animals. Some views of how it was with the old owner showing us round – 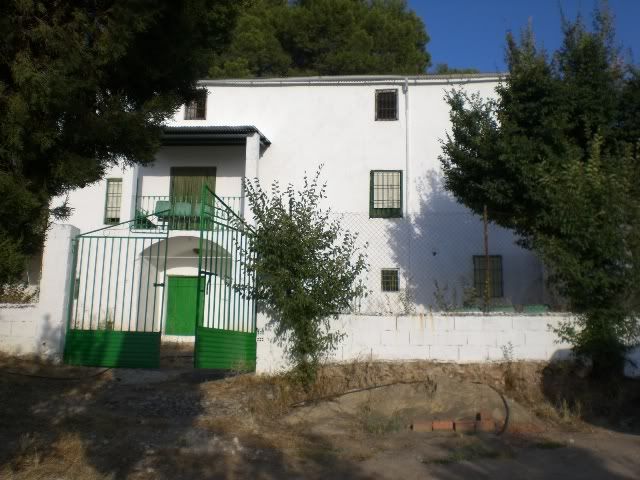  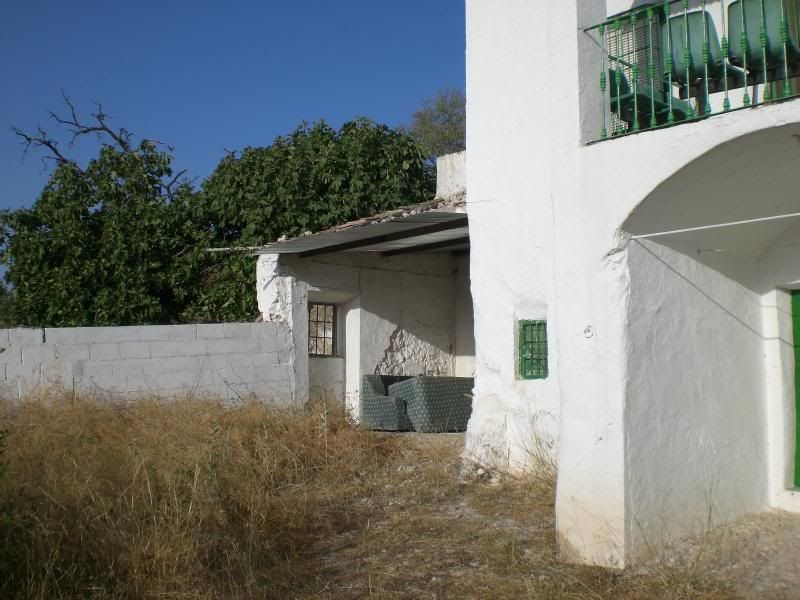 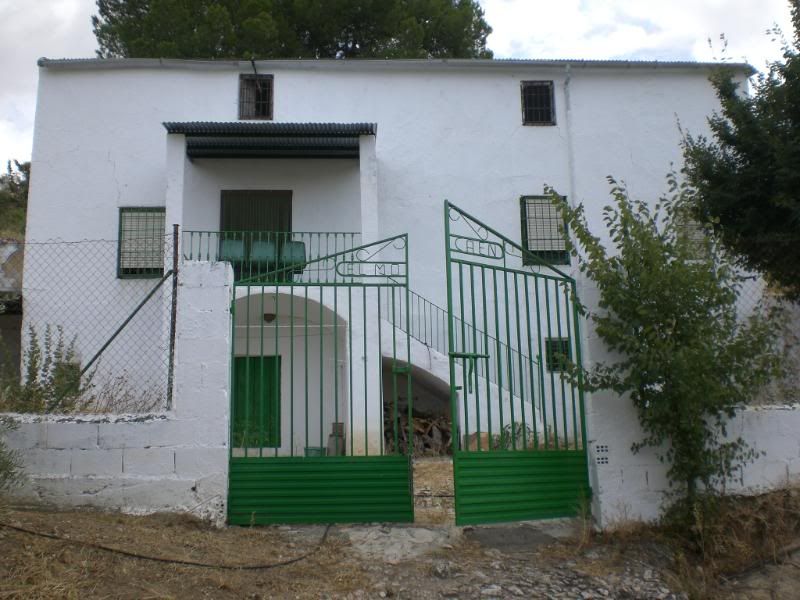 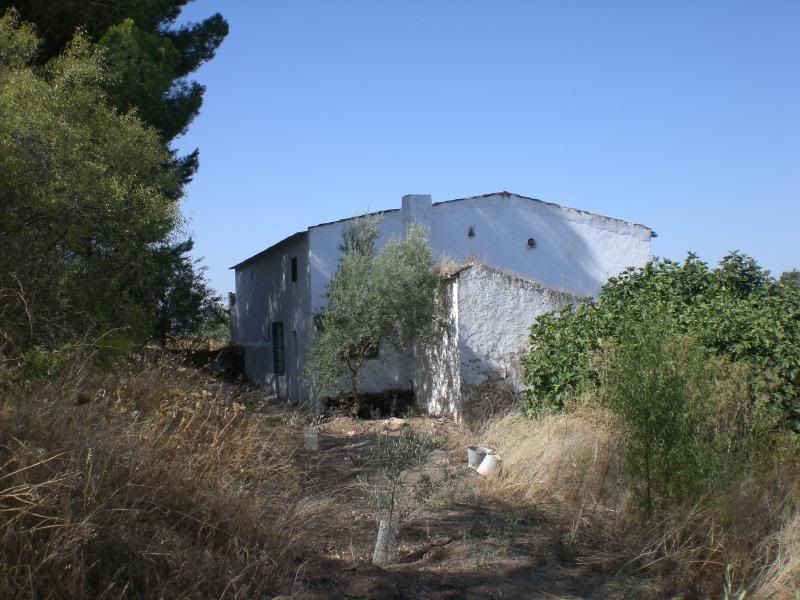 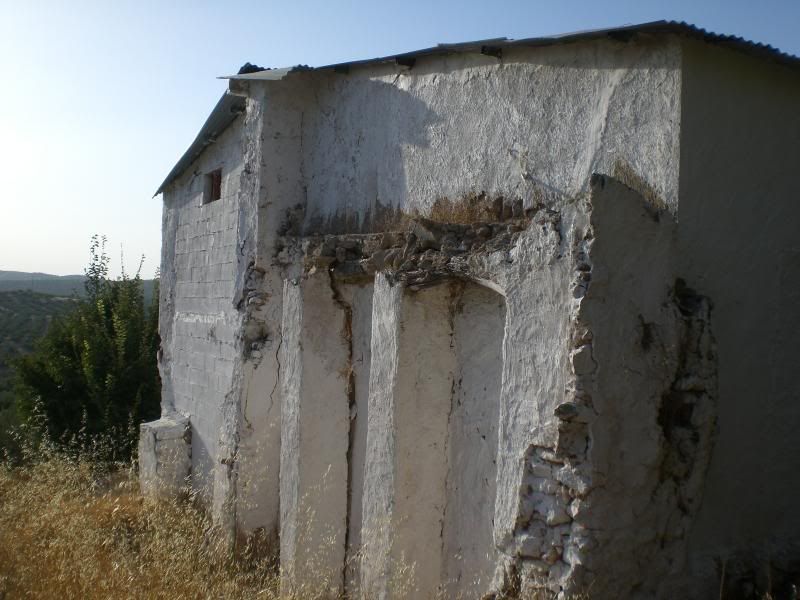 (The son of the owner) 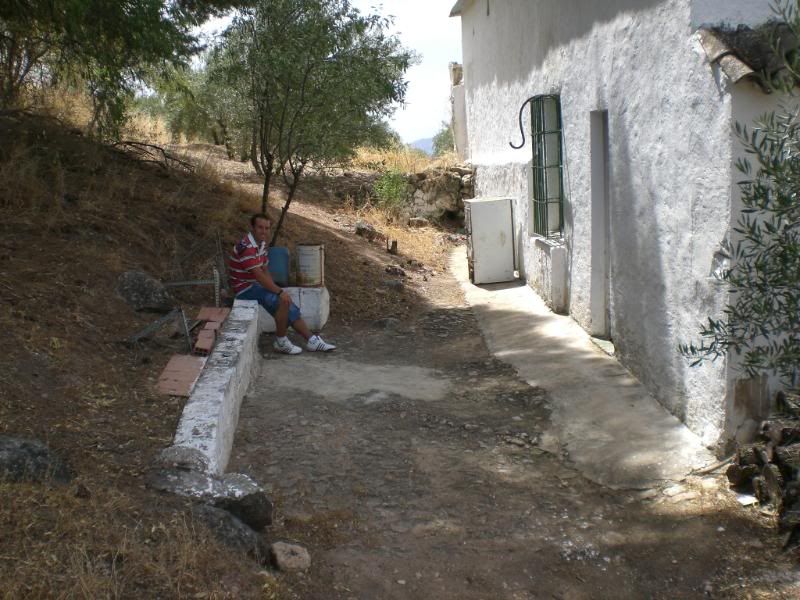 |
|
|
|
Post by OnlyMark on Jan 11, 2012 11:07:27 GMT 2
|
|
|
|
Post by OnlyMark on Jan 11, 2012 11:09:21 GMT 2
We got to a point where the house is in our possession, signed, sealed and delivered. So we poke our nose into every nook and cranny and ideas begin to form as to what we want to do with it. The next step would be to get an in depth structural survey and employ an architect to draw up detailed plans for a builder to interpret and continue through with. Far too simple for us. One of the thoughts we had about the house was that we could stay at arm’s length and just employ people to produce the finished product. A fairly sterile, though effective, approach. We wanted to be involved, to ‘own’ the house. After all, it wasn’t supposed to be just an investment or a place to live, it was to be ‘us’ – if you see what I mean. So it was decided by my wife that she’d call my bluff (bless ‘er little cotton socks) that over the years I’d convinced her how capable and handy I was and not such a big chump as I’d made out – she decided that I would do all that. Gulp. I did mention to her though that the major building work was a little beyond me - especially as we weren’t even living in the same country as the house. She relented and said that we’d employ a builder then but I had to do all the plans and advise how, what, where etc. With this in mind I went back to Spain and had a really good look round at everything, including the land we’d bought. We weren’t farmers, we knew nothing about olive trees so the land was attractive in that it didn’t include any agricultural land, just the part they couldn’t use, being the hill. I had noticed before a hole – 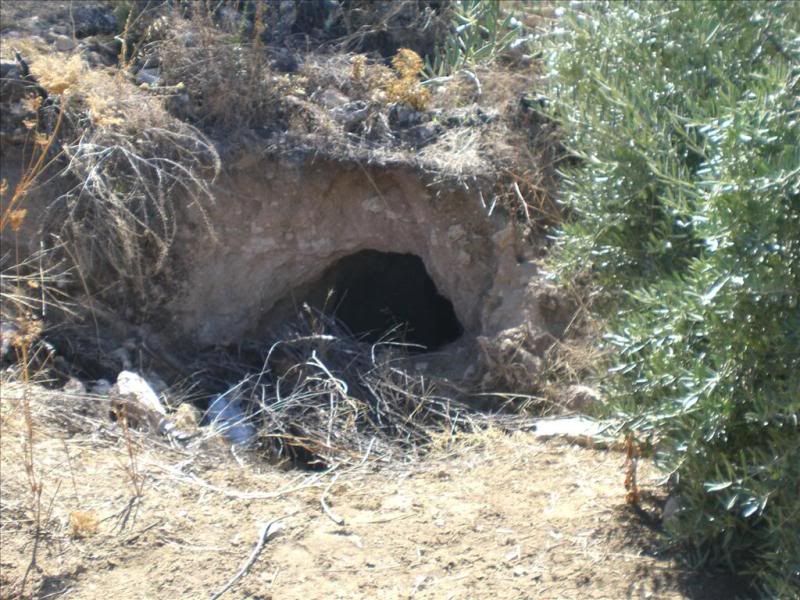 A little way from the house –  I was by myself, out in the middle of nowhere, so I went and got my brother the next day, and we went down it. Quite deep – 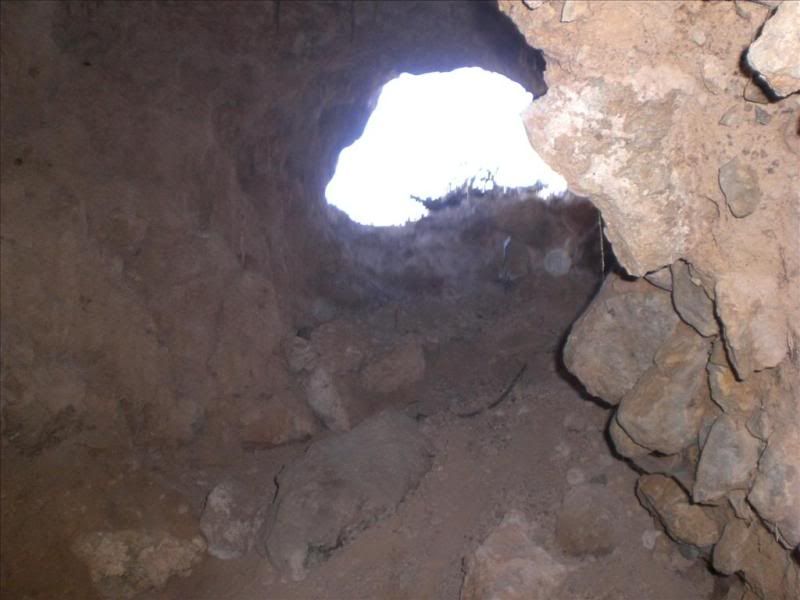 And then we discovered –  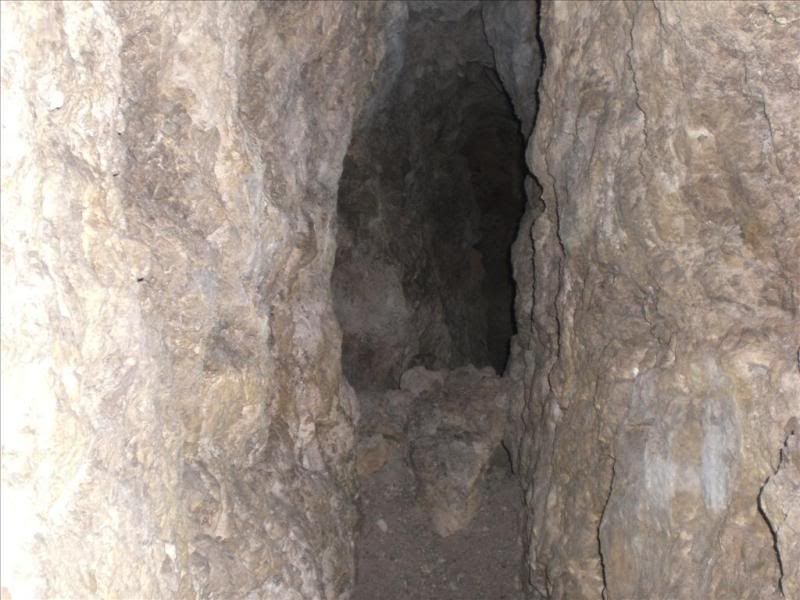 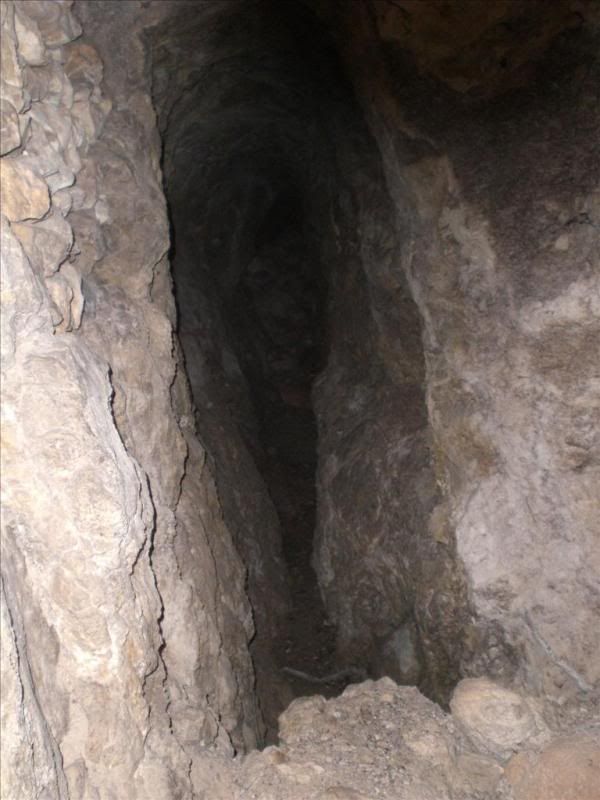 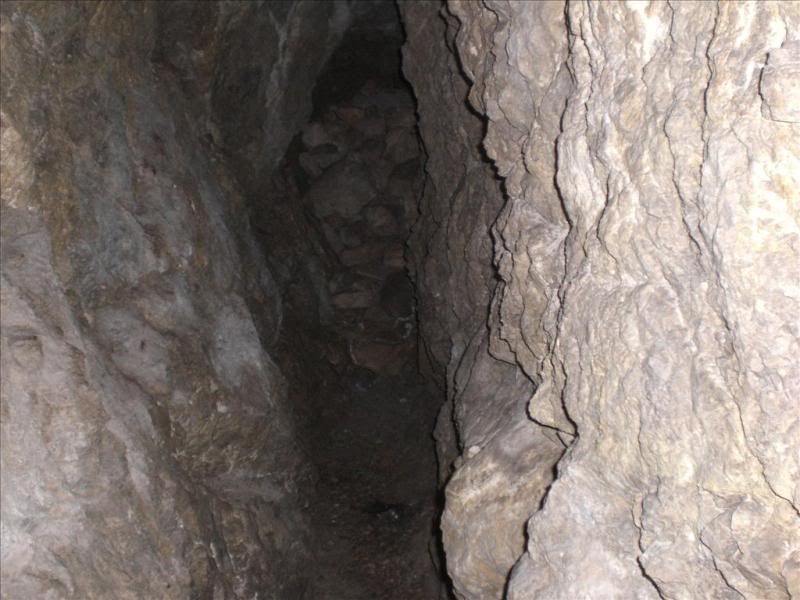 Notice the smooth pebbles on the floor of the cutting – 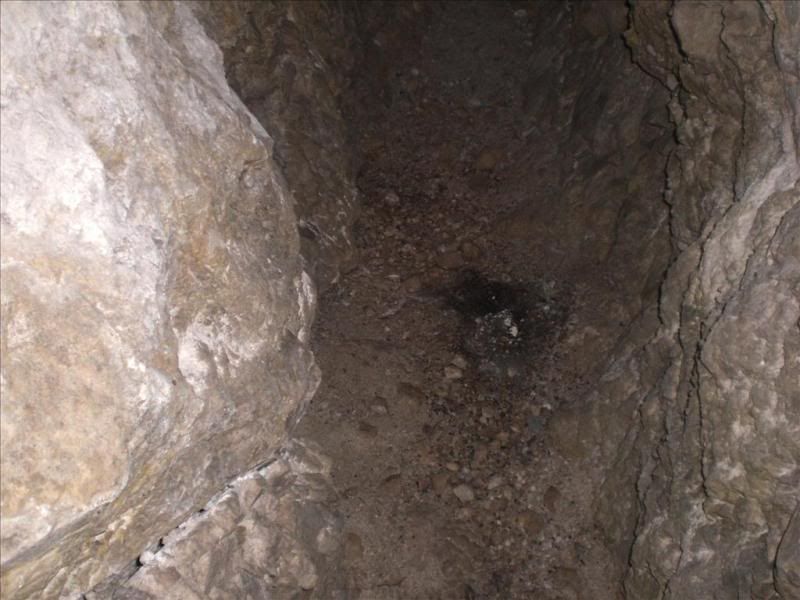 I could only come to one conclusion. It was hundreds of years old and built probably by the Moors to channel water. It stretched now though only about 20 metres and was blocked. We made our retreat and I pondered what to do with it. My pondering lasted quite some time but ended when I went back the next time and found that due to some adverse weather conditions bringing loads of rain, the entrance had collapsed and was completely blocked for all eternity. That was the end of that then. |
|
|
|
Post by OnlyMark on Jan 11, 2012 11:16:04 GMT 2
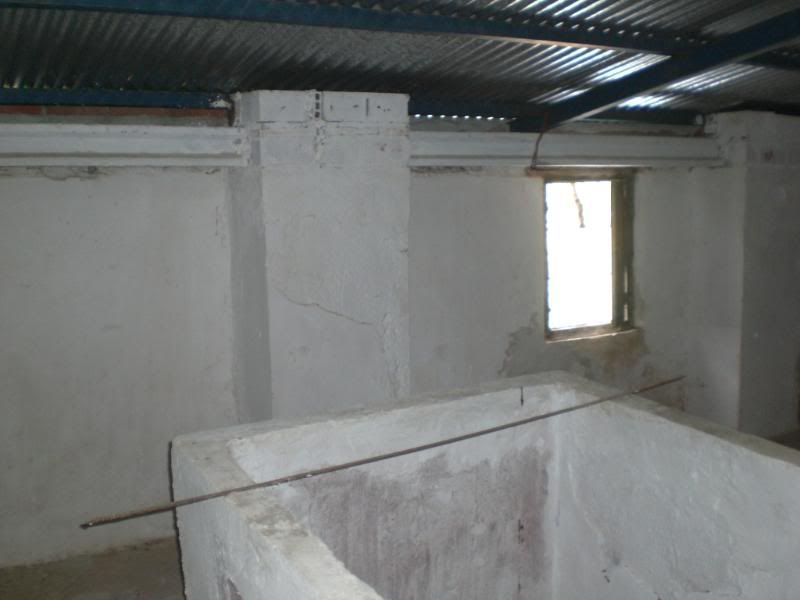
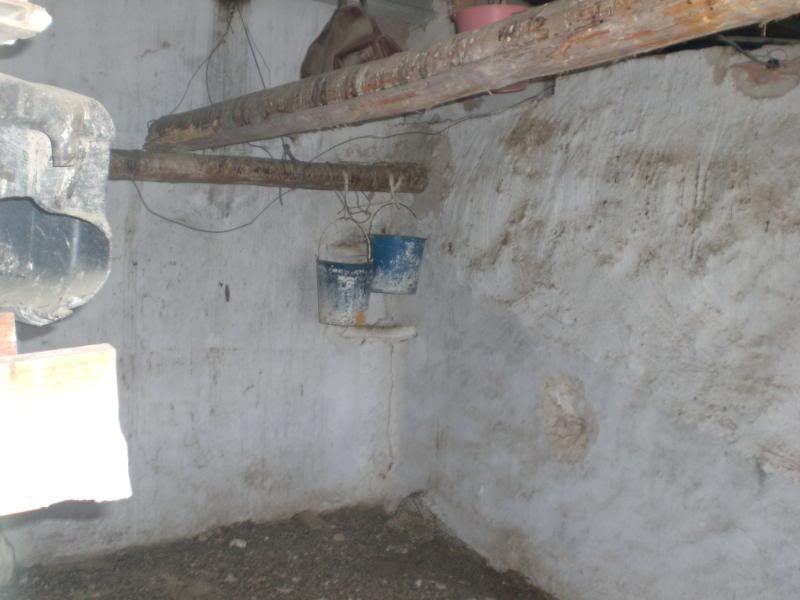
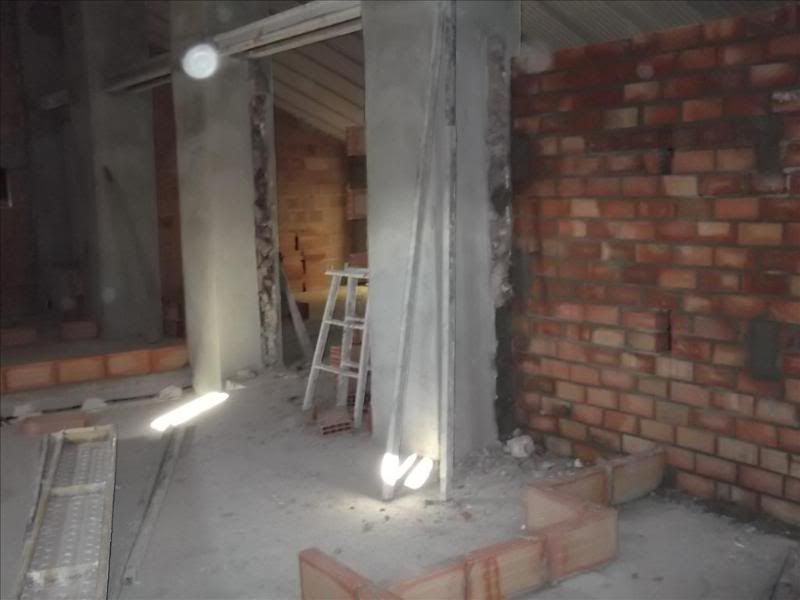
The house, as we knew, needed major structural work. This is an example of the pillars that were doing the support after I’d attacked it to find how strong it was – 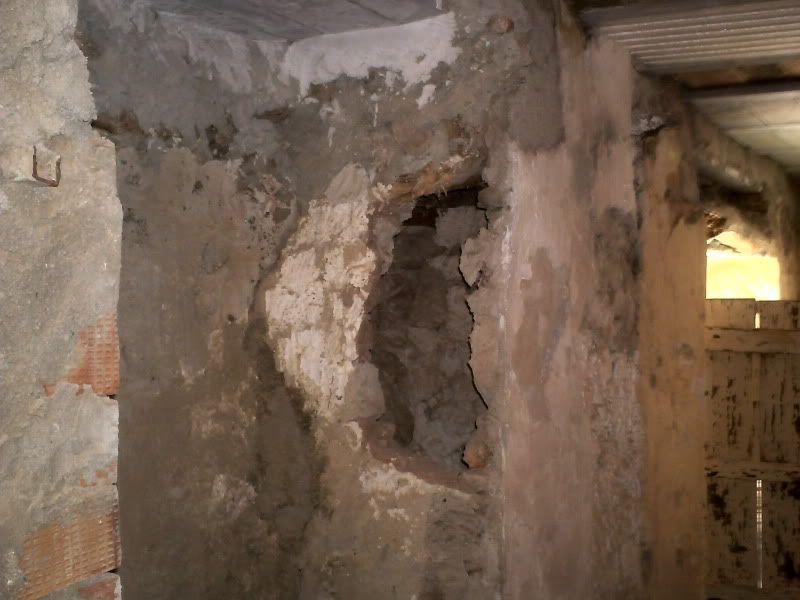 We could have just ‘made do’ with replacing a number of floor beams and doing bits and bobs here and there to make it a bit liveable in. It wasn’t in danger of falling down but if we were going to do it properly, like putting new floors in and a new roof on, it needed strengthening. In the mean time we’d sorted out getting mains water when a pipe was run across the fields from near the local village. Electricity was a bit more of a problem. After long and involved enquires regarding several power lines running in the vicinity we plumped for an initial outlay to get solar power with the added advantage of then not having any bills. Careful calculations were made by me and much research as to what we needed and didn’t need and a local firm eventually sorted it all out, plus solar hot water as well. Unfortunately I’ve realised I don’t have photos of the panels, water tank or the batteries. I must put that on the ‘to do’ list for next time. The house doesn’t face south, it faces west, so the panels were fixed on a pole a few metres up the hill in an open space and the pipes and cables run down to the batteries and water tank situated in the ‘shed’ at the side where the old sofa was in photo number 4 from the top. The open front was walled in to make a secure area. So electric and water were arranged but there was something we’d sort of forgot a bit – sewage. Even though there was a nearby village road there was no sewage pipe running down it. So we had to install a septic tank. Again, after much research into eco alternatives etc we installed a three stage tank (actually two separate tanks) whereby crap comes in and clean water eventually comes out. You can’t see much from the photos, just the mounds of earth where they were put – 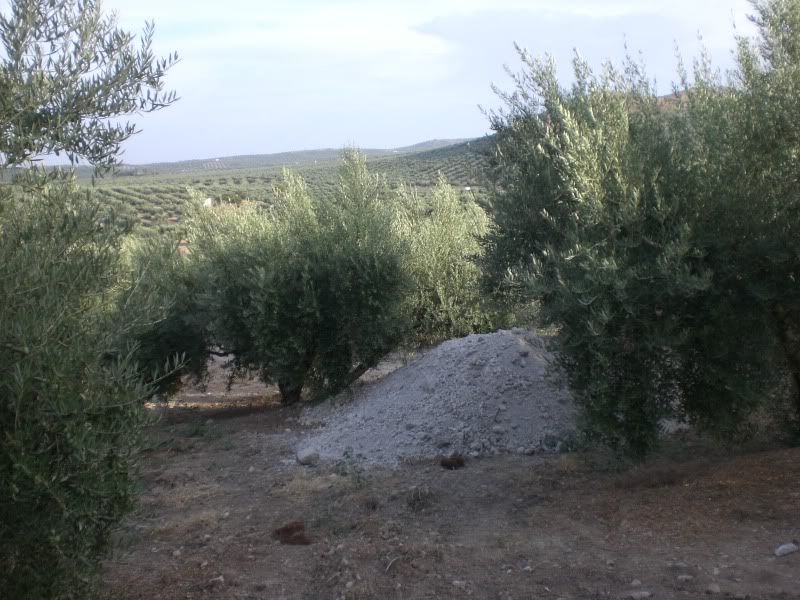 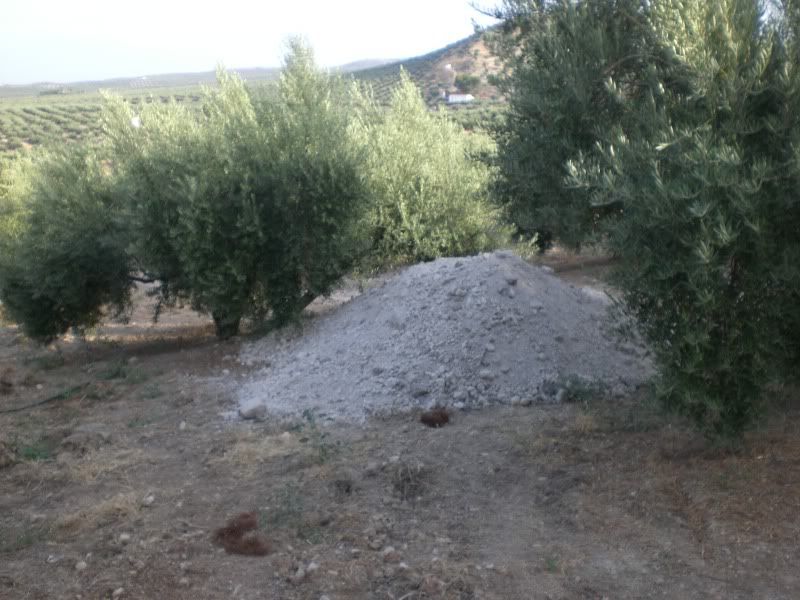 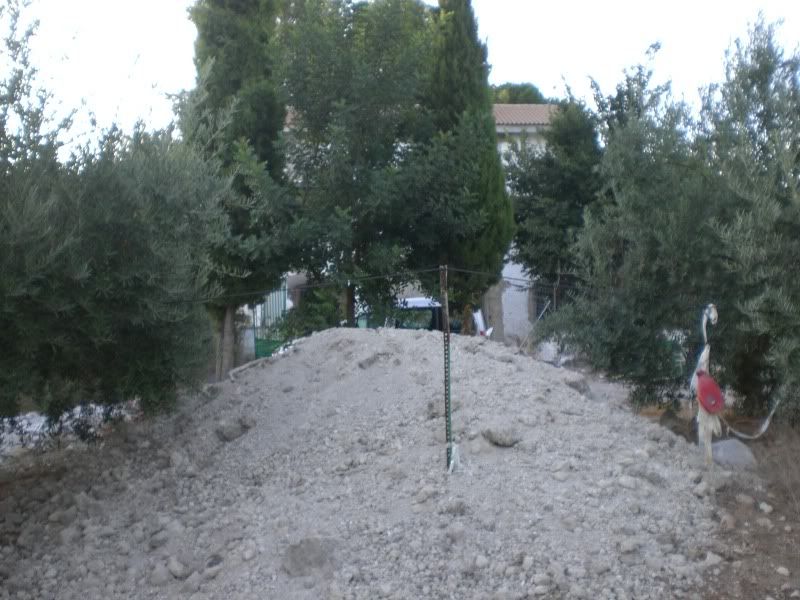 The firm that put in the solar stuff, the son spoke English. The sewage tank was done by someone else who didn’t. This was the problem with doing the major structural work – communication. I needed to be able to speak details with the builder without having to involve my wife (bless her cotton socks again) who wanted to leave it with me but who spoke Spanish. We cast around and found a bloke from the UK who did building work and who lived a couple of villages down. This proved in time to be half a mistake. Half it wasn’t because the standard of his (and his men’s) work was very good. The half that was bad was to do with money and specifically extra charges. To cut a long story short, we had a number of set to’s with him via email and in person eventually hinting to him that if he didn’t deliver what the contract said that was signed, we’d seek ‘redress’ in one form or another. He basically made mistakes in costing the job and was then trying to adjust the figures so that he wasn’t out of pocket – but he ended up being so. When he’d finished what we’d set him out to do (which I’ll get to soon), we told him he would have no more work from us. The last we’d heard was that he’s taken the initial 50% payment for a major job from someone else and then done no work but done a runner back to the UK. |
|
|
|
Post by OnlyMark on Jan 11, 2012 11:17:57 GMT 2
So we're at a point where we are ready to start the proper work on the house. I'd spoken at length with the UK builder about what was possible and what we wanted. After I'd gone through the house with a fine toothcomb I set him about converting our wishes to reality. However, a picture is worth a thousand words as they say so rather than there be misinterpretation of what was required when I was back in Egypt or elsewhere - and then I turn up again and it's all wrong - I needed a method of drawing something to send to him so that we 'were both on the same page'/ 'singing from the same hymn book' (*gag*). I began to get conversant with a free programme called Google Sketchup. It's a basic design programme (there is a pro version) whereby you can draw and design anything you want and send it on as an e mail either as a flat 2d photo type thing or a 3d package that the recipient can open if they also have sketchup, and then fully rotate it and see what it's all about. An example is a representation of the woodwork required for one of the built in cupboards we (very) much later are getting round to. It's in Spanish as it's meant for a Spanish carpenter - 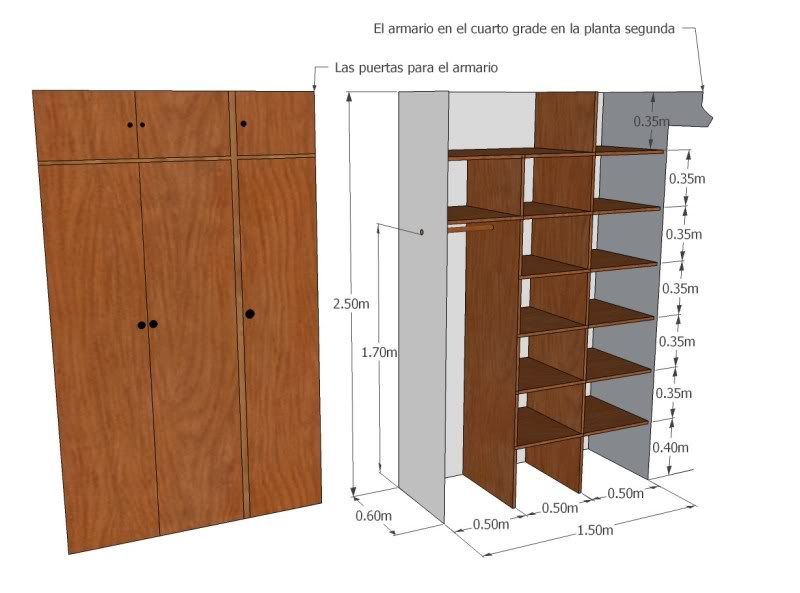 On the programme there is also a library of shapes/furniture/stuff done by others that you can simply copy and paste into your drawing. A handy feature. |
|
|
|
Post by OnlyMark on Jan 11, 2012 11:20:21 GMT 2
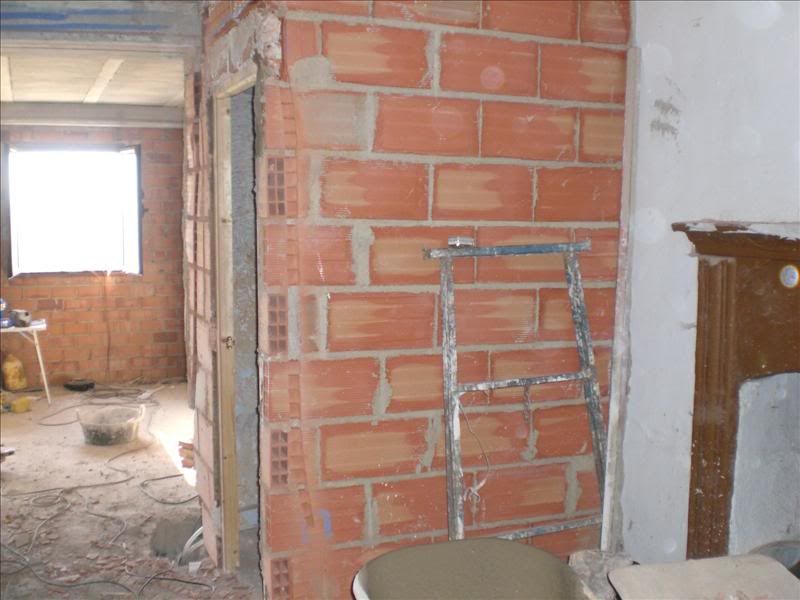
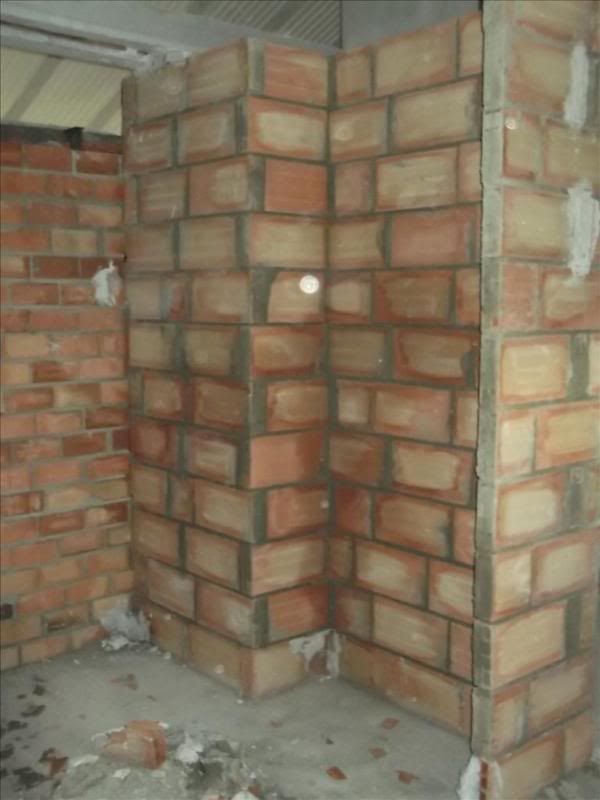
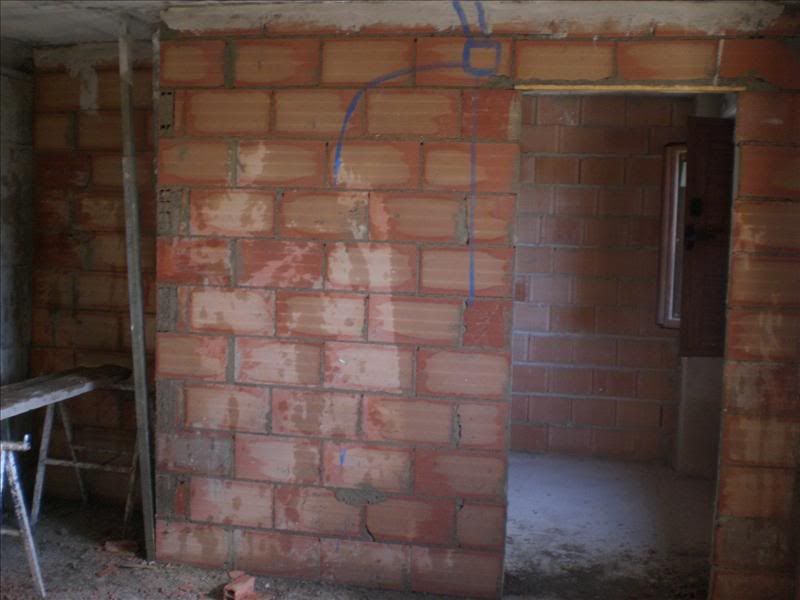
Work began with the following brief – Gut everything out internal that isn’t structural. Remove the stairs from the ground floor to the middle floor completely and block it in so there is no access. Remove the stairs from the middle floor to the upper floor, put in a temporary steel stairway – but facing the other way (i.e. rotate the stairs 180 degrees.) Replace all the floors. Replace the roof. Extend the floors through the big open barn space to make two levels, a middle floor and a top floor. To cope with the extra weights of the floors and roof we had to have built, more or less, a house inside the house. We lost a fair bit of room but most pillars were redone, each external wall had a wall built inside it to take the weight of the floor above and then to roof. The floor beams ended up being concrete and we’ll get to the roof later. We also needed what’s called a ring beam or two (concrete beams forming a ring around the inside of the house) to tie in all the pillars and support the roof so that the walls weren’t forced outwards by the weight of that and the floors. So, removing the old floors and beginning to put in the internal walls and gable ends (the walls on each end of the house) – 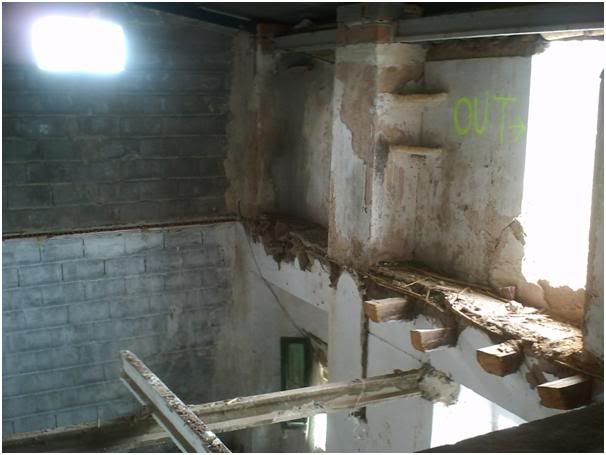 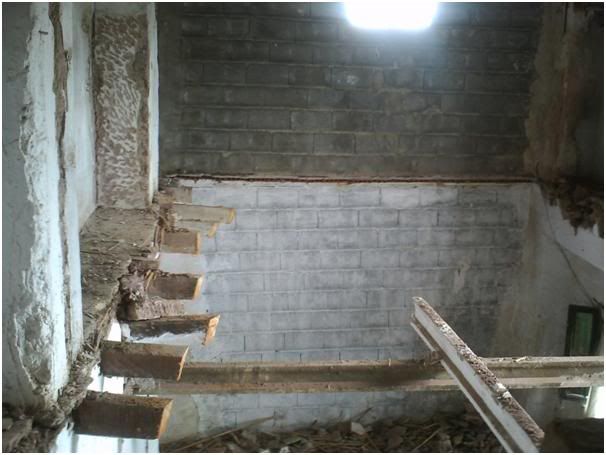 These old weak wooden beams also had to be replaced and the ring beam was formed – 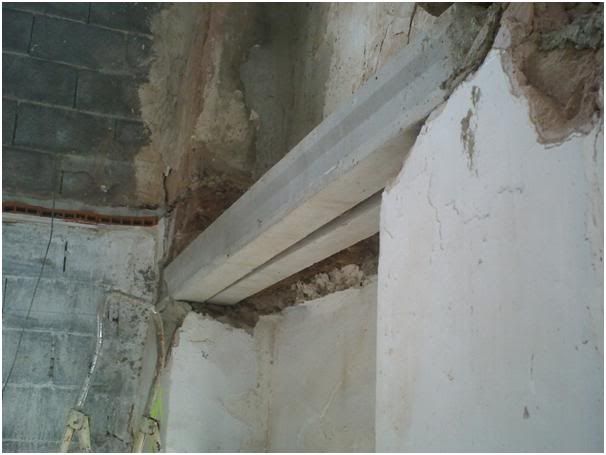 Various parts had to be supported – 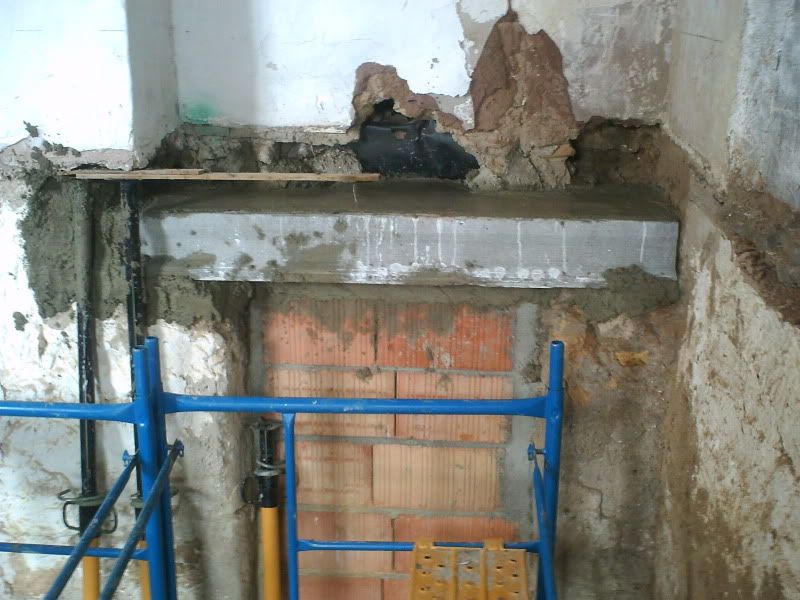 More ring beam – 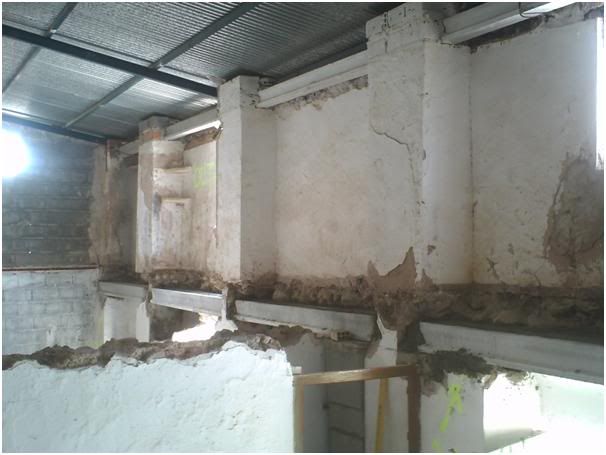 More internal walls built just with the old external walls – 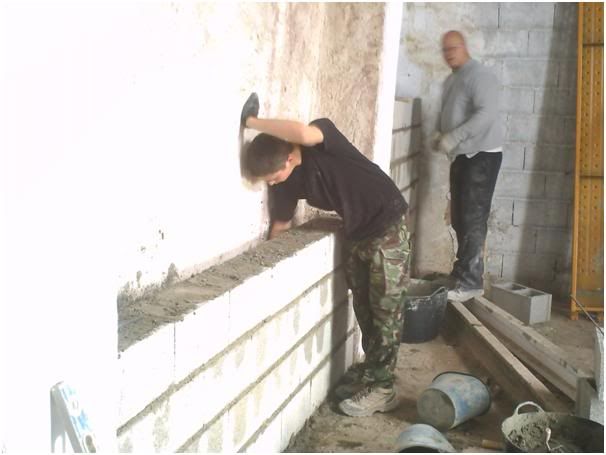 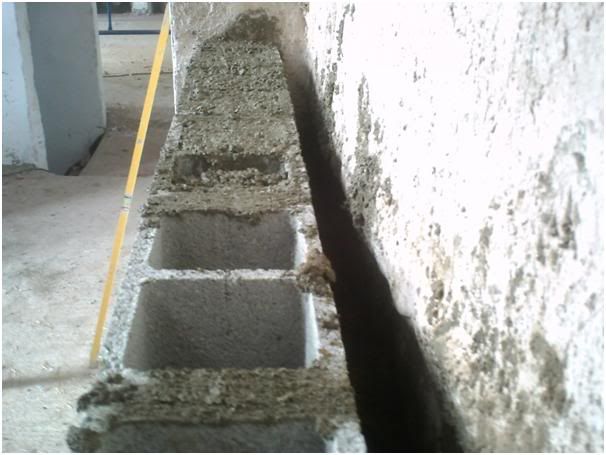 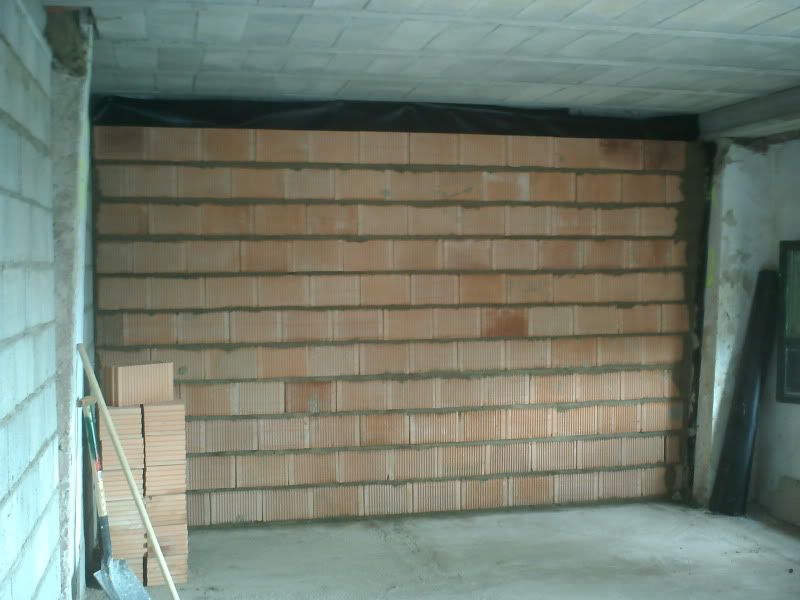 Concrete beams placed across the new floor areas and resting on the ring beams – 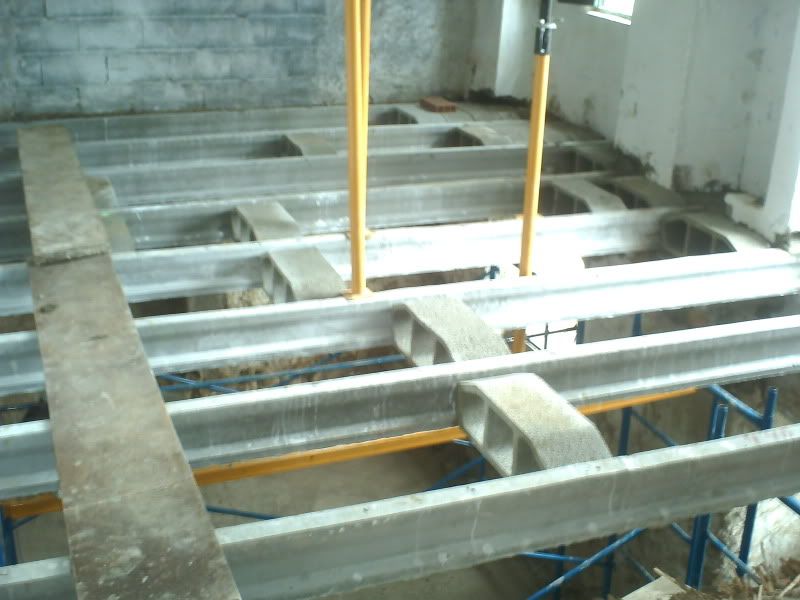 The gaps filled in with pre-formed concrete blocks that are designed to be used with the beams and lock in to them. The beam spacing has to be quite exact – 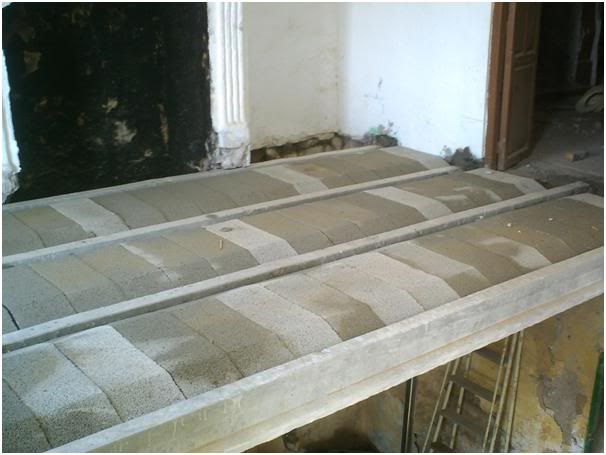 These are then finished off to form the floors with a grid of reinforced steel and then covered in concrete – 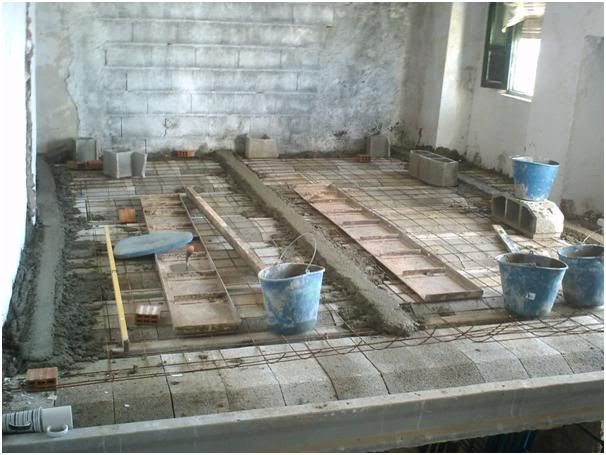 |
|
|
|
Post by OnlyMark on Jan 11, 2012 11:23:09 GMT 2
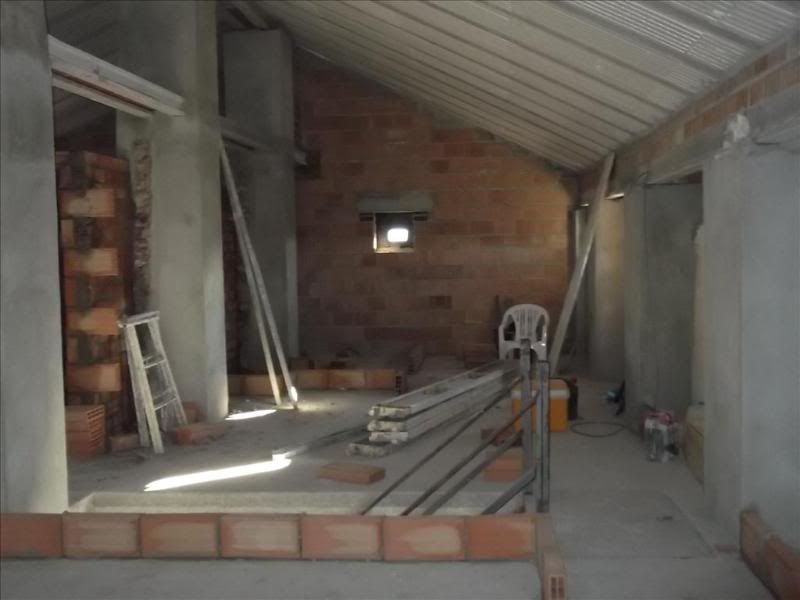
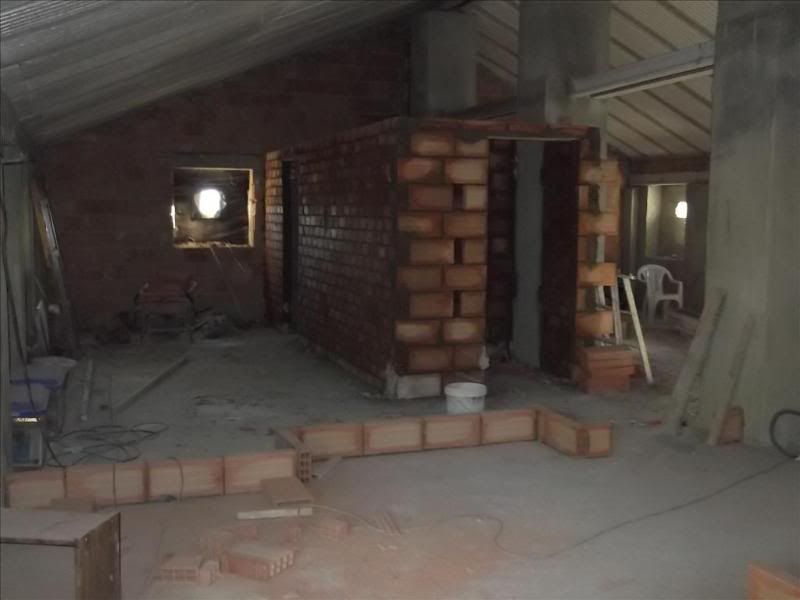
The big open space at the rear of the house now had a new concrete floor. Just under the small scaffold on the far right was the small access and a couple of steps to get in originally. This floor is now at the same height as the middle floor floors (if you understand me) and thus a level above the ground floor. This was no hardship or loss particularly of room as this was where the hill extended back and up to the left beneath it – 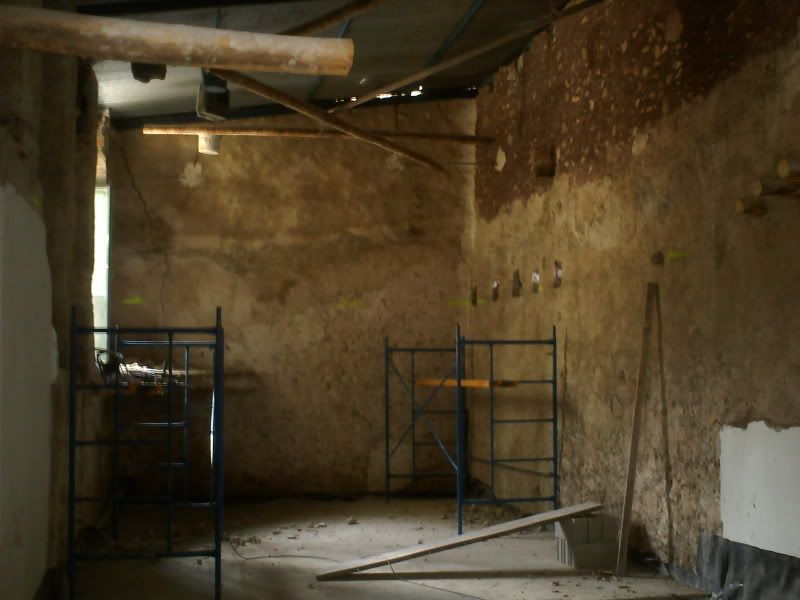 This is now a double height space that we thought long and hard about as mentioned. But eventually the practicality of what we wanted made us decide to split it into two floors so that we had a couple more bedrooms on the top floor. To do this we had to punch holes in the right hand wall, which is the centre spine wall of the house to house the floor beams – 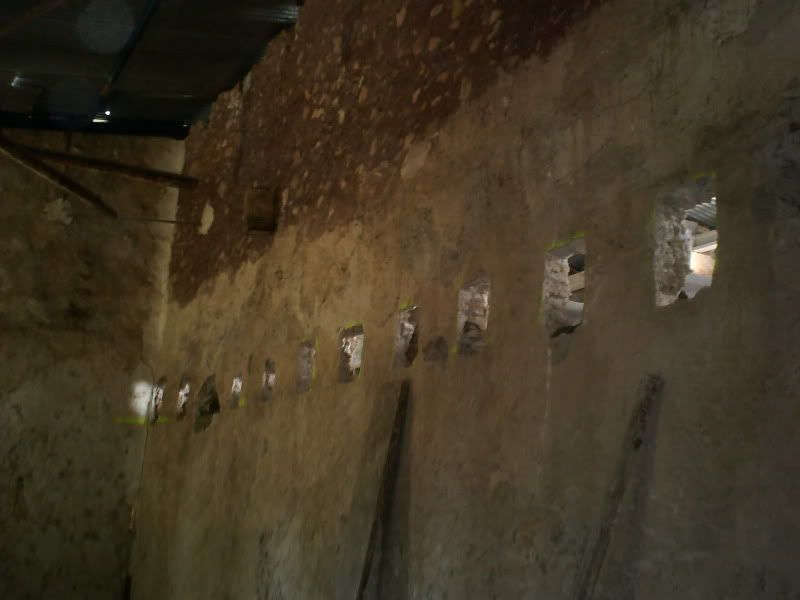 Eventually it looked similar to this with the roof just above and a complete floor below – 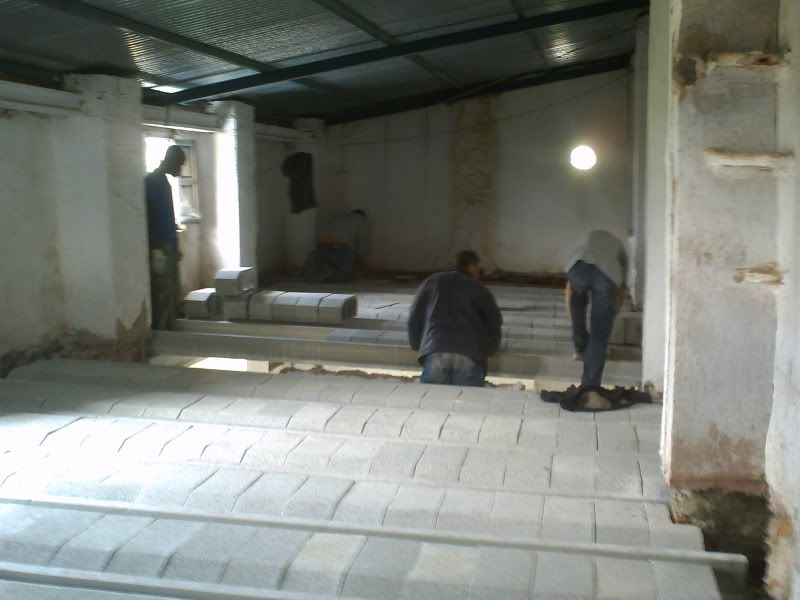 Now, as everything was done we had a number of open spaces. The floors were in, the structure strengthened and all we had were open plan areas either side of the centre wall on three floors and stretching full length side to side with no obstructions. The next step was to replace the roof. Oh boy, did this cause some friction between us and the builder. |
|
|
|
Post by OnlyMark on Jan 11, 2012 11:25:14 GMT 2
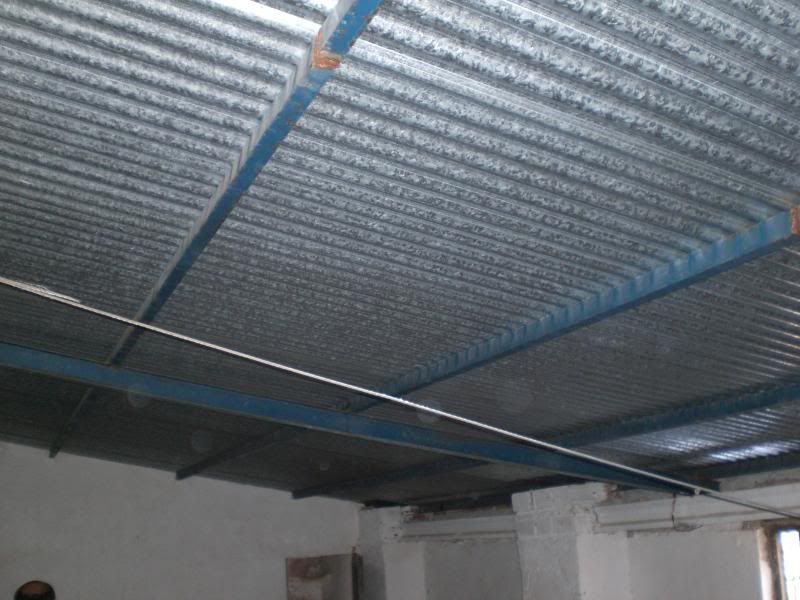
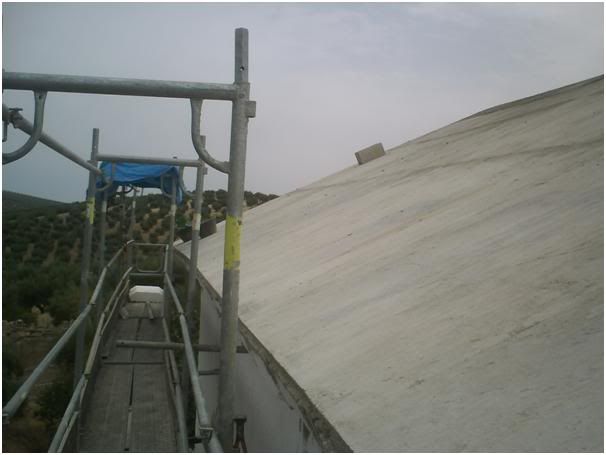
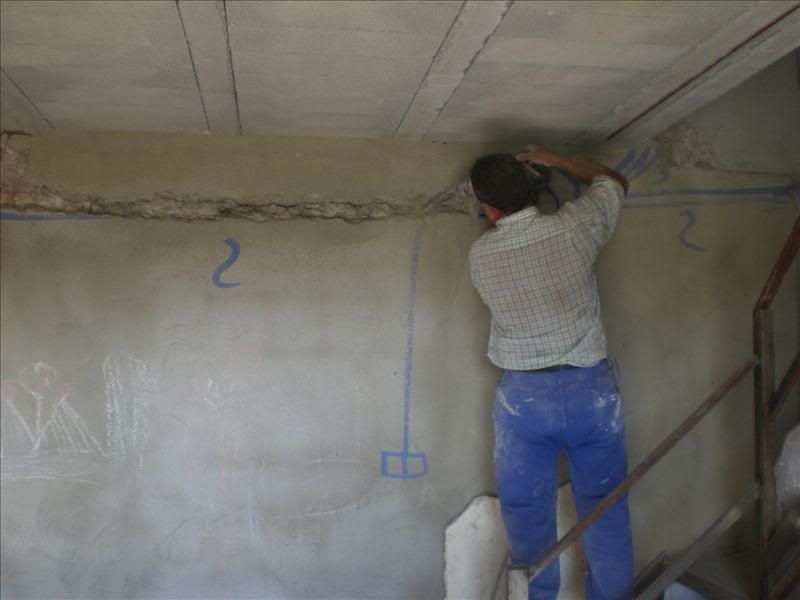
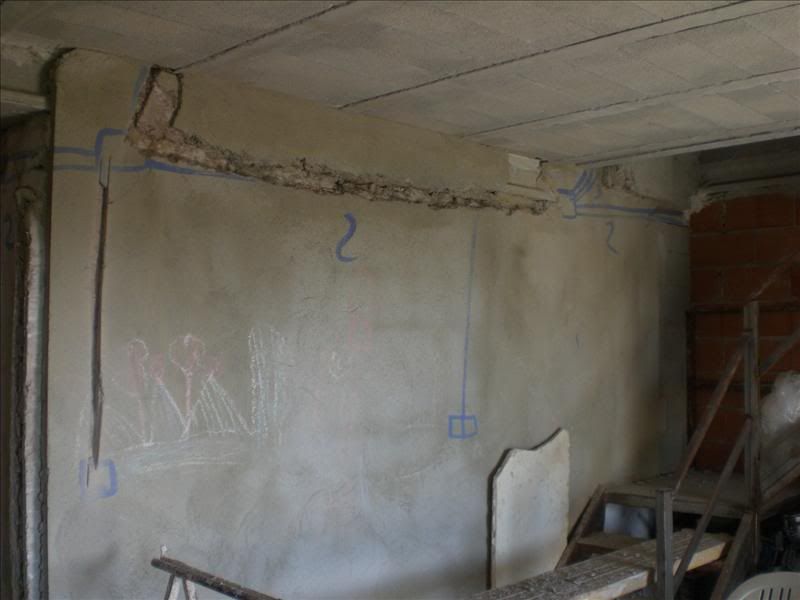
The roof caused all sorts of problems between us and the builder. The main problems were that when he costed out the whole job he included in all the calculations for the rest of the work, the roof. However, he must have made some mistakes in his workings out as when we got to the roof, which was the last thing, he started to contact us for much more money. He said that the regulations had changed and this entailed a different design to the one he had costed – thus making it more expensive. Unfortunately for him we were just about to fly out there for our summer holidays, so we could see him face to face. The original idea was that he’d be finished and gone well before we got there. But due to blaming various factors outside his control, he was well behind in the work. In the meantime he started stripping the roof down – 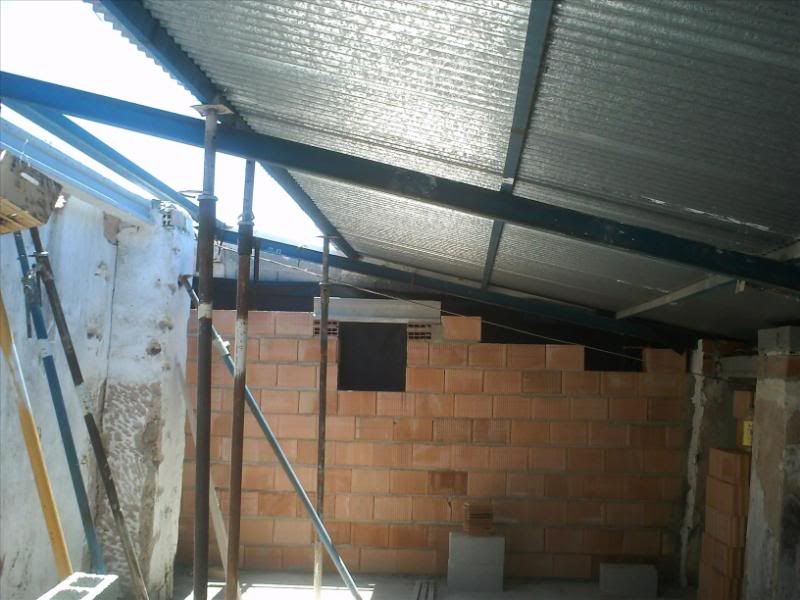 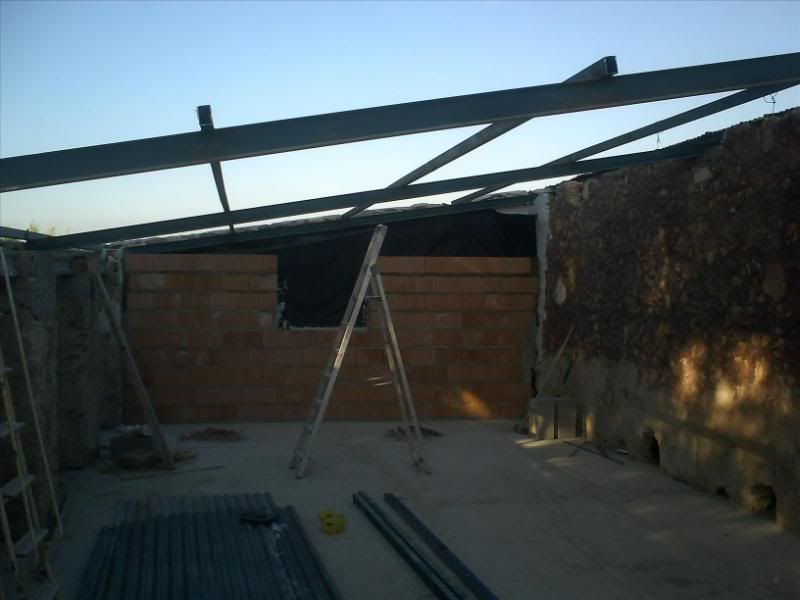  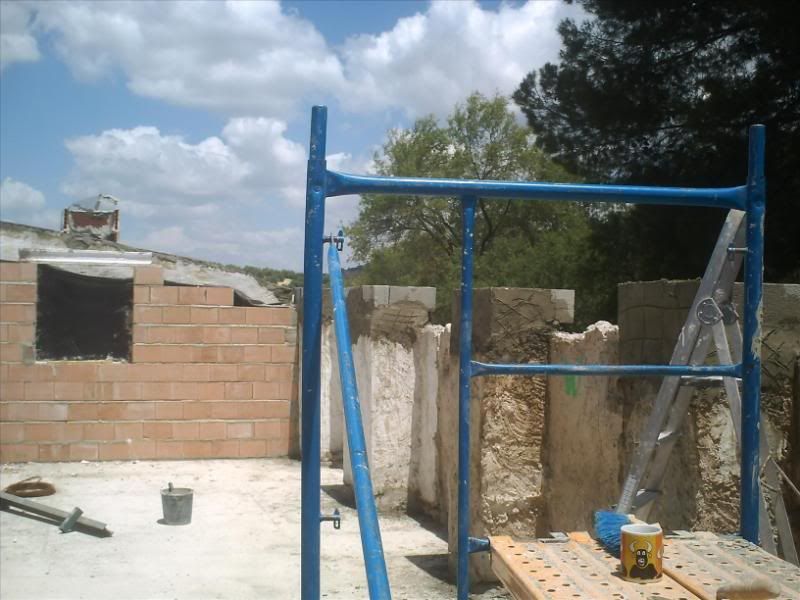 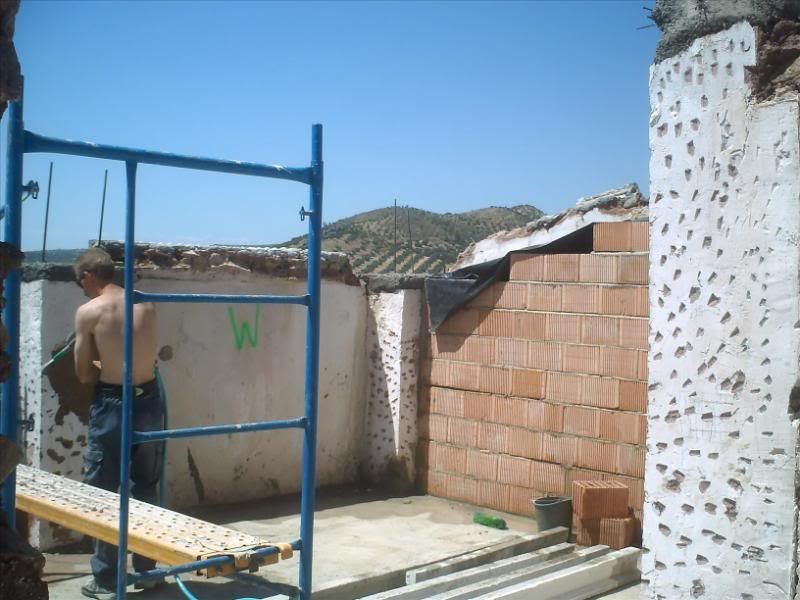 The original pillars were strengthened above the rest of the pillars and floor in the lower floors that had already been done – 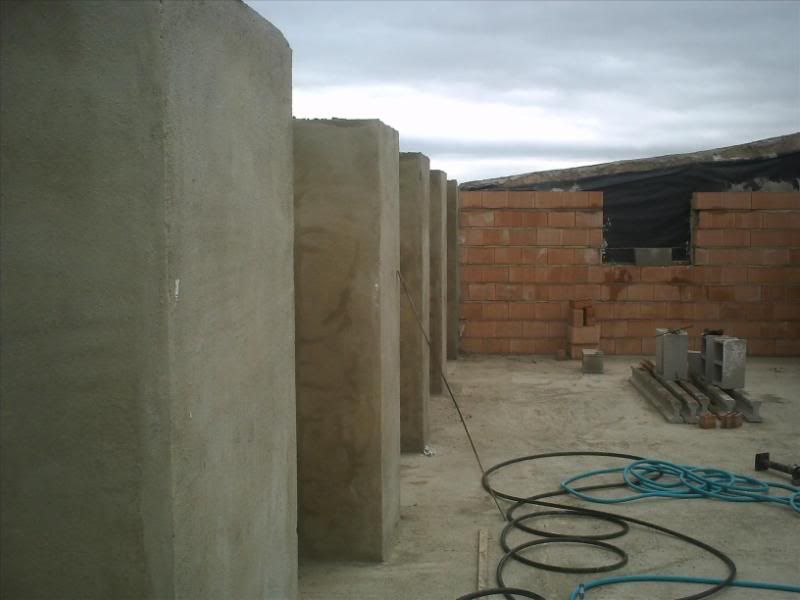 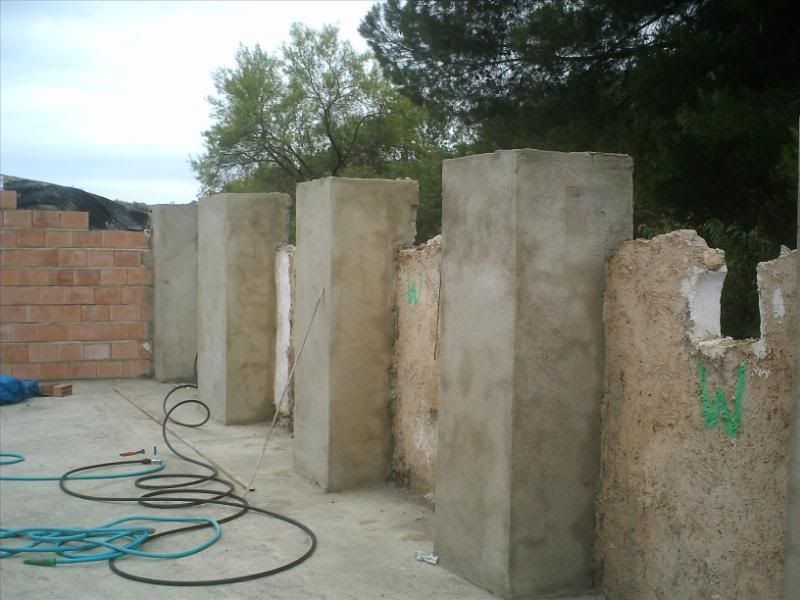 You can see a bit of a lean in the centre of the building which needed correcting – 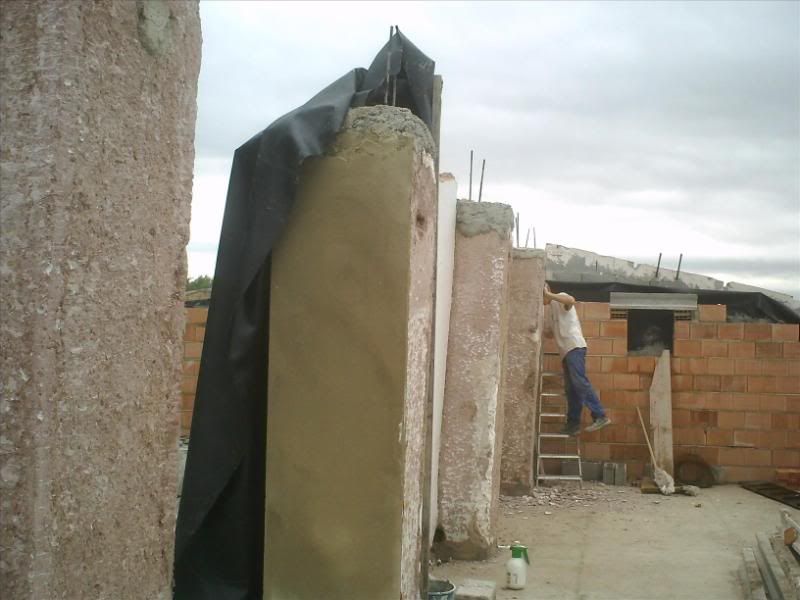 Once corrected new concrete beams were installed across the centre and lined up with a makeshift locating jig – 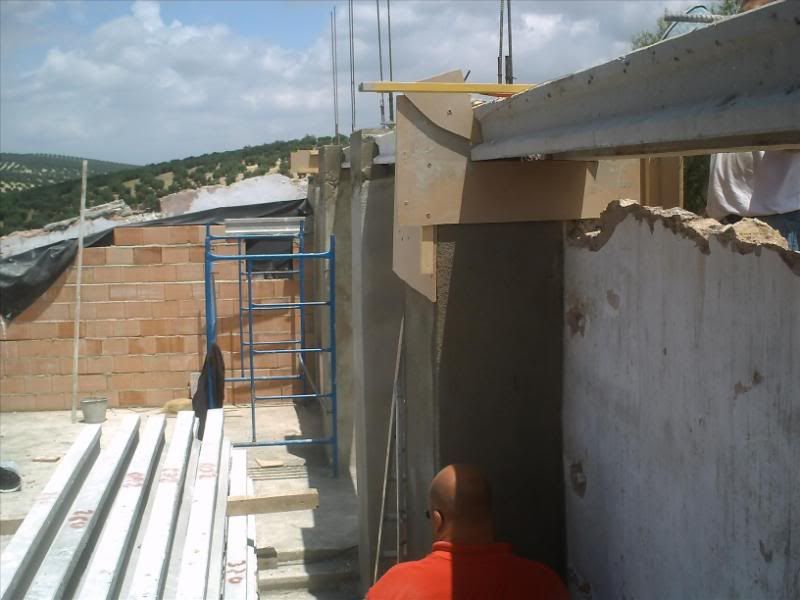 These then filled with more concrete – 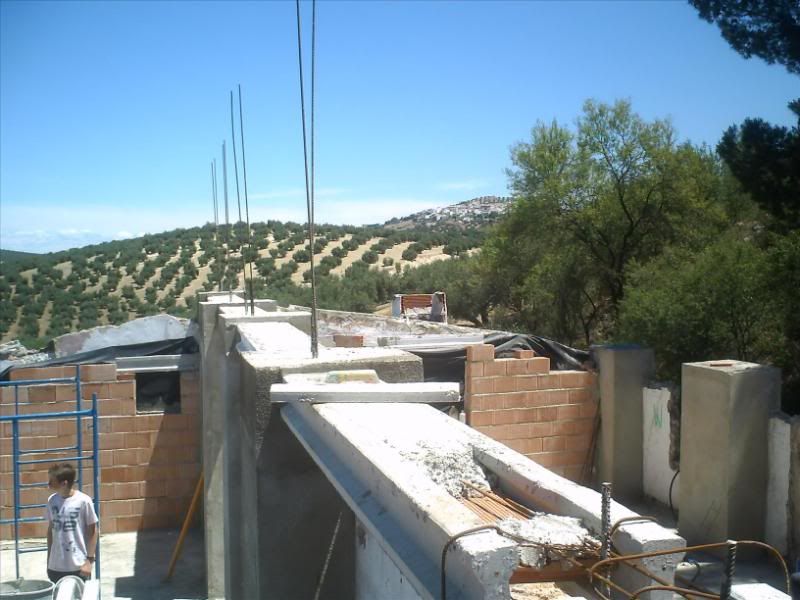 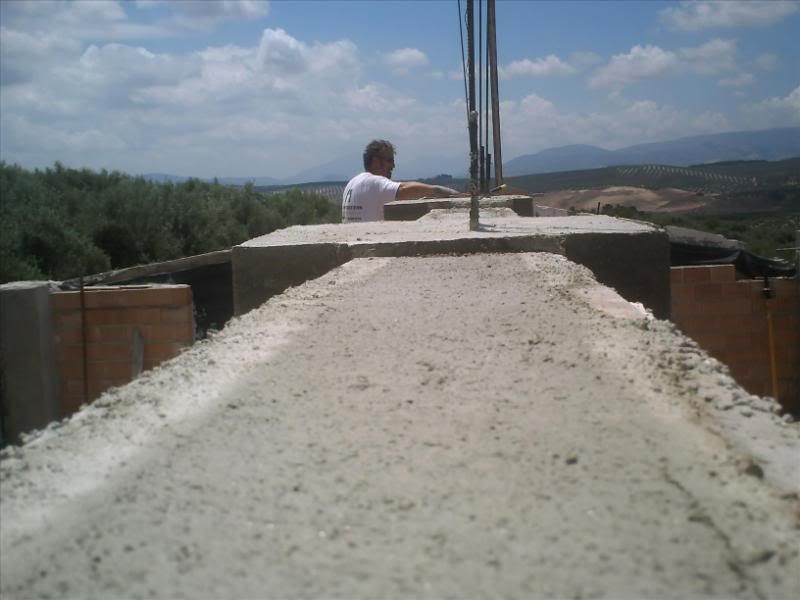 |
|
|
|
Post by OnlyMark on Jan 11, 2012 11:27:04 GMT 2
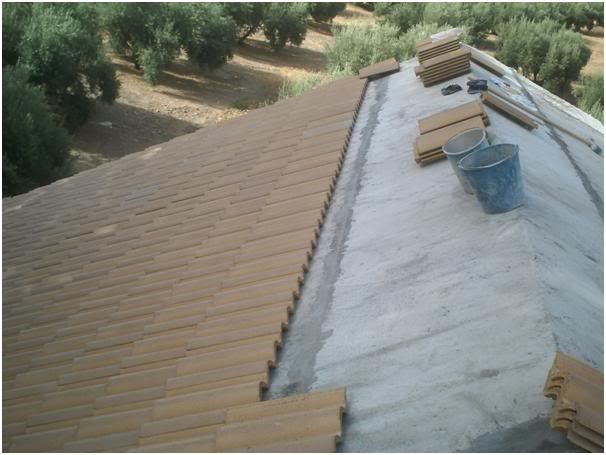
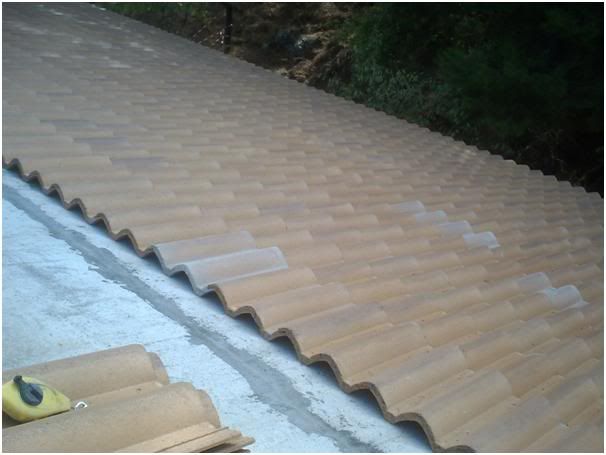
The front and back walls similarly done – 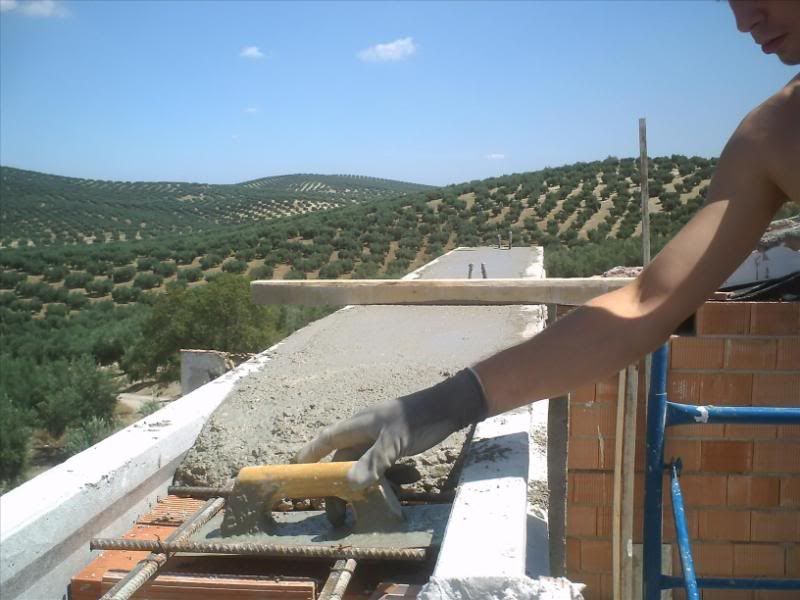 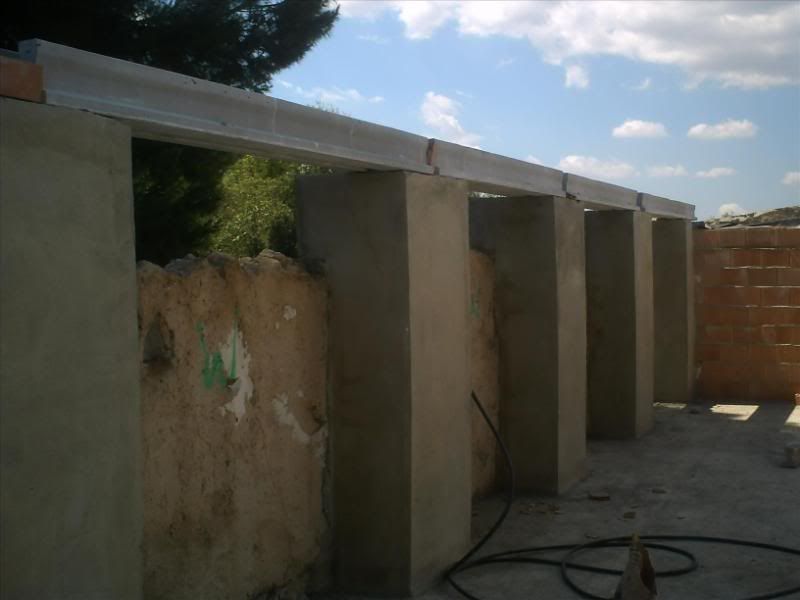 The central pillars were then extended upwards to account for the ‘new regulations’ – 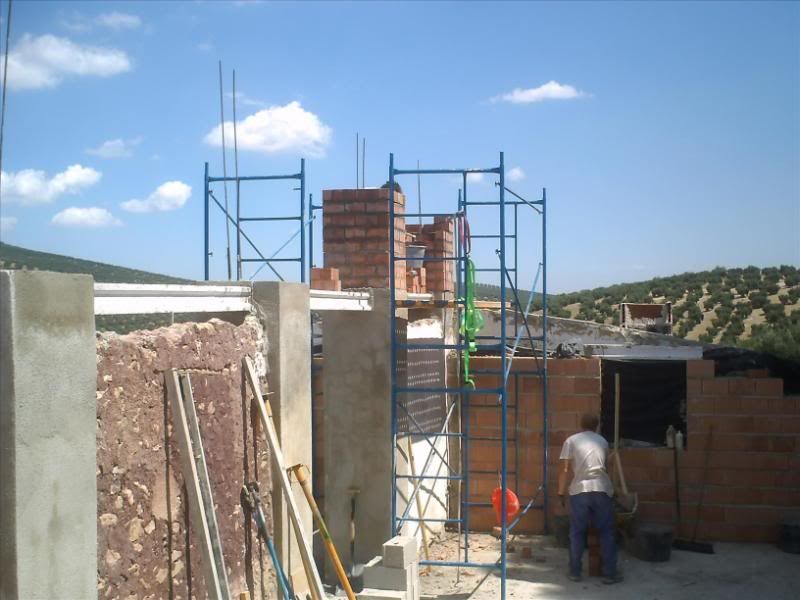   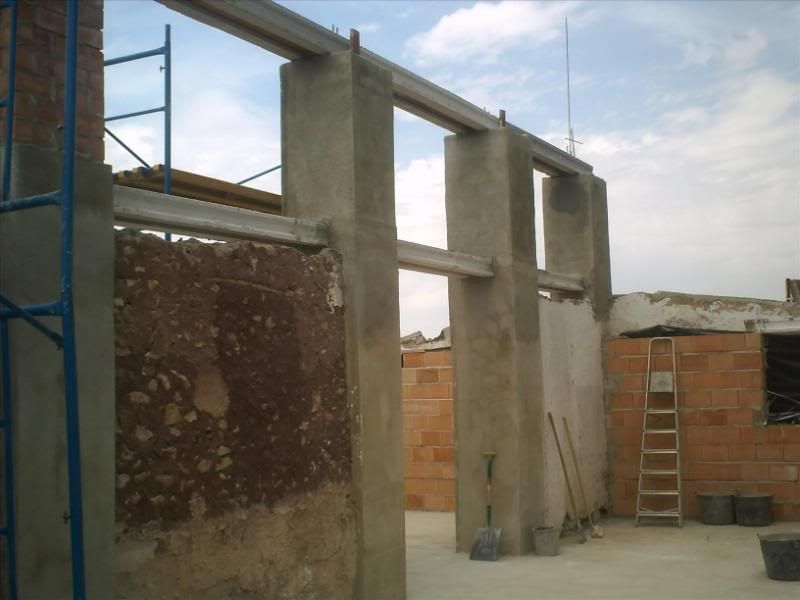 And then came the concrete beams to span across from the front and the back to the centre. But this was another of the areas of friction between us. In short, the regulations he had to abide to were from four years before this was happening (as I found out) – hence, he should have known. Secondly, he’d ordered and paid for roof beams (a lot of them) that were the wrong size. I also pointed out to him that the tiles we’d agreed on, that he’d ordered, wouldn’t clear rain according to their specifications below a certain pitch (roof tiles are not the same and only work properly at certain angles according to the manufacturers specifications. Pitch = roof angle). So a set of longer beams and more expensive ones, had to be ordered and paid for. This mistake he tried to get us to pay for. But anyway, work cracked on while we sorted this out. He even threatened to take his men off the job and walk away from it there and then. However, the roof beams arrived and started to be fitted –  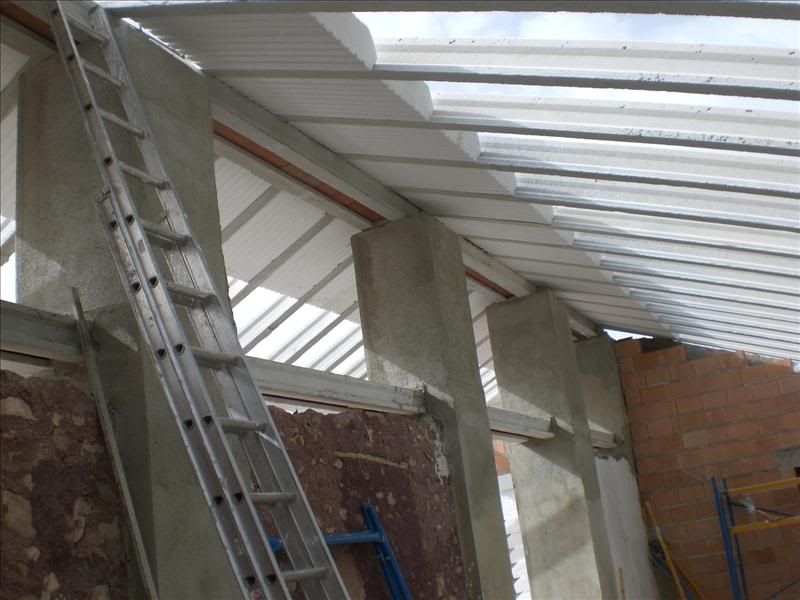 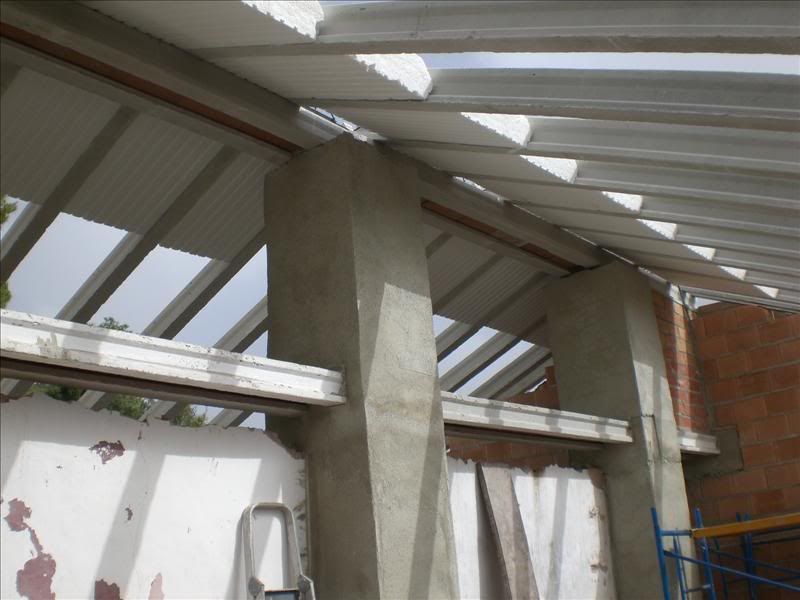 |
|
|
|
Post by happytraveller on Jan 11, 2012 11:27:42 GMT 2
Haven't read it all yet but just wanted to say I just love love love the view ! Such a beautiful spot !
|
|
|
|
Post by OnlyMark on Jan 11, 2012 11:28:51 GMT 2
|
|
|
|
Post by OnlyMark on Jan 11, 2012 11:30:46 GMT 2
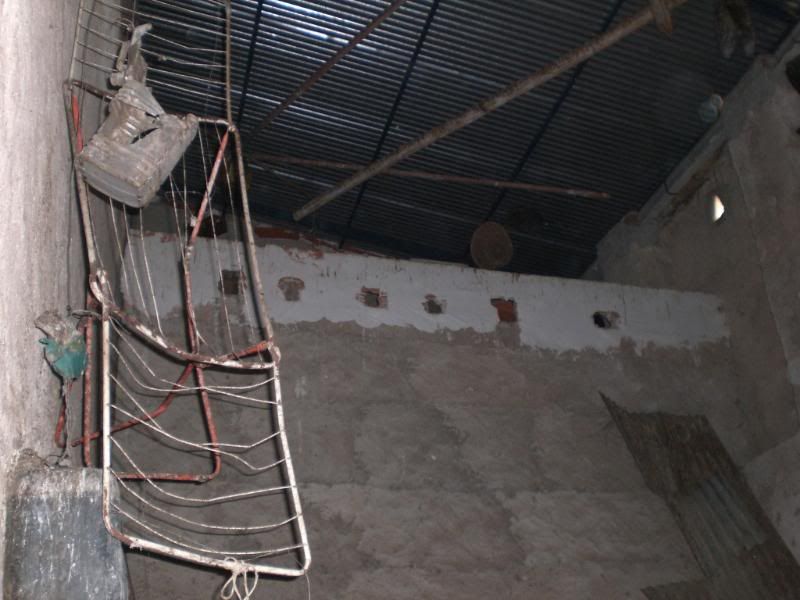
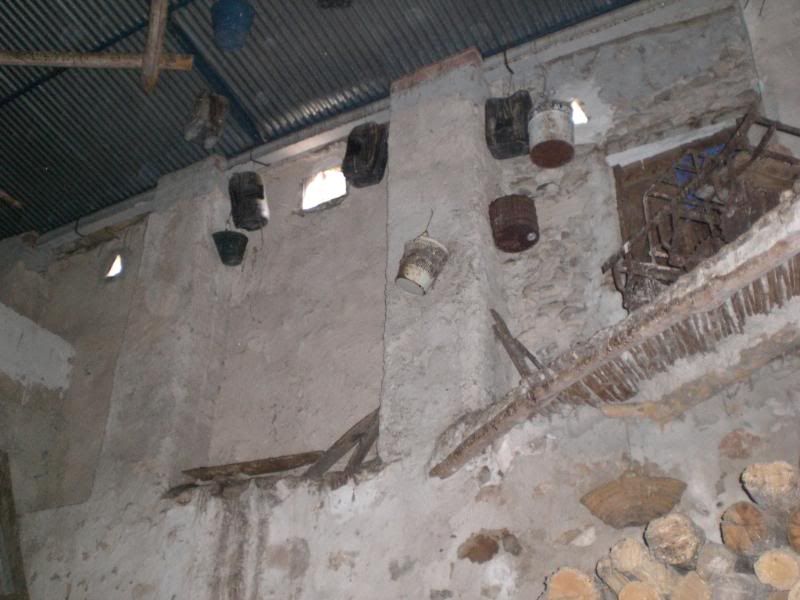
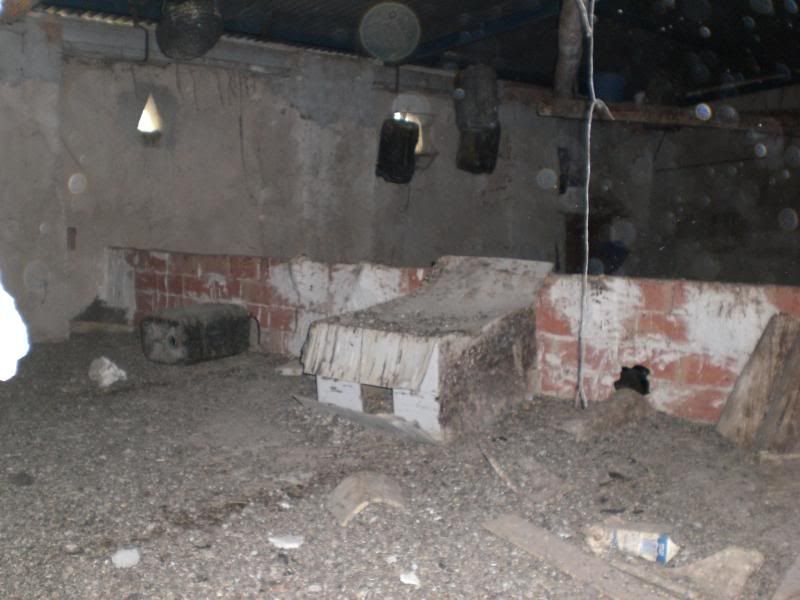
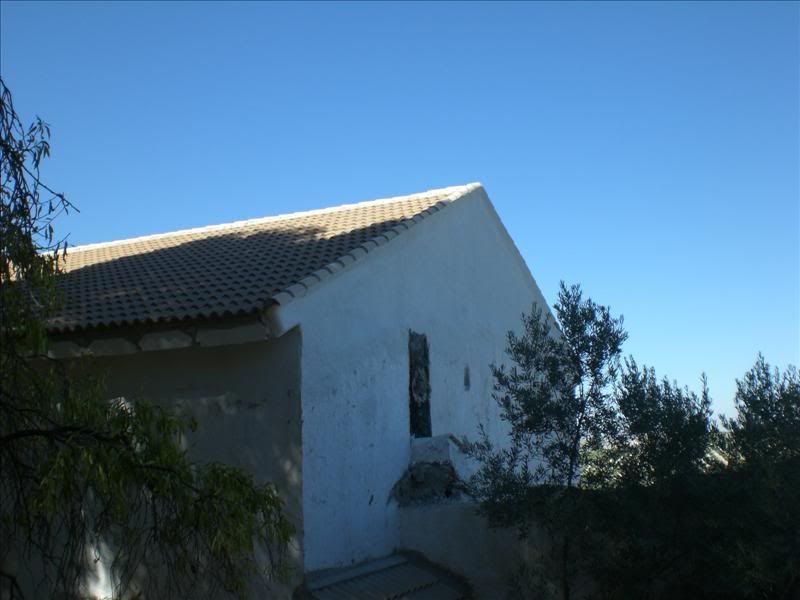
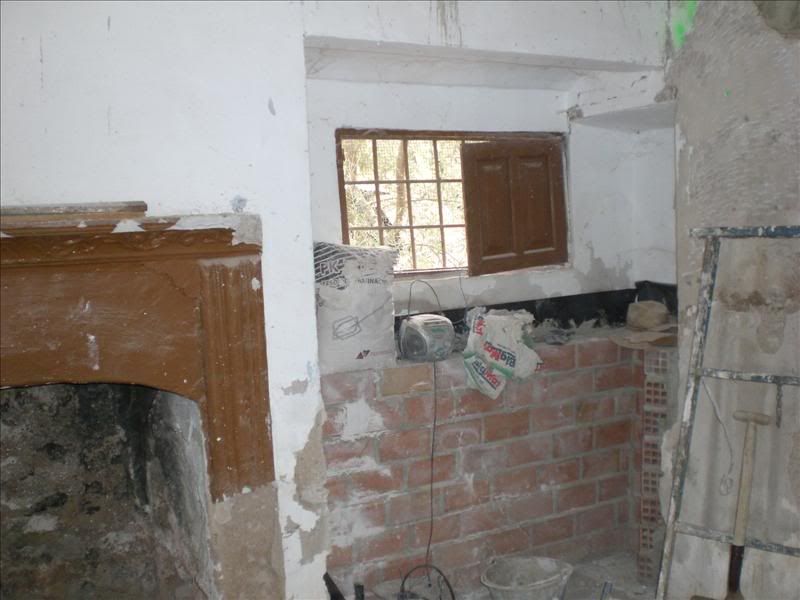
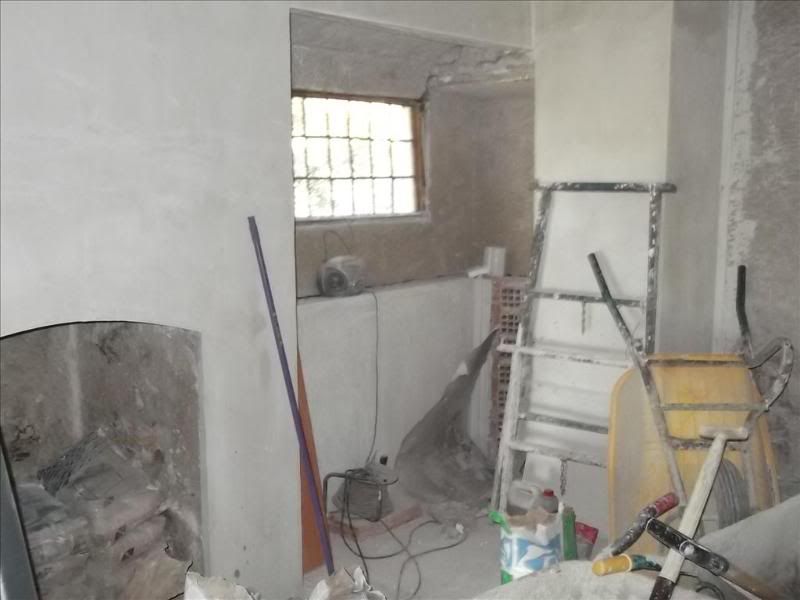
The UK builders had eventually finished the late summer of 2010. And good riddance. It is a cliché to say they spent all day supping tea, but that’s what they seemed to do. They’d turn up around 8am and be gone again about 3pm with frequent breaks. The lads were nice enough and I got on well with them, but had little work ethic. They worked as they would in the UK and I’m not surprised they never had any work from the locals, they relied on expats to provide the business. And as there aren’t that many around us................ That left us in the position of needing someone else. Now the initial hard work and major work had been done, the building was structurally built like a tank and a bit of a blank slate. A local cafe had been renovated and we were regular customers (free wifi etc, the owner spoke excellent English as well). We were in there one morning when we were admiring the standard of workmanship. We asked him who had done it and he pointed to a man sitting at a nearby table with his family – he said he was the local builder and if he was still welcome then he couldn’t be dissatisfied with what the builder had done. We politely interrupted him and it more or less carried on from there, we set him on to do the next parts we required with the thought that if he’s no good then there are still plenty of them available. We met with him in his office the next day and my wife detailed what we wanted, he spoke no English. He came and had a look, submitted a quote and when we met him again I asked what would happen if he encountered problems, any problems at all, halfway through or whenever, that cost extra time and materials. He replied that is then his problem. The price is fixed, it won’t be cheaper, but on the other hand it won’t go up by one cent. I told my wife I love him and want to have his babies. She didn’t pass this on though. This builder has now continued through various phases with us. He understands we don’t have the money to do it all in one go and is happy doing things as we require in fits and starts when the finances permit. My problem is the obvious one – I can’t communicate with him in Spanish, but my wife can fortunately. This is ok when she is there with me, but I do go very often without her. However, we do communicate through drawings. It is a bit of a universal language in that I do plenty of detailed drawings and pass them on to him and we both understand the materials used in the building work. There is very little then that he needs to question and when it does happen we sketch a few more things or do a bit of charades to get the point across. Working from then on, in the house, is usually just a man and his lad. The man is highly skilled and the lad keeps him topped up with bricks and mortar, plaster etc. Sub-contractors are also used from time to time mainly to wire and plumb the house up, but not often. They turn up at first light, whatever the time of year, have half an hour break in the morning, have an hour siesta from 3pm and then work through either until just after it is dark or 8pm whichever is the sooner. When it was all just a building site we, or I, tended to camp there – 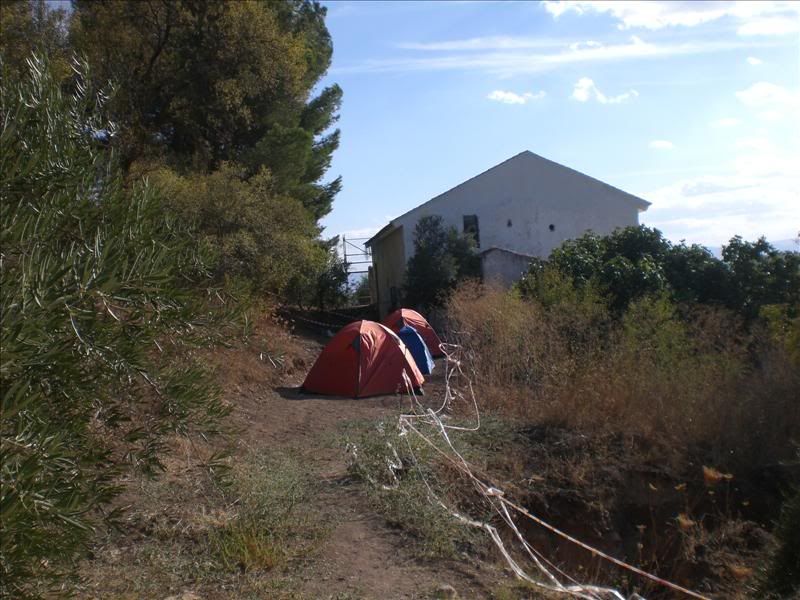 The open shed/lean to type thing had been blocked in and secured for the batteries and water tank – 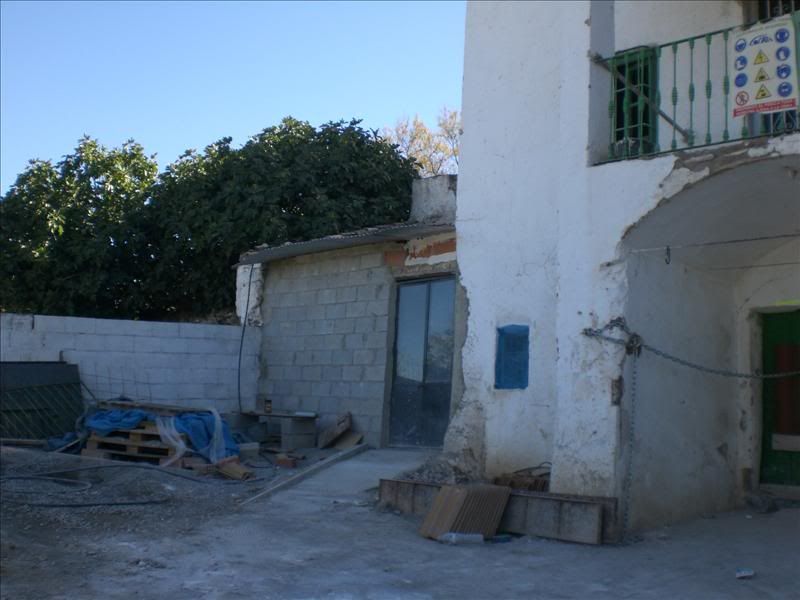 The outside crap house, missing the ‘porta potti’ at the time of the photo – 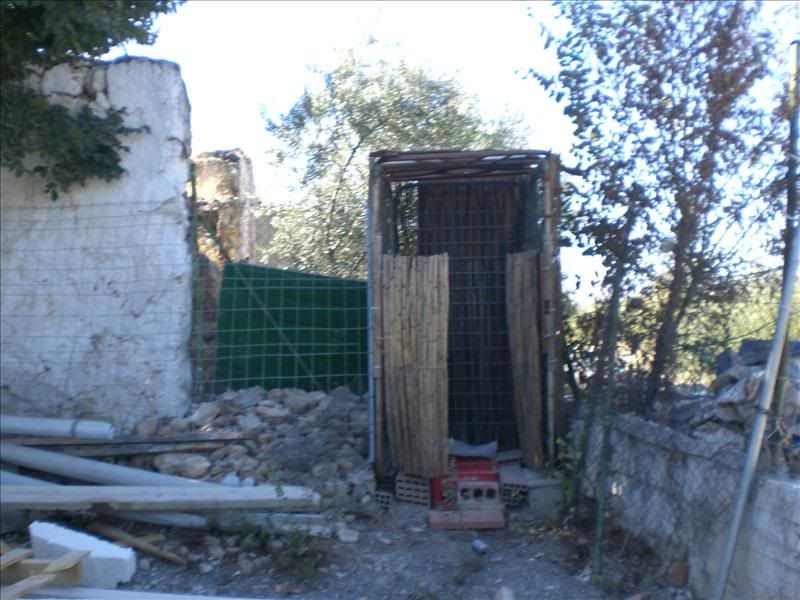 The steel erector building the temporary stairs – 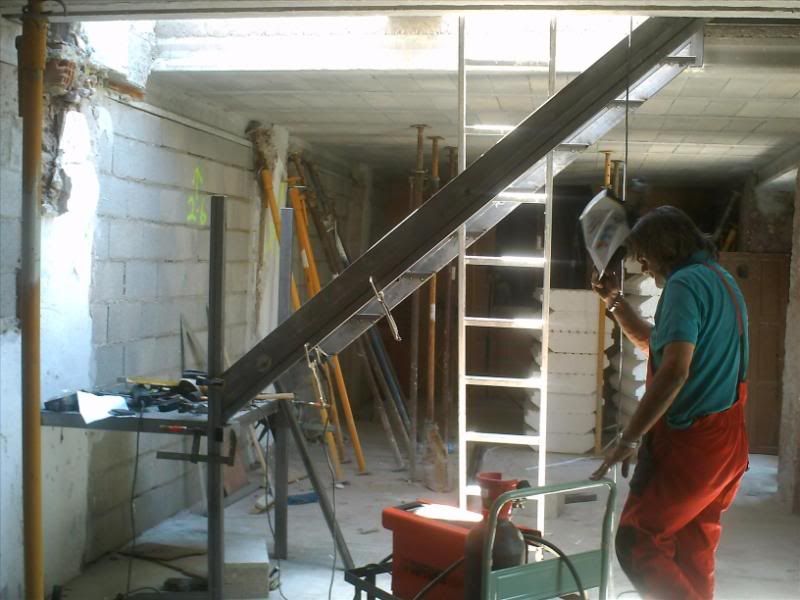 |
|
|
|
Post by OnlyMark on Jan 11, 2012 11:32:34 GMT 2
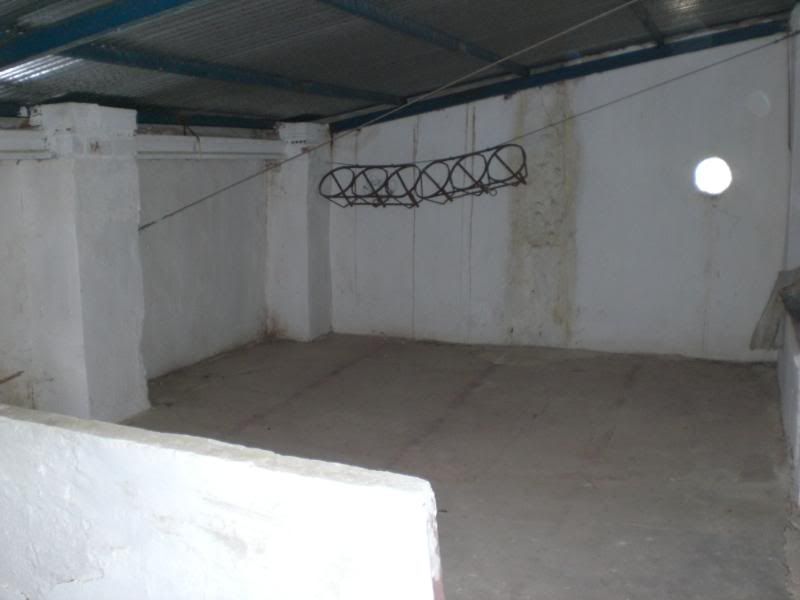
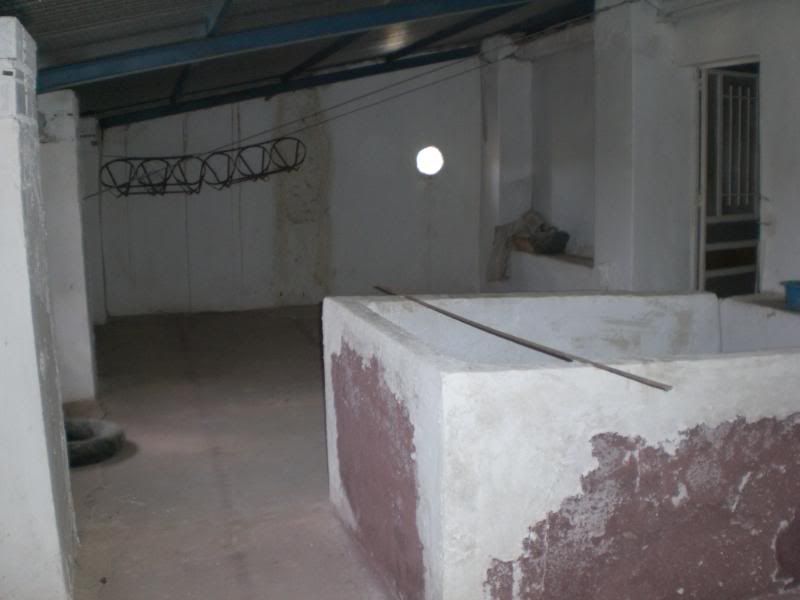
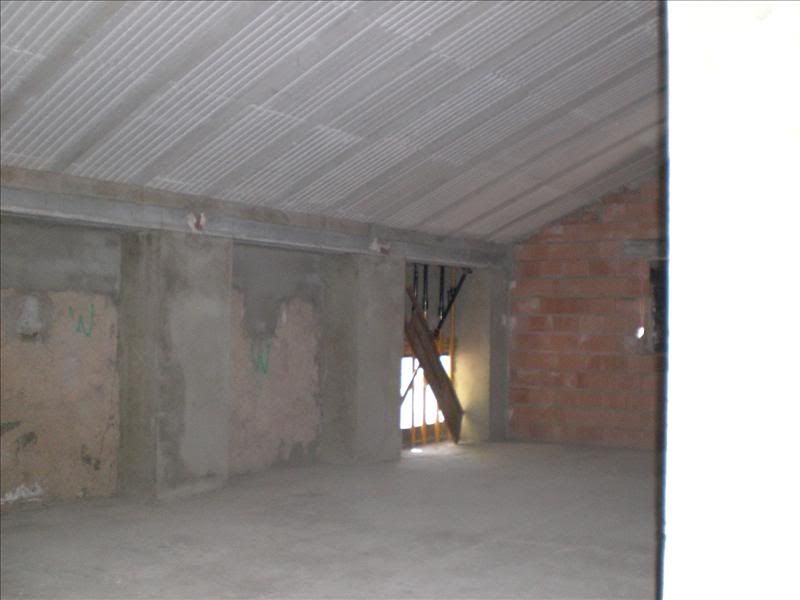
Originally there was a stair way from the ground floor to the middle floor and then another one from there to the top floor. We had to decide what we wanted for the house – the layout more or less. We decided that the ground floor would be made in to two guest bedrooms, each with its own entrance, not connected and most important of all, not connected to the rest of the house. If, in the future, these would be rented out we didn’t want guests to be able to wander willy nilly around our part. Mainly though they were to be used for relatives (especially her mother). This meant that the staircase was removed and blocked in making just a separate ground floor. The stairs from the middle to upper floor needed replacing anyway but it wasn’t the best idea to make new ones and have them ruined by builders working and messing them up. So we had temporary steel ones built that will last until all the top floor is completed. This is then how the ground floor looked after concreting, insulating and the access into the big open area blocked up and the stairs removed – 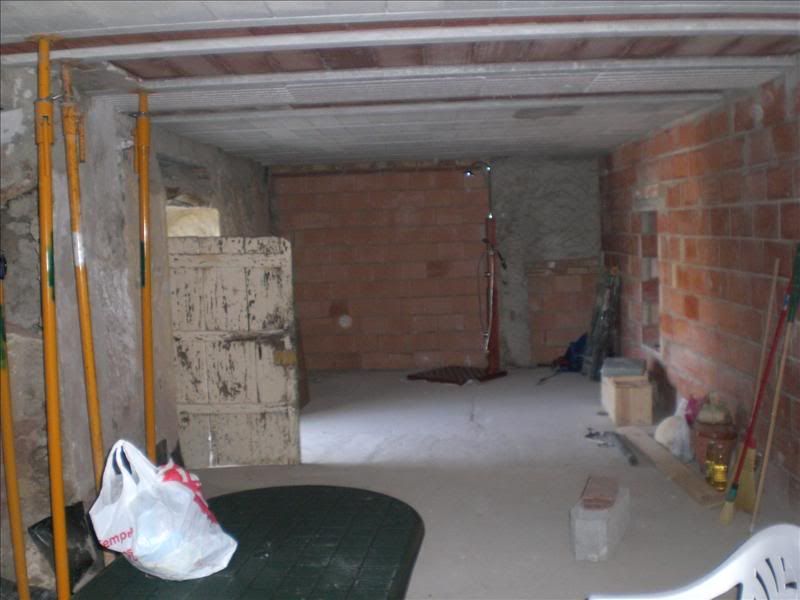 I then started to layout on the floor where the bathrooms would go. It’s all right measuring up and doing a drawing, but far better if you can lay it out in real life to see if when you have a shit you can reach the toilet roll –  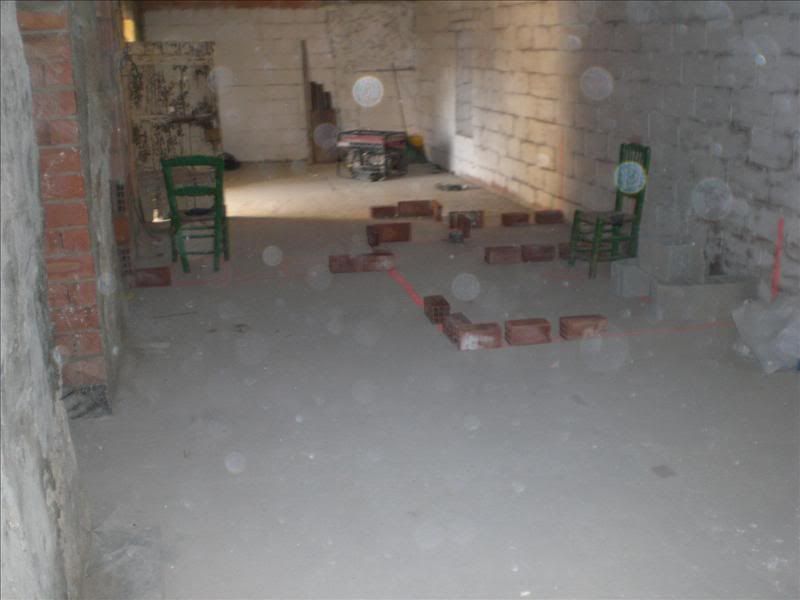 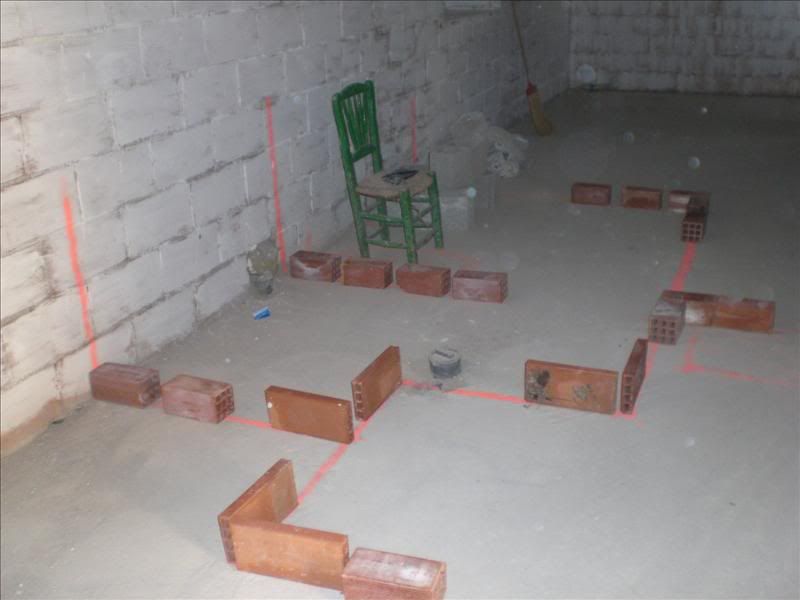 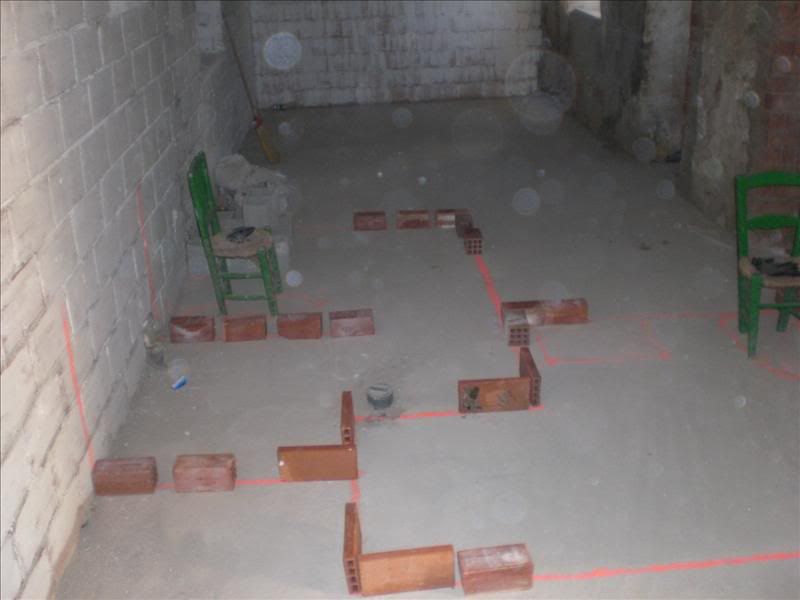 Still a bit dark in there but better when the new doors and windows are fitted – 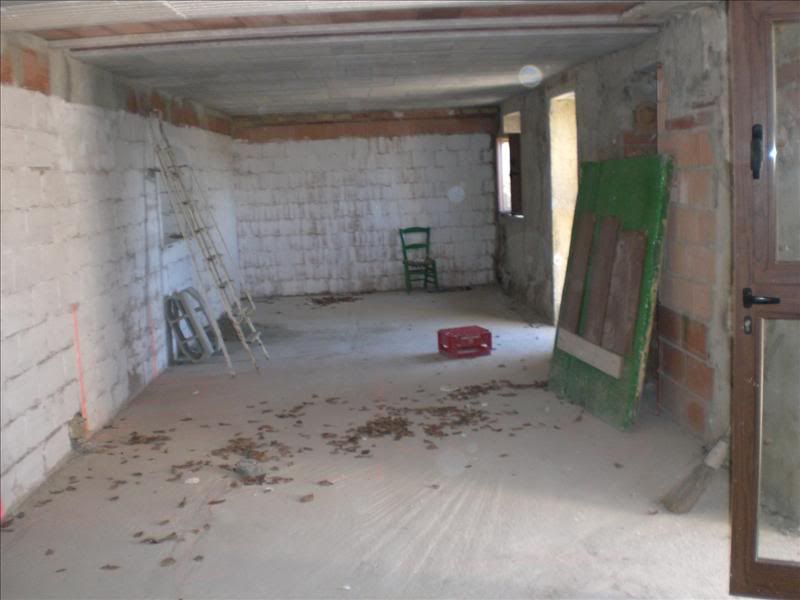 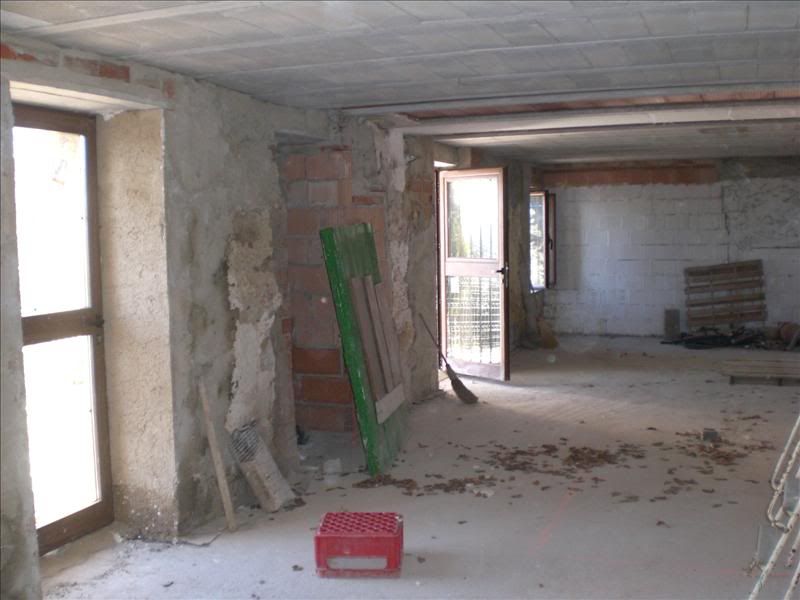 To give an idea here is what it looks like on paper empty – 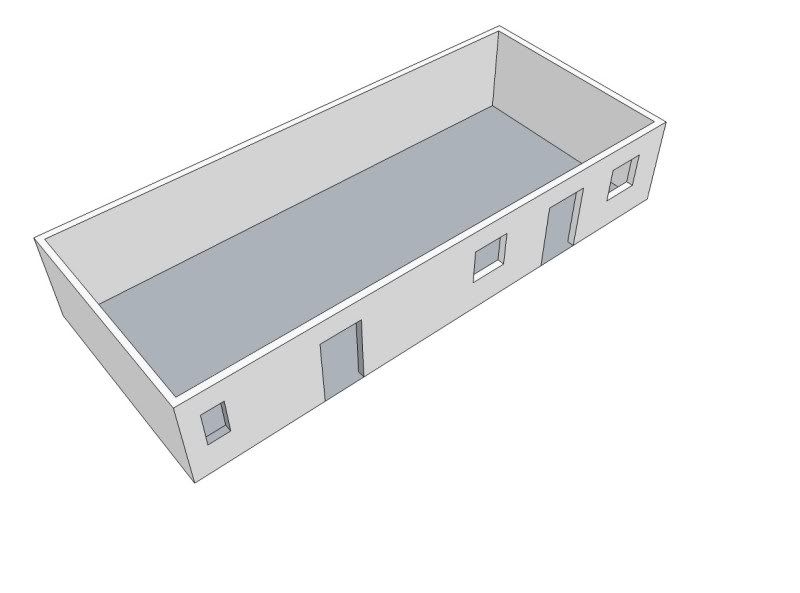 |
|
|
|
Post by OnlyMark on Jan 11, 2012 11:34:56 GMT 2
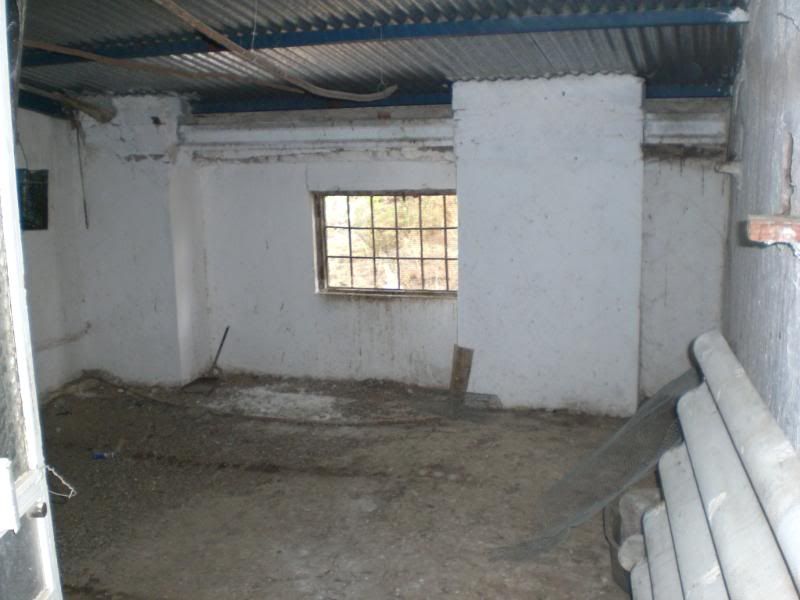
Just to mention, if you remember the front of the house, it has steps outside from the courtyard up to the middle. Eventually these will be torn down and the entrance door will become just be French doors one floor up with no access. To get into the house there will be two doors at the rear, one into the kitchen and one into an entrance hall. To get there, there will be steps around the side of the house but these will be one of the last things we do whilst the builders need access. To give an idea of the middle floor this is part of the rear of the house that’ll become the kitchen. The floor is what was the old large open space. Again, it’s quite dingy because no windows were yet put in. You can just about see the holes for the rear windows to the left which are necessarily small because of the thickness of the wall in that area – it’s just over a metre thick – 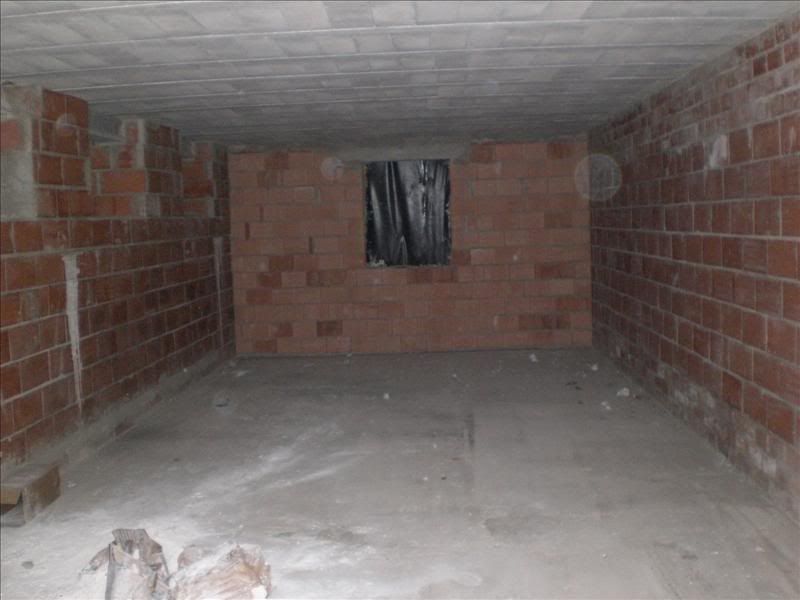 This is a representation of what the middle floor looks like at this point with the window holes put in – 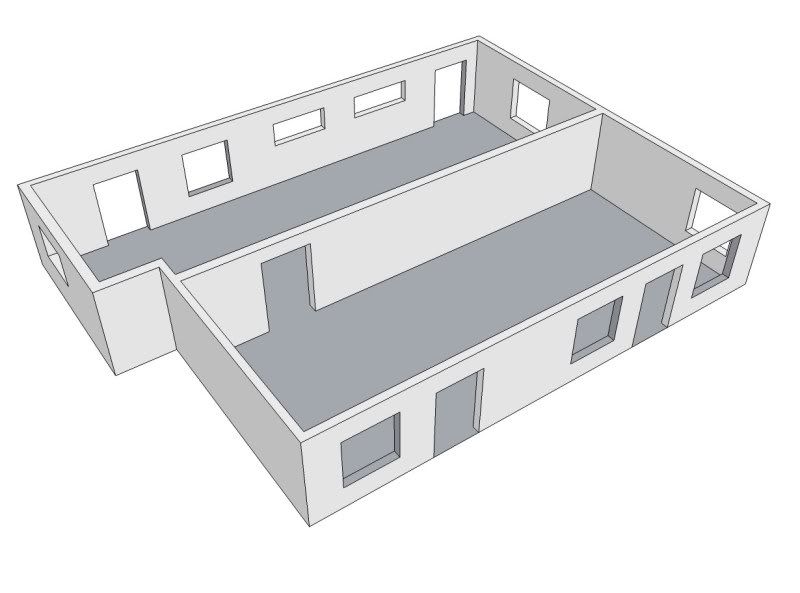 The top floor, with the steel stairs and no windows looks like this – 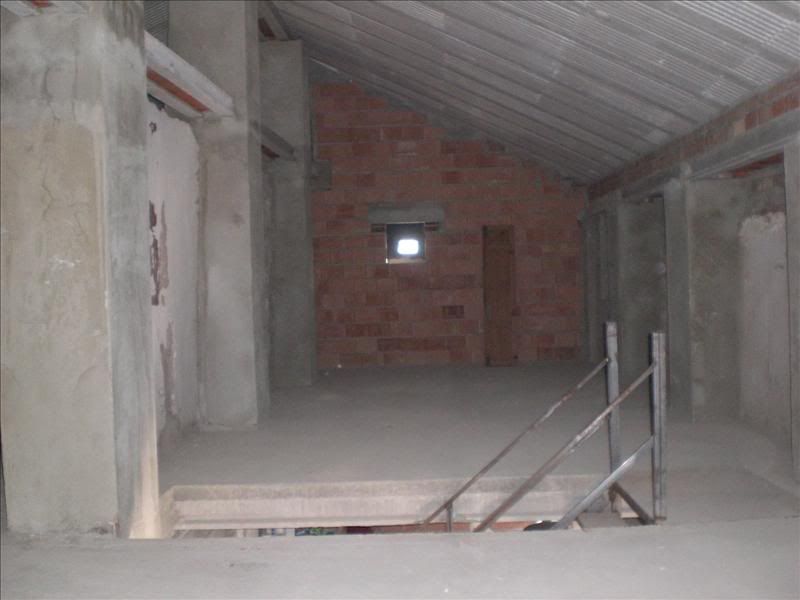 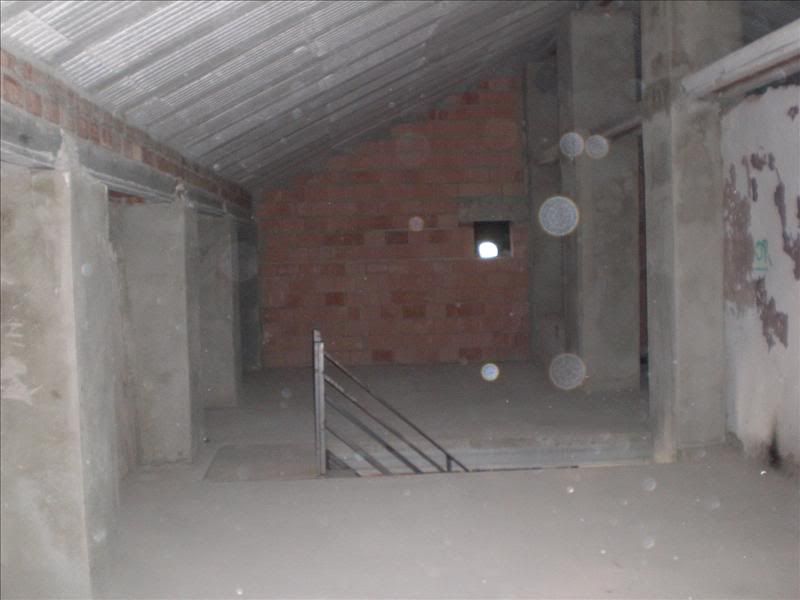 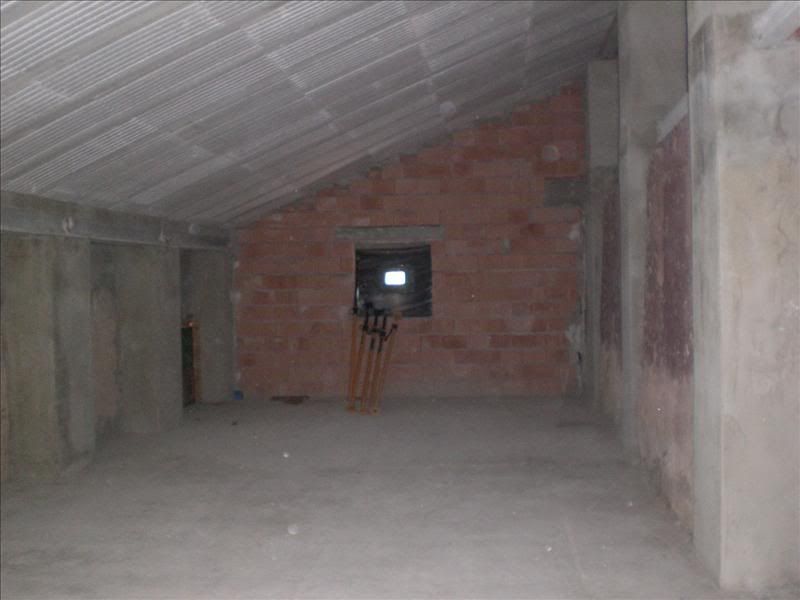 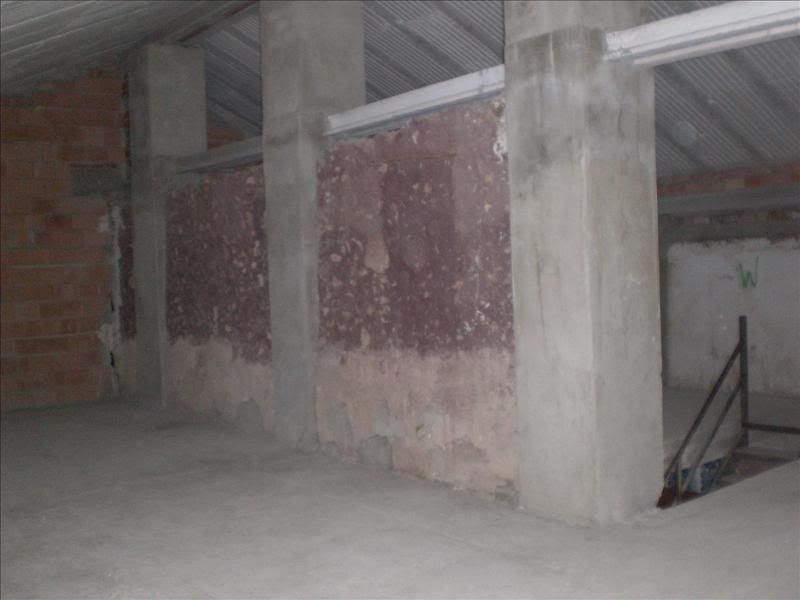 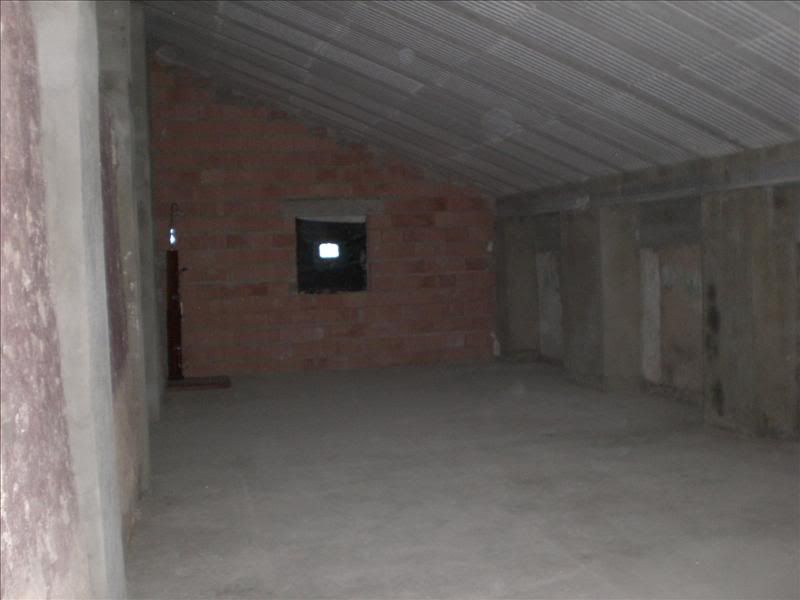 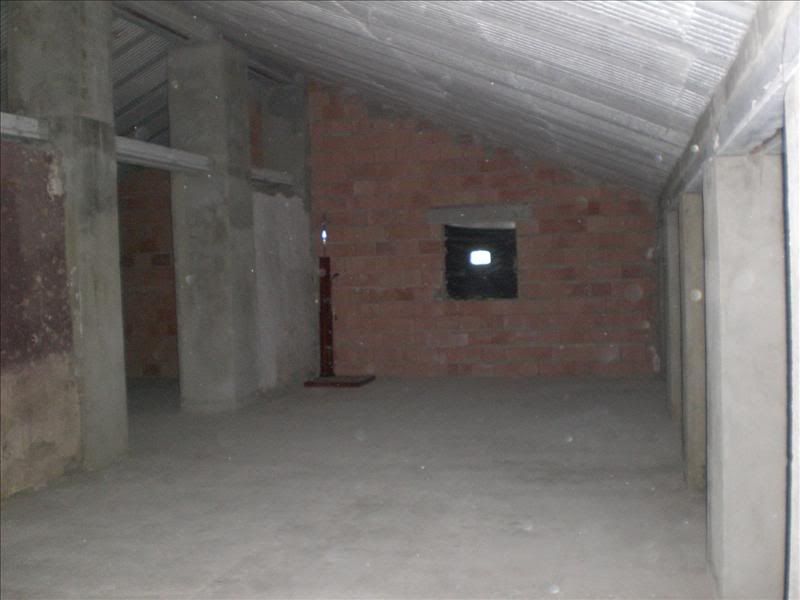 And a representation – 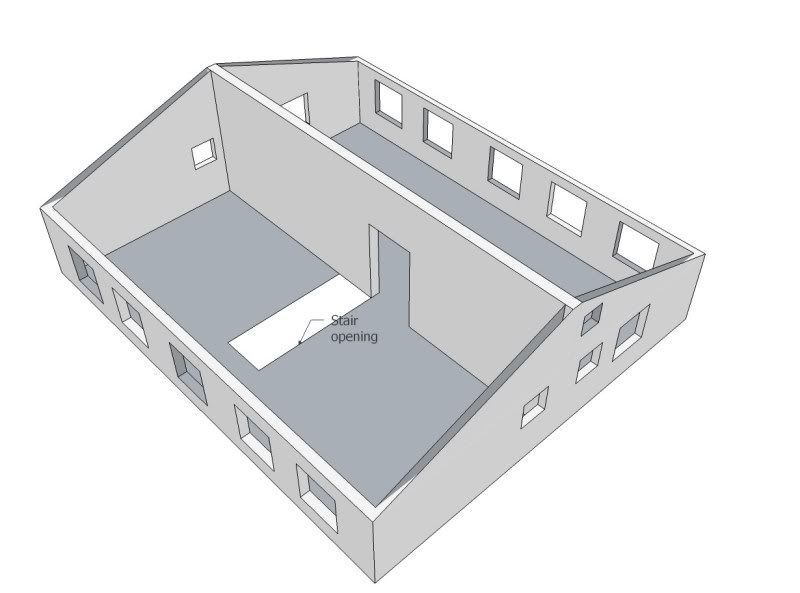 The building stayed like this the whole winter to dry out and settle and the next thing was to put windows and external doors in. |
|
|
|
Post by OnlyMark on Jan 11, 2012 11:37:18 GMT 2
Windows and doors – I wanted wooden ones. The builder didn’t. Nor did anyone else for that matter. All the advice we were given was, don’t have wooden ones. We spent ages looking at every building we could find, at the windows - wood, aluminium, plastic, steel whatever. What we also didn’t want was those uPvc type white ones that were cheap and user friendly, but not really in keeping with our view of what the house should look like. Many buildings seemed to have those steel ones found on 60’s council estates in the UK, many had uPvc and many had wood – but virtually every wooden one we opened (usually surreptitiously) stuck in one way or another. Some had aluminium, some even had wood effect aluminium. These were a reasonable price, had the right feel to them, looked fine after a few years – but looked a bit cheap and shiny when new. We also had a number of criteria – they must be able to have shutters and must be able to have mosquito nets. Eventually after an exhaustive search, these were the type we had to settle on, the aluminium wood effect types. Plus there was a local firm that manufactured them, which was a bonus. The doors we needed all had to match as well, this also could be done and the firm were willing to adapt any design they had so that we could have the mossie nets, the shutters and with the doors, a split window where the top opened plus shutters/mossie nets as well if needed. No matter how secure they were we also needed a security grill/door on the outside. This spoils the look somewhat but is necessary – and is traditional. So – these were the type of windows – 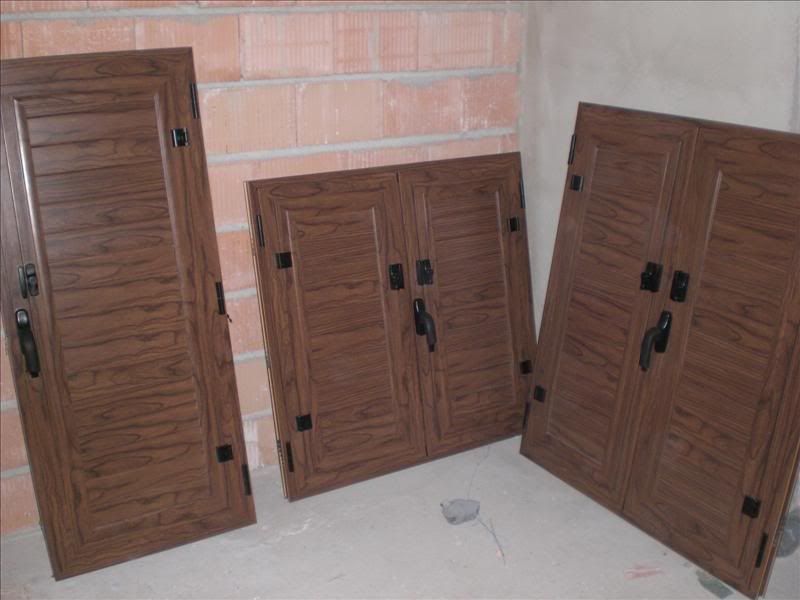 As mentioned before we need quite a lot, of various sizes, plus several doors. A price was agreed on, a delivery date and the builder was perfectly willing to put them all in. In several places the external wall that was left was not strong enough to support the window so an internal wall had to be built. This was also insulated between the two. This shows one of the three insulation boards placed in each one for that purpose – 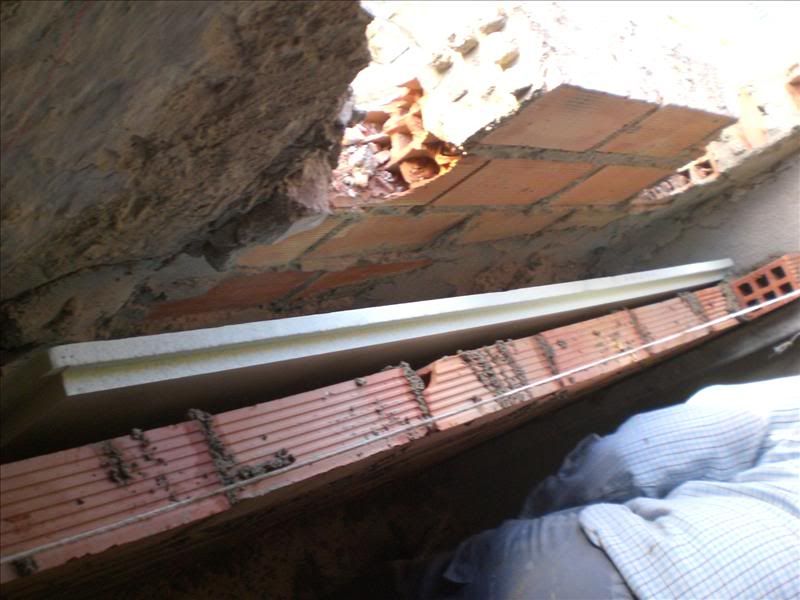 The finished window from the inside. Obviously the wall isn’t finished, it needs a scree of plaster. On the inside of the windows are shutters and when the window is opened an external mosquito screen can be pulled down – 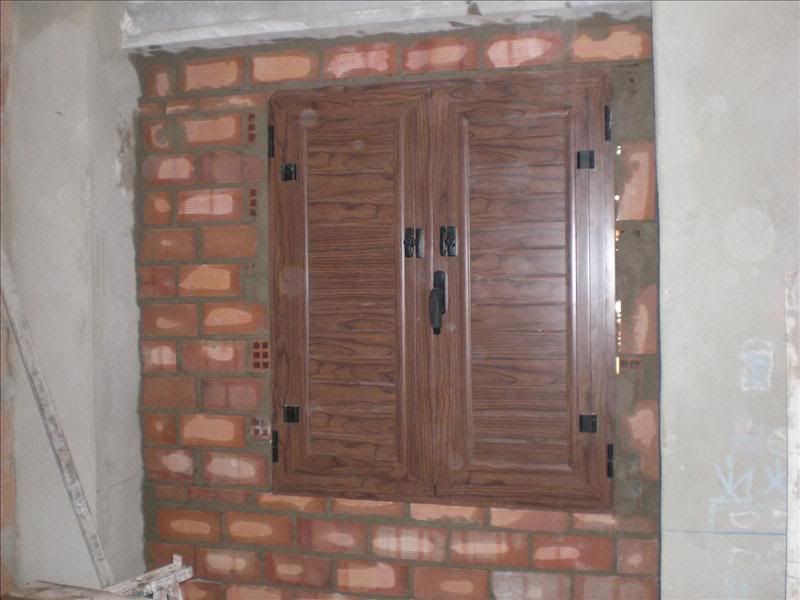 From the outside, with the security grill it all looks a bit grim, but functional. I’ve now painted all the grills with Hammerite (special hard wearing anti-rust paint) in a dark green colour and they look better than in the photos. Note the steel door in this first photo, it'll be replaced – 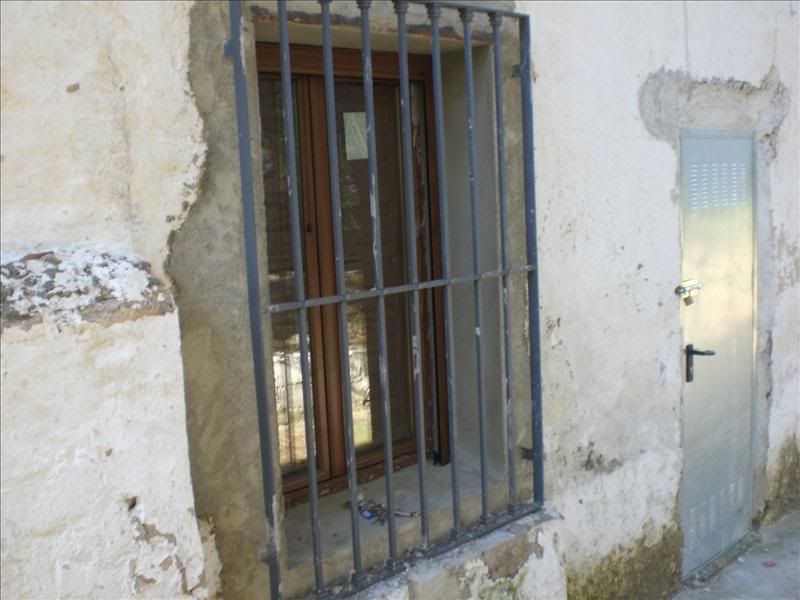 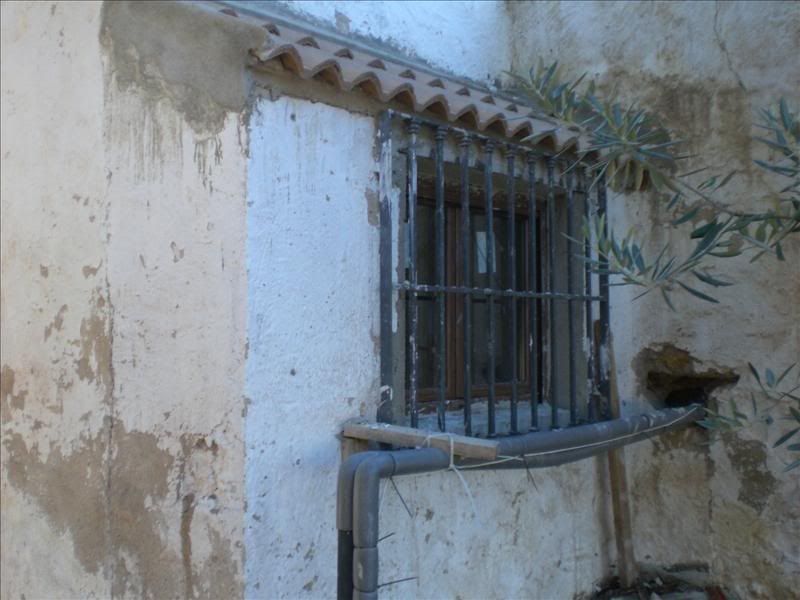 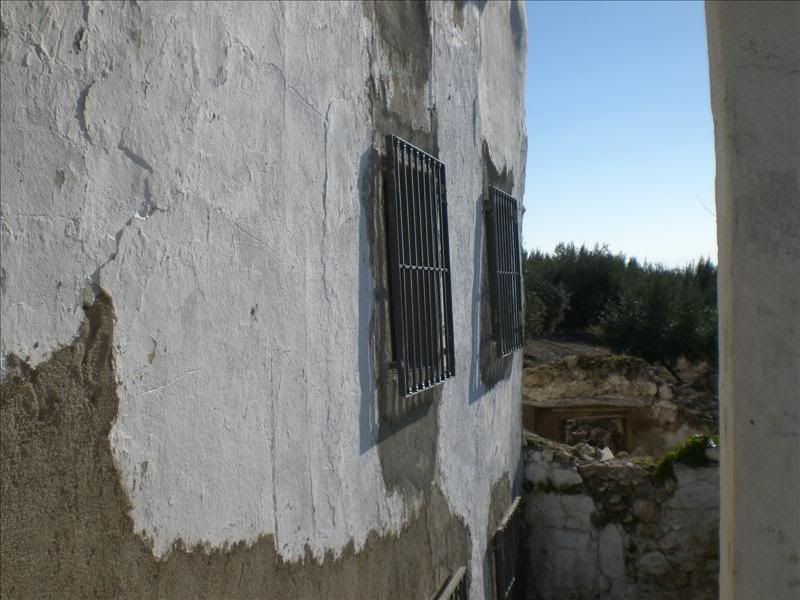 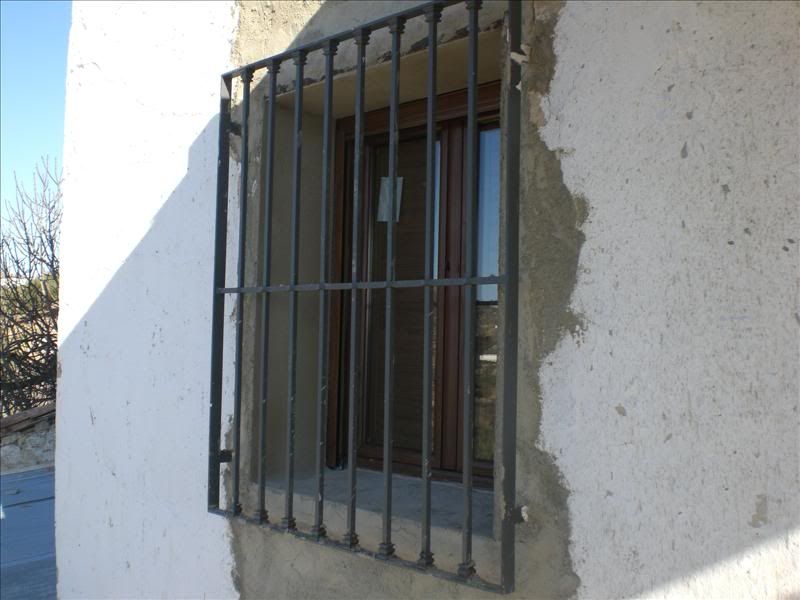 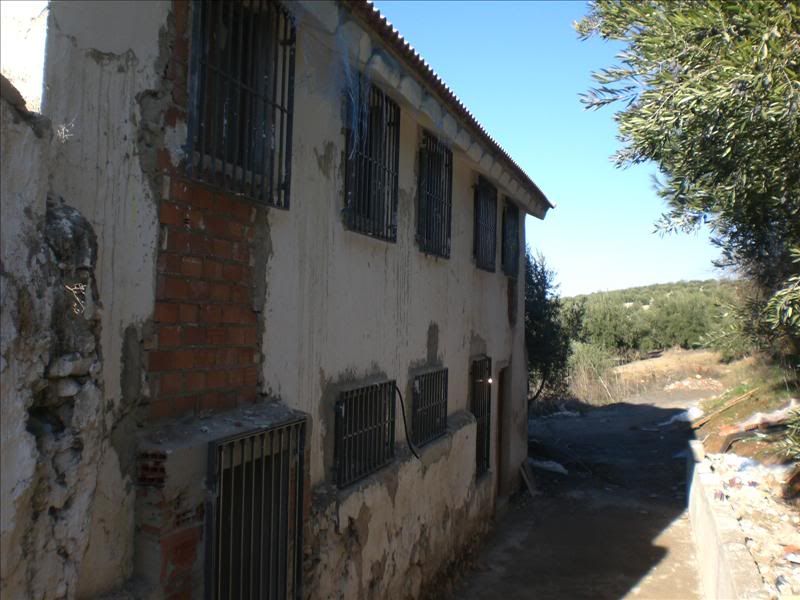 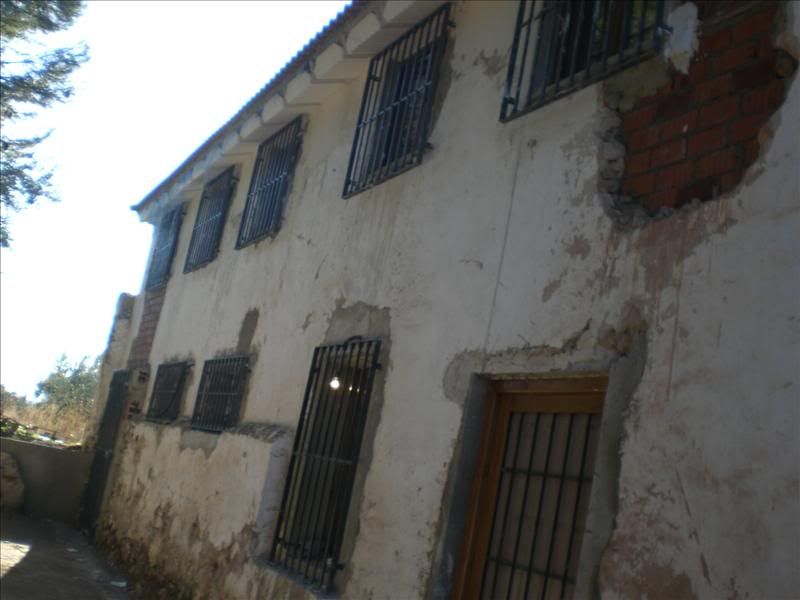 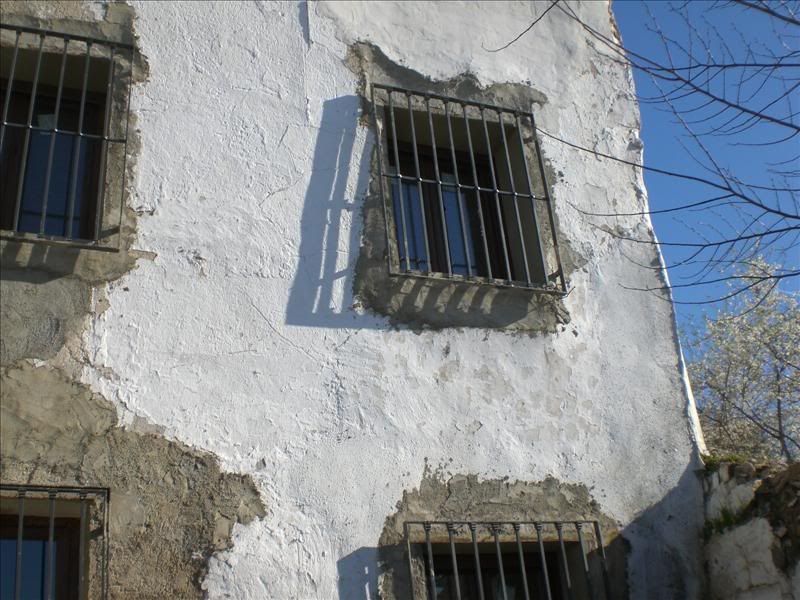 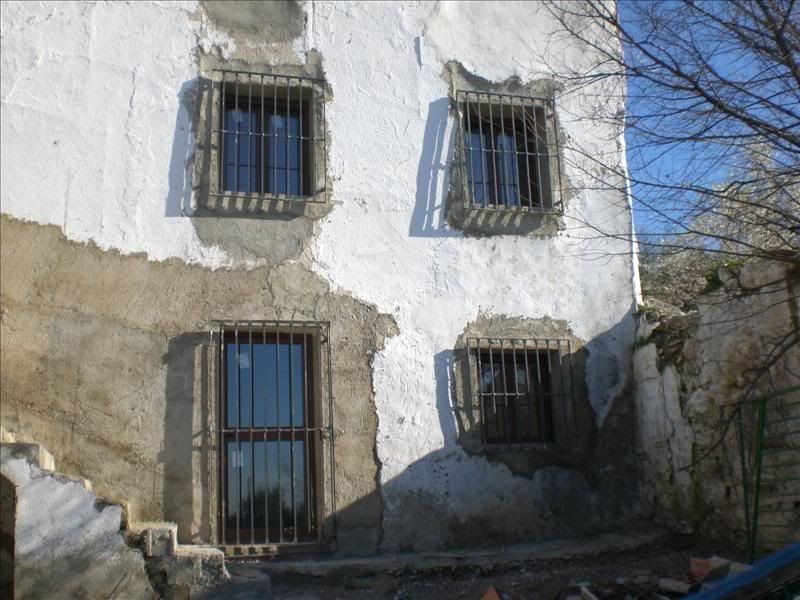 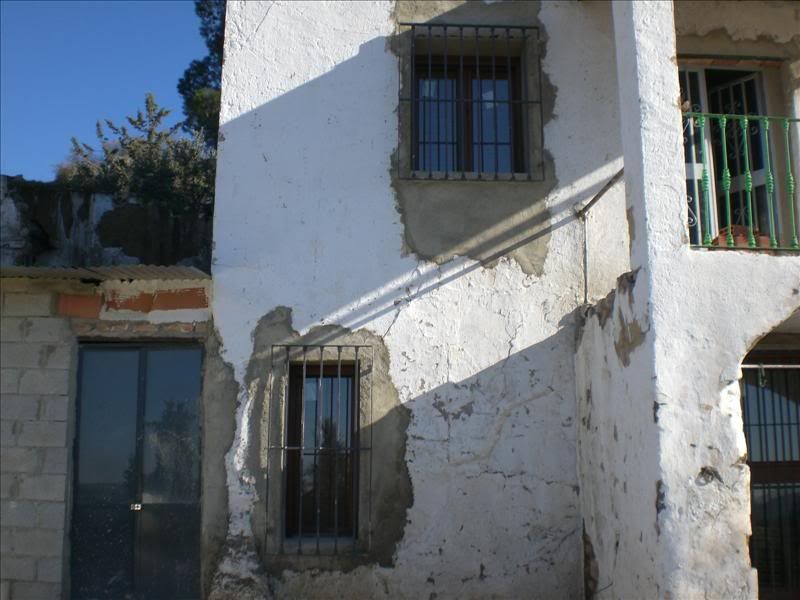 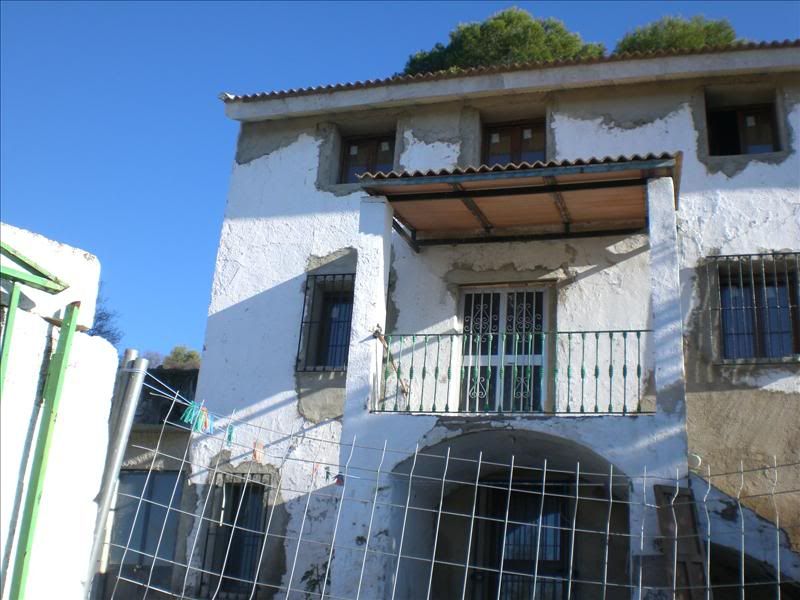 |
|
|
|
Post by OnlyMark on Jan 11, 2012 11:39:09 GMT 2
Note the French door/window in the middle of this one - 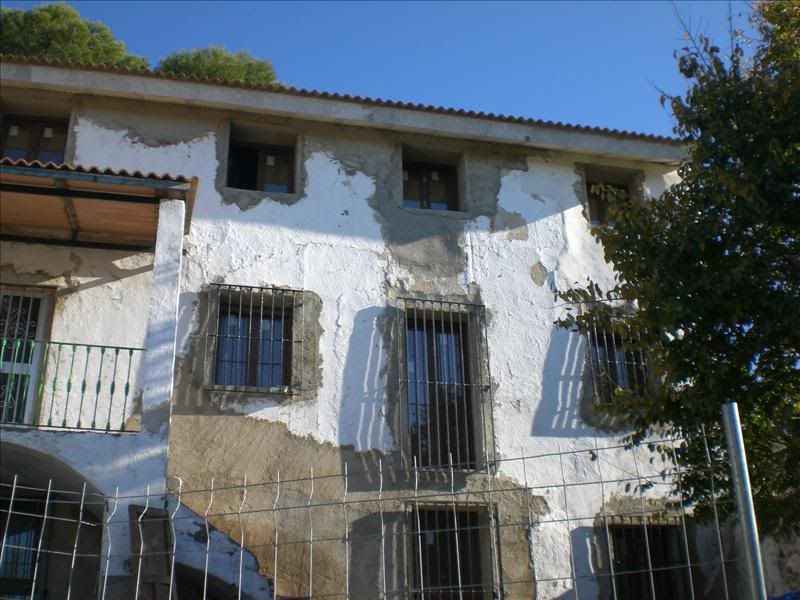 And then again in this one. Where the external steps are and the silver aluminium door, the steps will be demolished and a French one put in there as well – 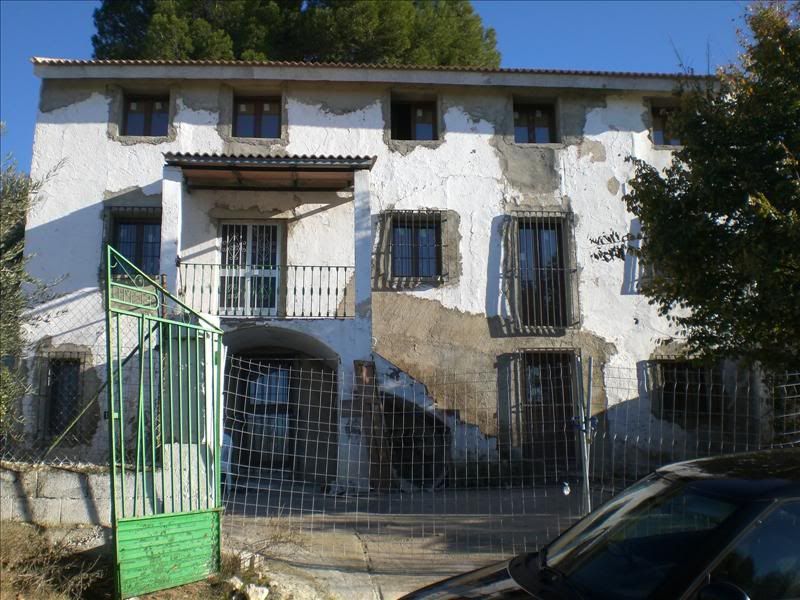 This was one of the sides of the house –  Looks a little different now – 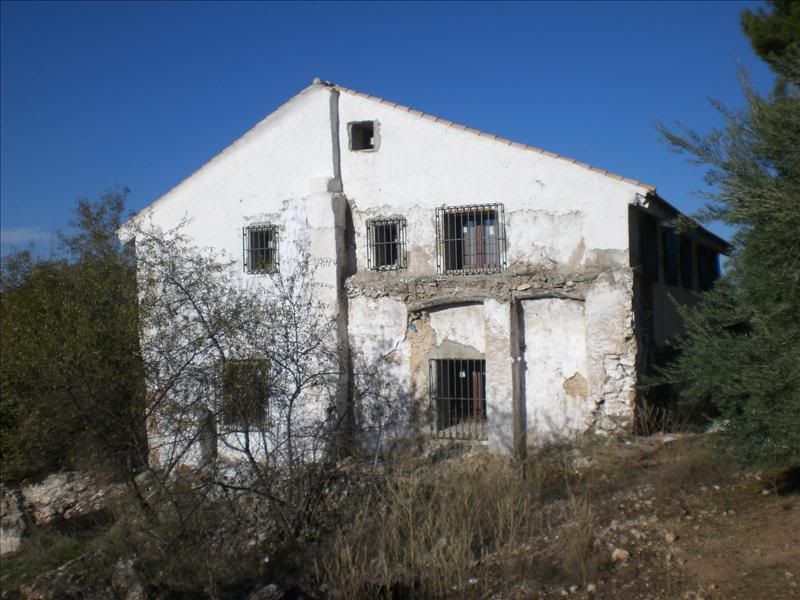 The doors at the front into the ground floor. The arch above the second is part of the external steps and due to be removed – 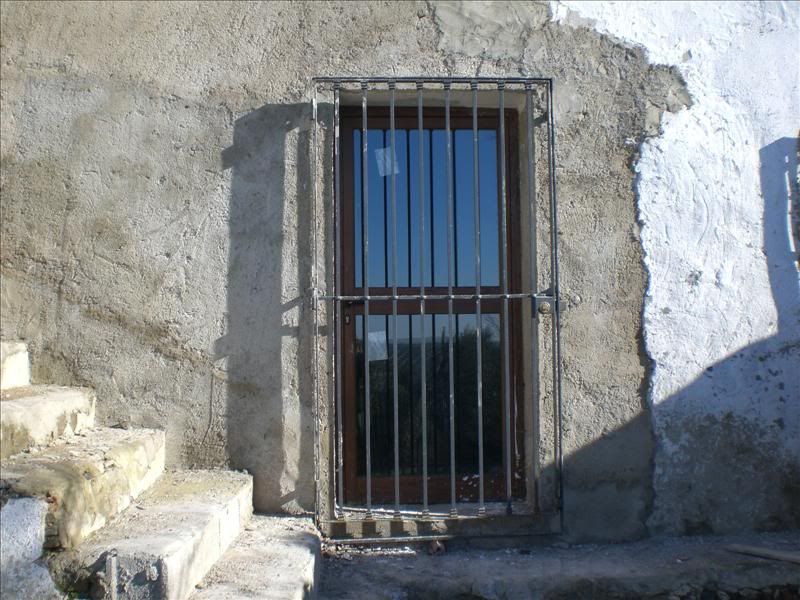 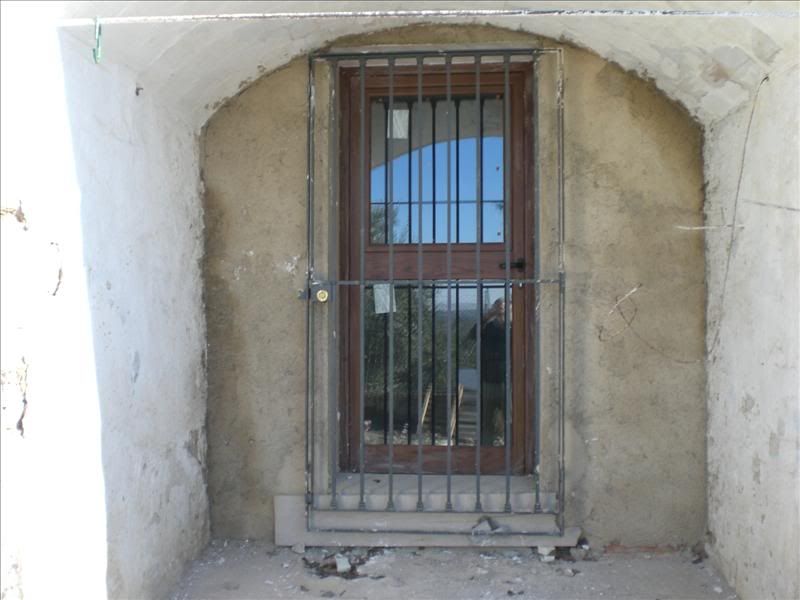 At the rear of the house on the middle floor (rear right as looking at the front) is the access to what will be the kitchen – 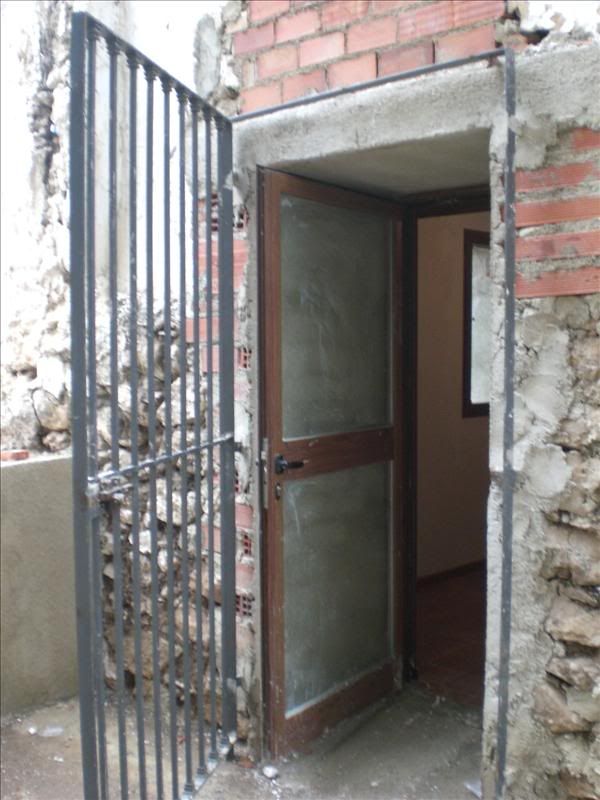 We had one door left to go. The main entrance door at the rear into the entrance hall. This also needed a shutter and a mossie net – but I put my foot down – I’m having a solid wooden one whether it’s good for me or not. I also didn’t want the security steel grill outside it for aesthetic reasons. So it had to be solid, fitted well and securely and capable of stopping a charging rhino. Cost a thousand Euros, but I hope will last me out (still looks a bit new though. It needs some kids scuffing it up and banging it shut a few times) – 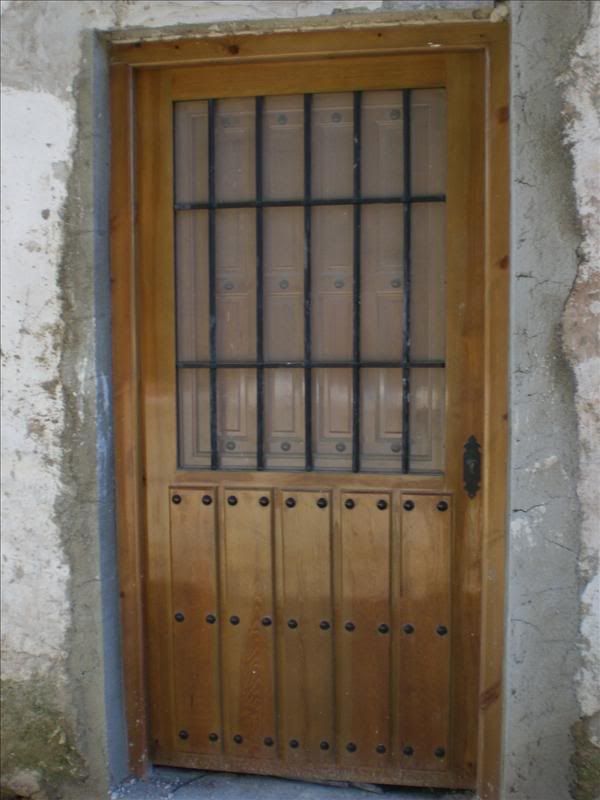  |
|
|
|
Post by OnlyMark on Jan 11, 2012 11:42:05 GMT 2
I’ll just mention the back patio. This is what it looked like – 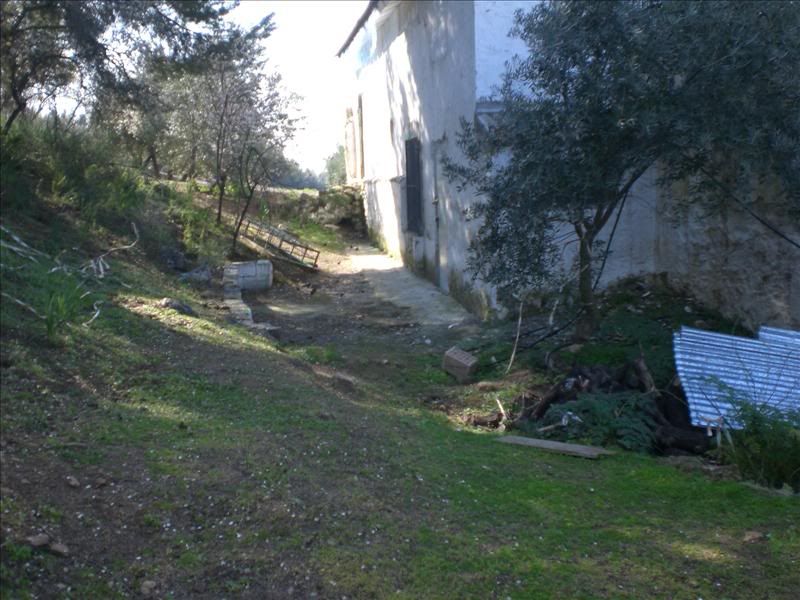 Quite nice actually but not wide enough, it didn’t extend to where the door for the kitchen would be and most importantly, sloped the wrong way. When it rained all the water would run to the rear wall and stay there, soaking in. Something had to be done. So it was. First of all we got a man with a machine in to dig it out – 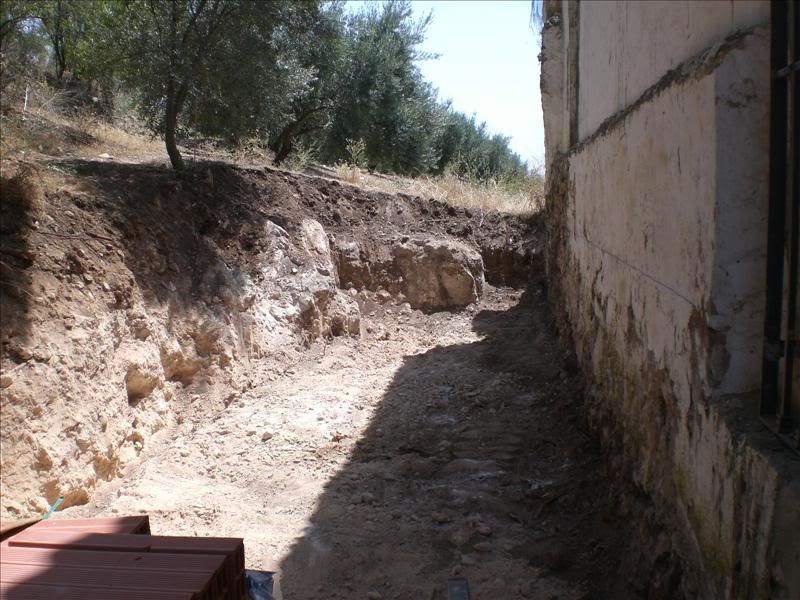 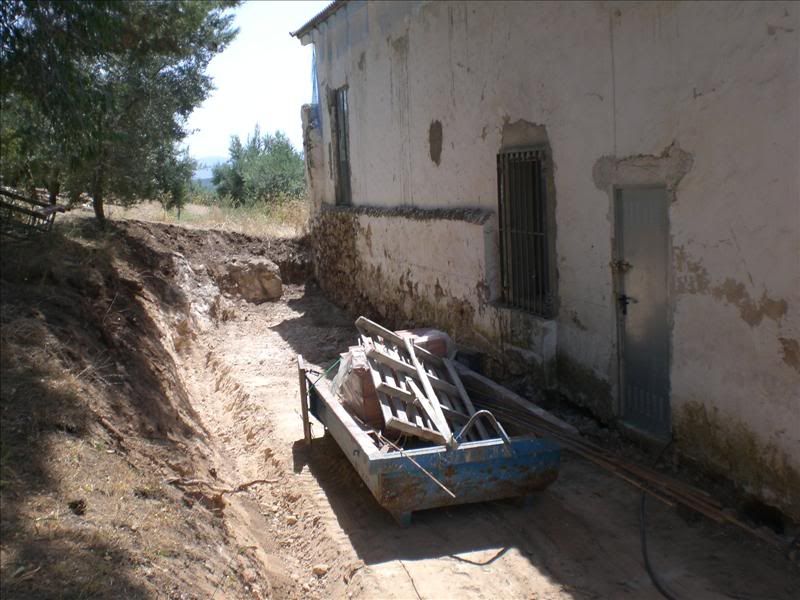 He asked me if I wanted the big rocks taking out at the end as well. No, I said, we’ll clean them up and paint them white – and build the wall around them. A concrete base was put in sloping away from the house – 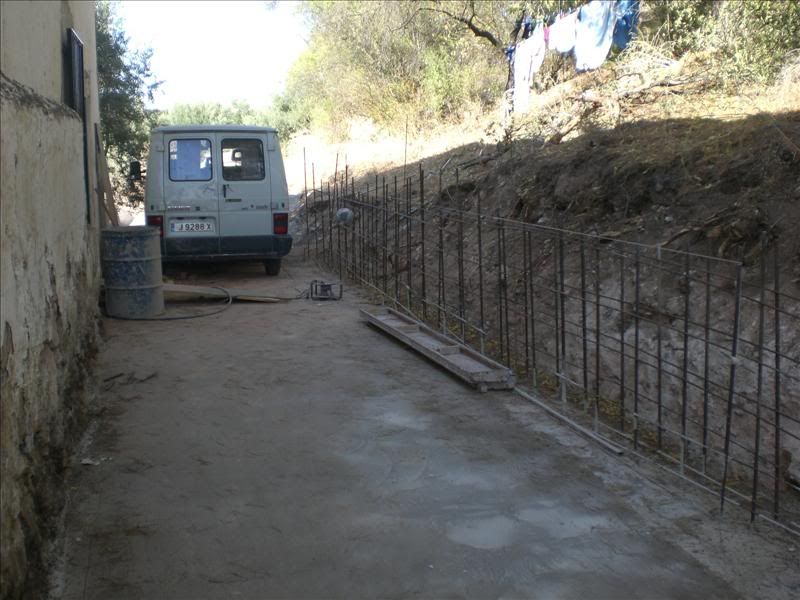 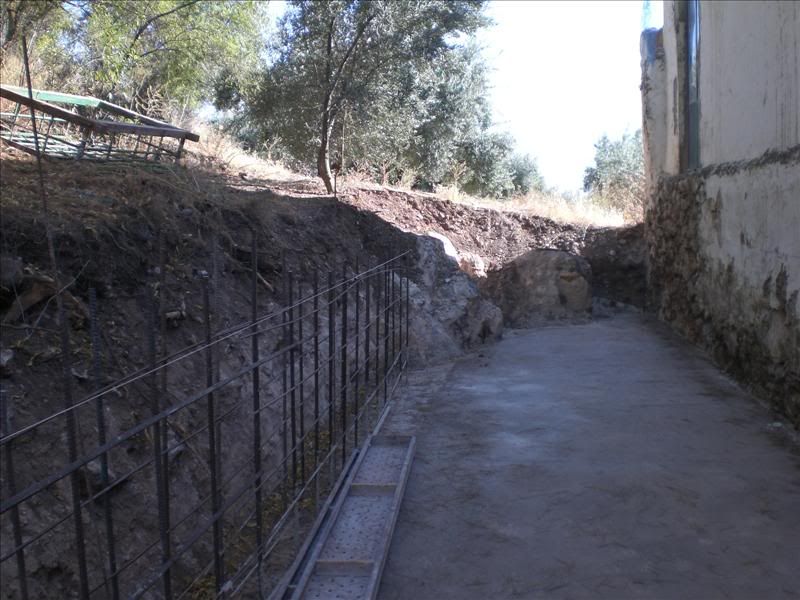 Question – how do you over the length of something like a patio, determine an exact horizontal so that you can build a gentle slope with a drop of about 10cm from one end to the other? And also a slope away from the house wall – in effect it slopes in two directions. Answer – you get a clear plastic pipe, like a hose pipe, that is long enough, plus a metre or two and that will stretch from one end to the other. Get two men, one at each end to hold it so that the ends are about at chest height at each end of the patio. Gently fill it up with water (using a funnel if you want) – it will run down the pipe which is resting on the floor (ends are up in the air). When it’s filled to about waist height – stop and hold it steady up against a wall (the back wall of the house in this case). Each man marks on the wall the exact level of the water as accurately as possible. These two points will be exactly horizontal. Join them up using a stretched taut chalk string line, twang the string carefully and a perfectly horizontal line will be marked on the wall. Measure up and down from this (the datum level) to get the slope you want. Here endeth the smartarse lesson for today. Build the retaining wall (they love concrete) – 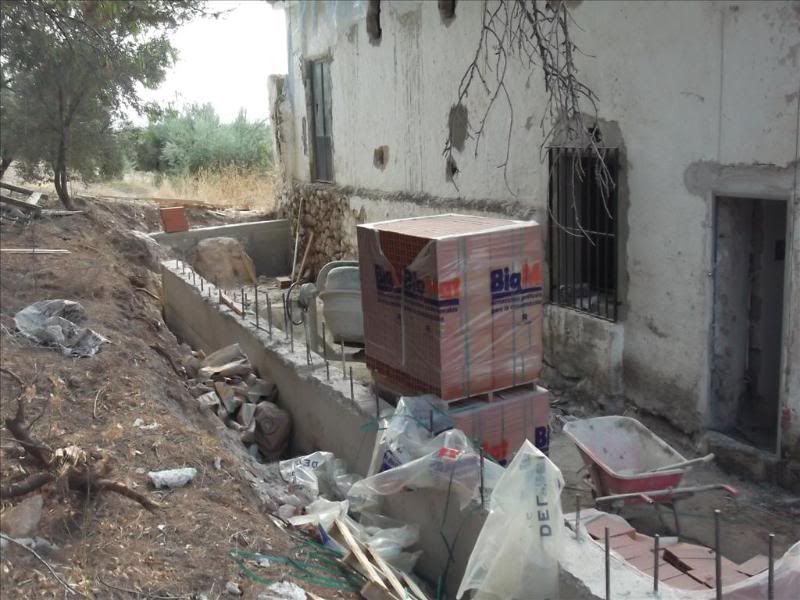 Clear the building materials off it, find an old broken plastic picnic chair and contemplate eternity in the gentle setting sun. Actually contemplate how much you need to clean it so you can dress the concrete properly with tiles or slabs – 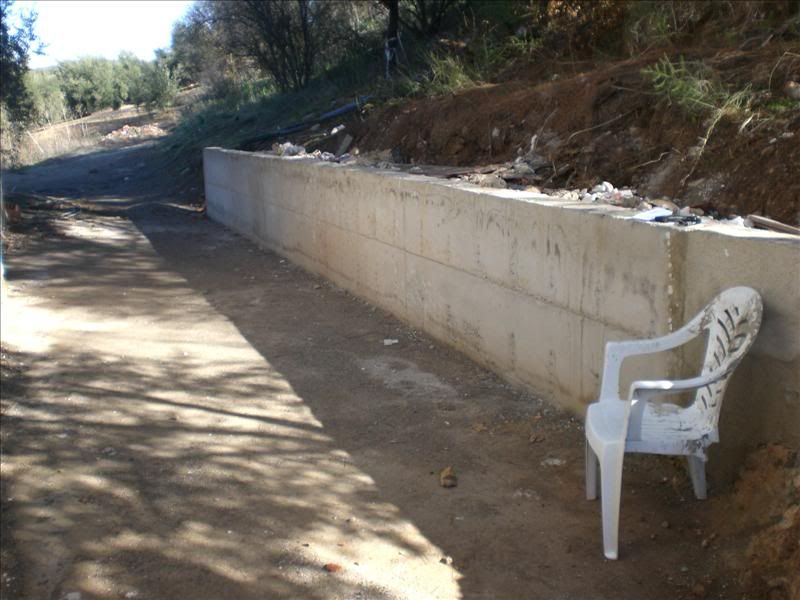 Then walk round to the front of the house to find it’s bath time for the kids – |
|
|
|
Post by OnlyMark on Jan 11, 2012 11:44:14 GMT 2
At this stage of the renovation we have a more or less empty house, just a centre wall and outside walls with a few holes in them. It was some time before this point where we decided what we wanted as to arrangements of rooms because of the locations of the windows and on the ground floor, where the drains would be when concreted in. The basic layout was made for all the floors, but on the top floor we had to make some changes. The original plan, after talking to the Spanish builder, wouldn’t work without some effort (and cost) because we’d put the bathrooms in a place whereby the drains from them would be difficult to run out of the house. Mainly this was because we’d wanted then towards the centre of the house when the best place, especially for the toilet, was on an outside wall. So I had to re-design the layout and produce new drawings for him. The builder initially wanted to know just where the internal walls would be – this he quoted for us – and the next stage would be to fit the rooms out with flooring, the bathrooms with showers, toilets etc and what tiles we’d want in there. But he did want to know where these would be so he could pipe them up accordingly. He also wanted to know where the lights and switches would be so he could ‘chase out’ (make channels in the walls) to run the wiring. The procedure is to build a wall out of block or brick, cut into it then for the pipes and wiring, then plaster the finish. So I sent him some plans. These are an example of what was sent. The ground floor was easy enough, it just wanted measurements for the walls of the two bathrooms. But I also sent him separate drawings of the lighting and location of the toilets, sinks and showers – plus a general picture so he could see what the final idea looked like. The walls and the final idea (bear in mind the tiles/colours were yet to be decided, it was just an idea) – 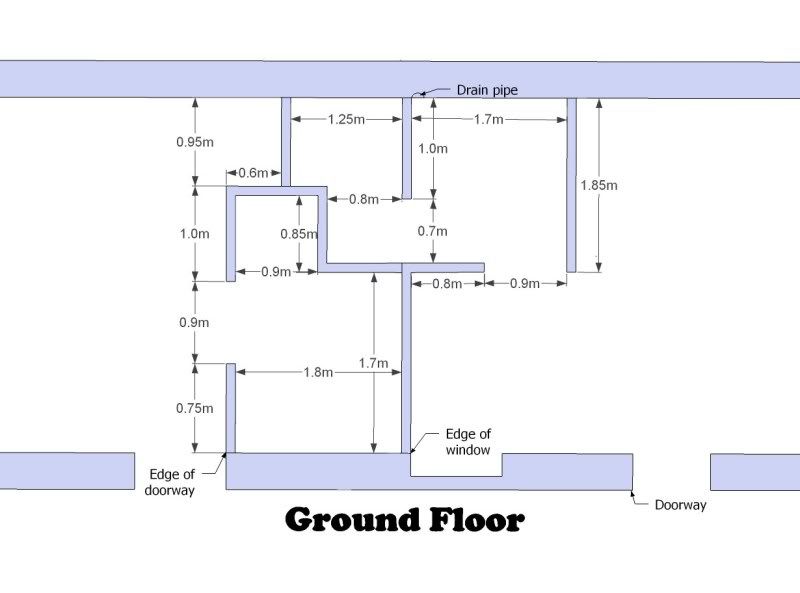  The middle floor with the kitchen representation for location, the entrance hall toilet, the rooms between the two which will be a TV room, at the front will be a living room and bottom right corner will be our bedroom and bathroom – 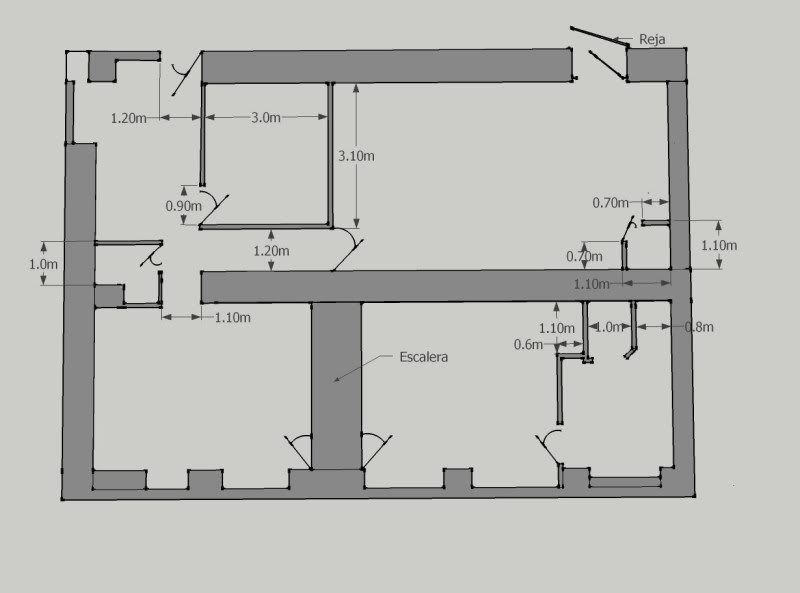 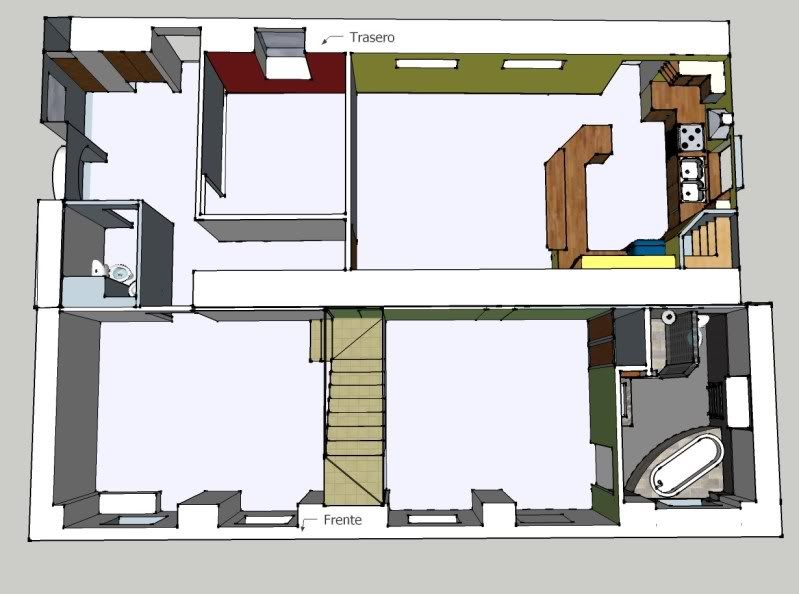  The top floor was more complex. On the ground floor would be two bedrooms and bathrooms, the middle would be as stated, but the top floor would have four bedrooms and bathrooms (or maybe three bedrooms and a study with a bathroom) plus a storage room. We have three kids, they need three bedrooms, so they’d get one each and we’d sleep on the floor below out of their way (yippee!). One room would be the study and occasional guest room. This necessitated a large number of drawings, even of the centre wall to get the sizes right. Here are just a few of them for an idea – 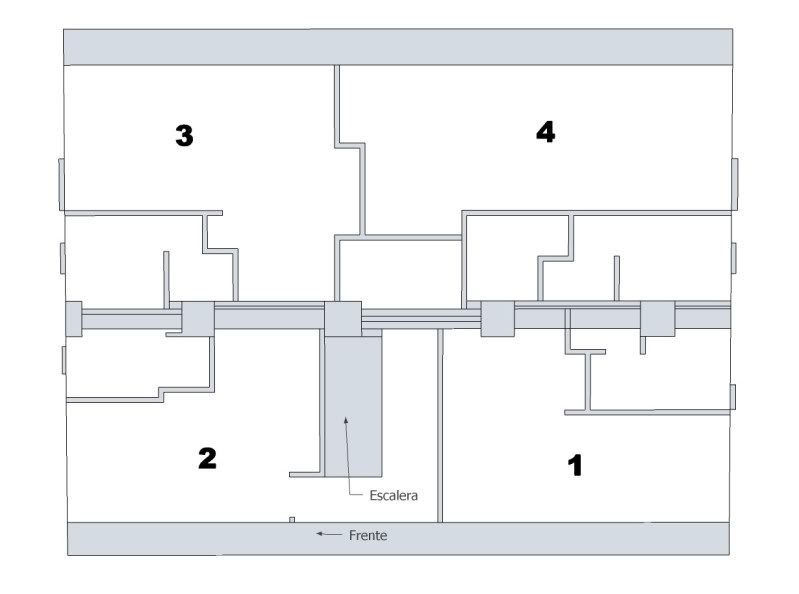 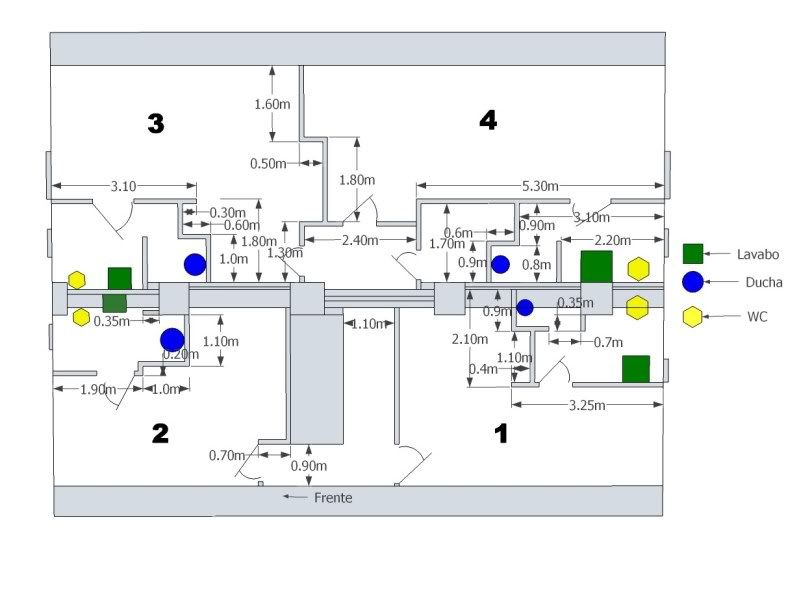 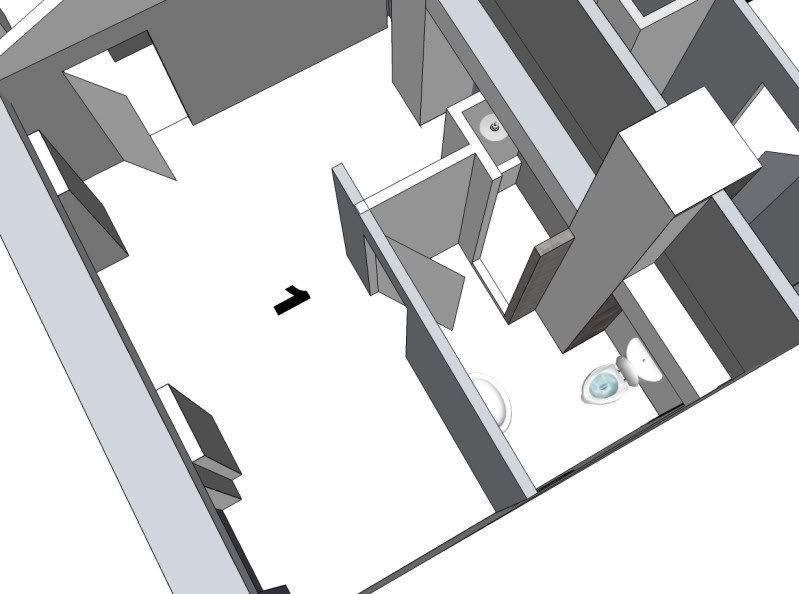 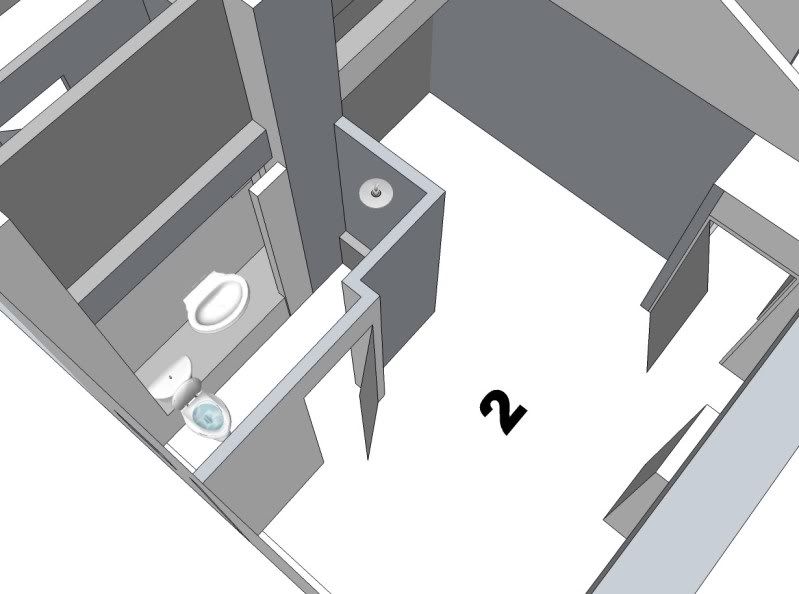 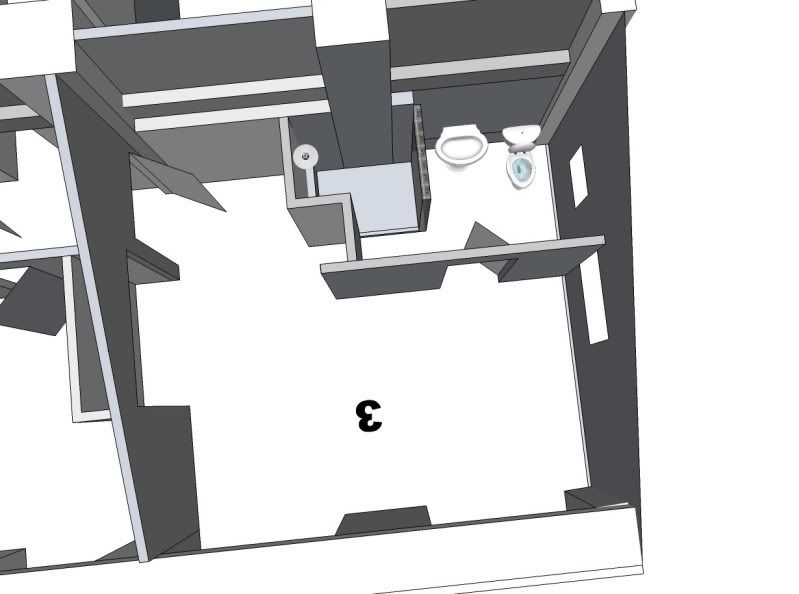 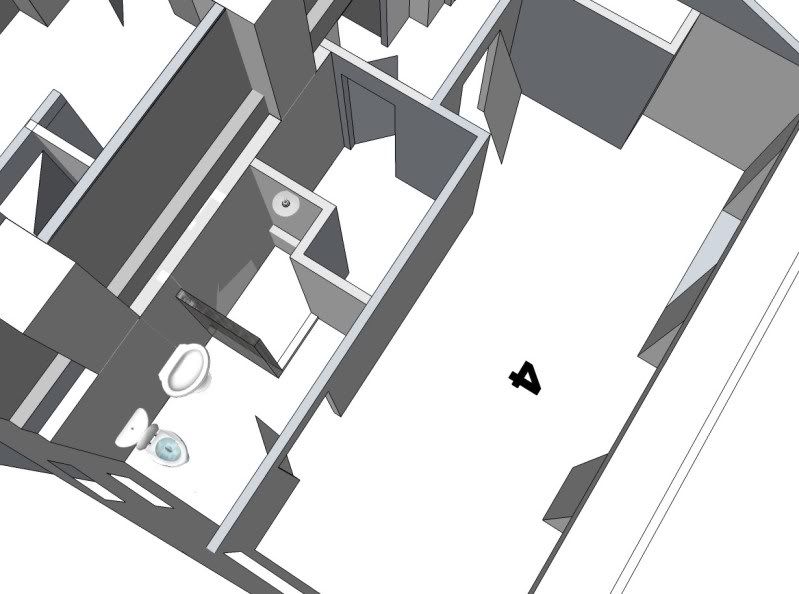 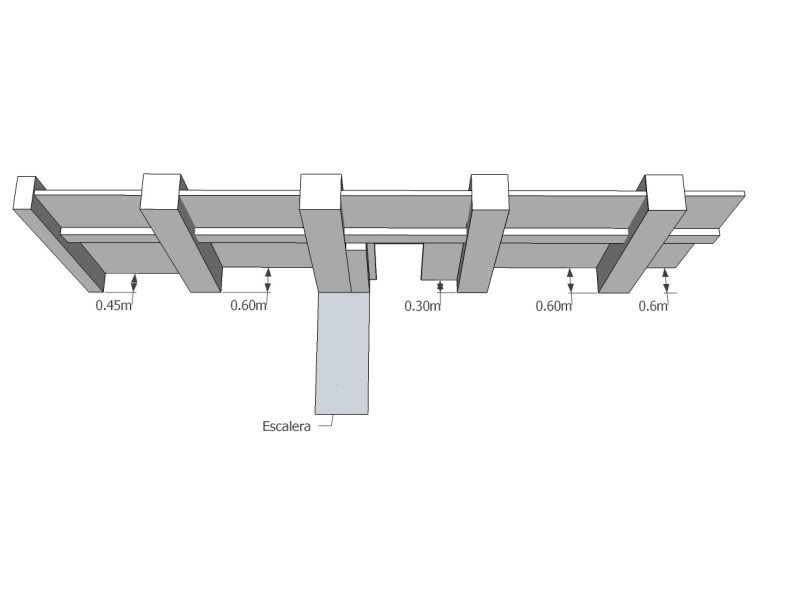 Then, as before, an idea of what each bathroom would look like but not with exact tiles as we needed to be in Spain to select what was available – but it gave an overview – 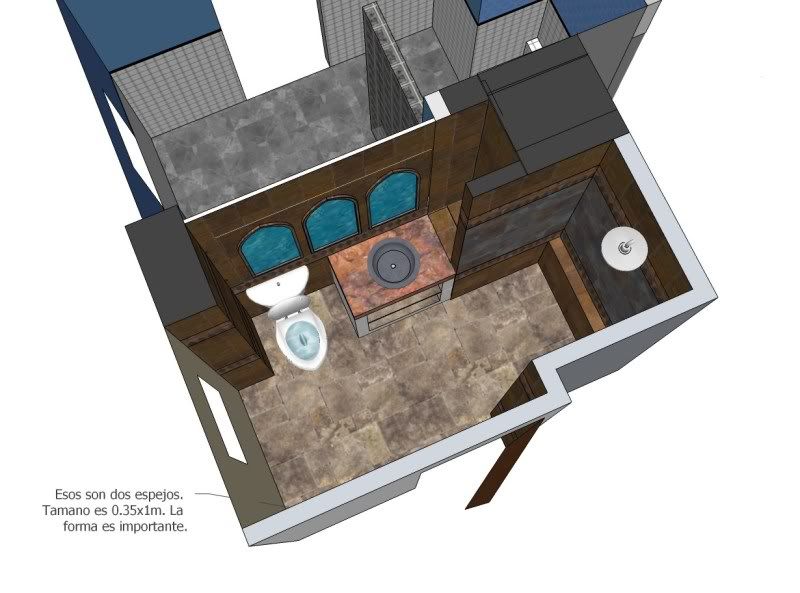 |
|
|
|
Post by OnlyMark on Jan 11, 2012 11:45:45 GMT 2
|
|
|
|
Post by OnlyMark on Jan 11, 2012 11:48:49 GMT 2
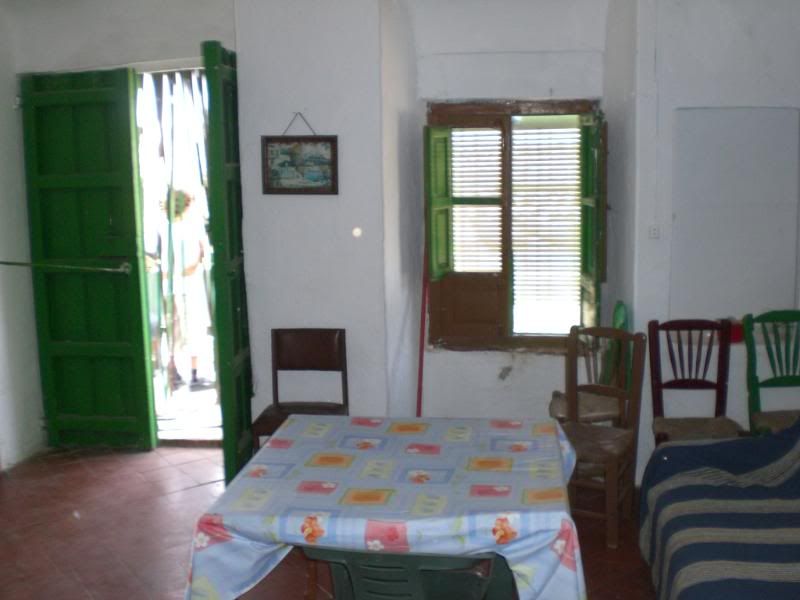
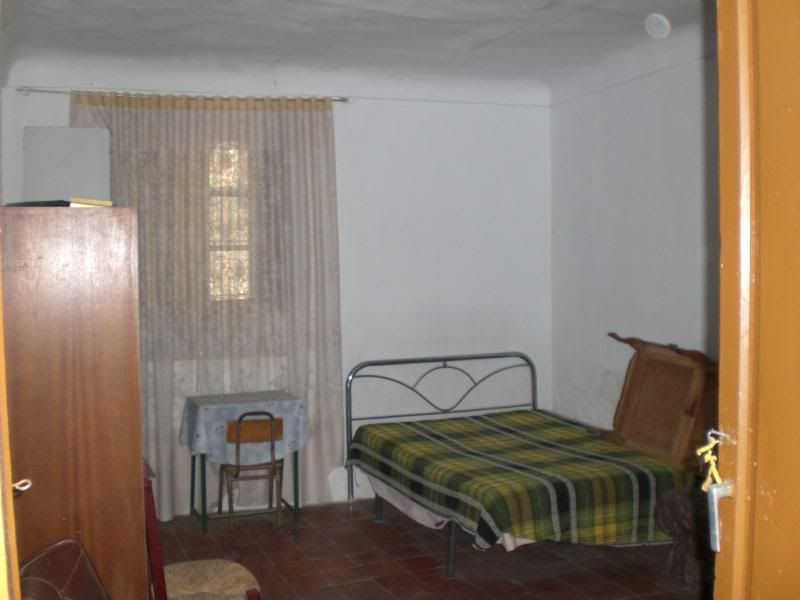
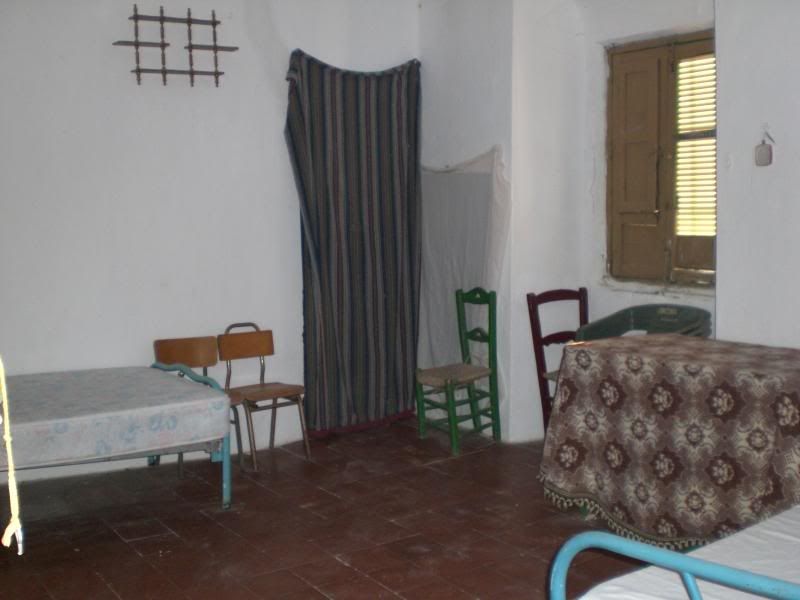
To come up to date where the house is at now – The ground floor has been completed and in fact we were living in this last summer. There are two rooms with their own bathrooms, unfortunately my camera is not good enough to do justice to them as all I can get in the frame is a wall and part of the floor. I need one of those special lenses that can get it all in. Before we cleaned it all up here are the sink units we had built – 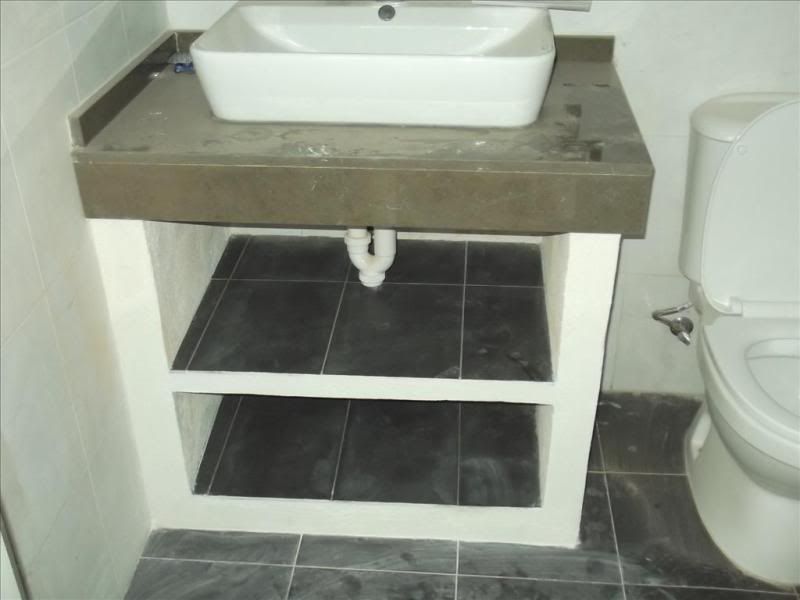 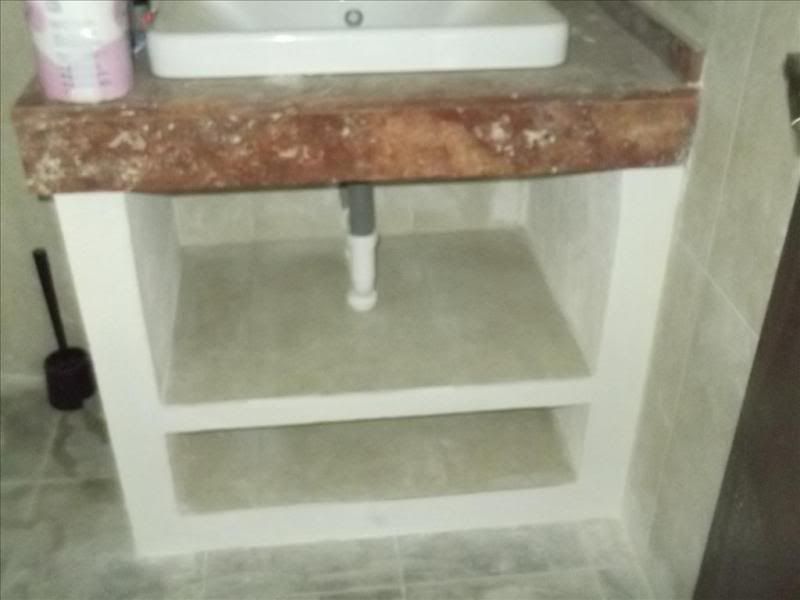 I found some odd bits of pipe laying around so I whipped up a small desk for something to do while the kids were mopping out. Don’t know what I’m going to do with it though – 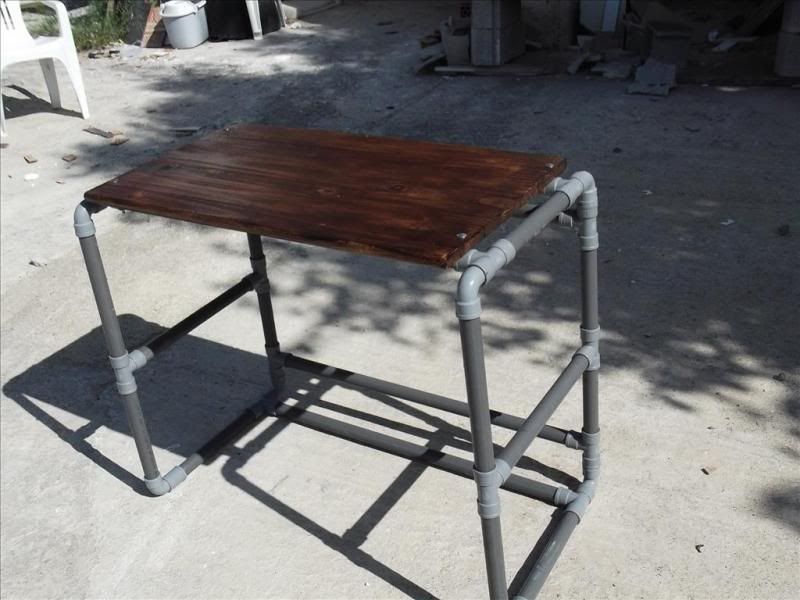 The entrance hall with the new window is coming on all plastered and fitted but needs floor tiles and painting, and the toilet – 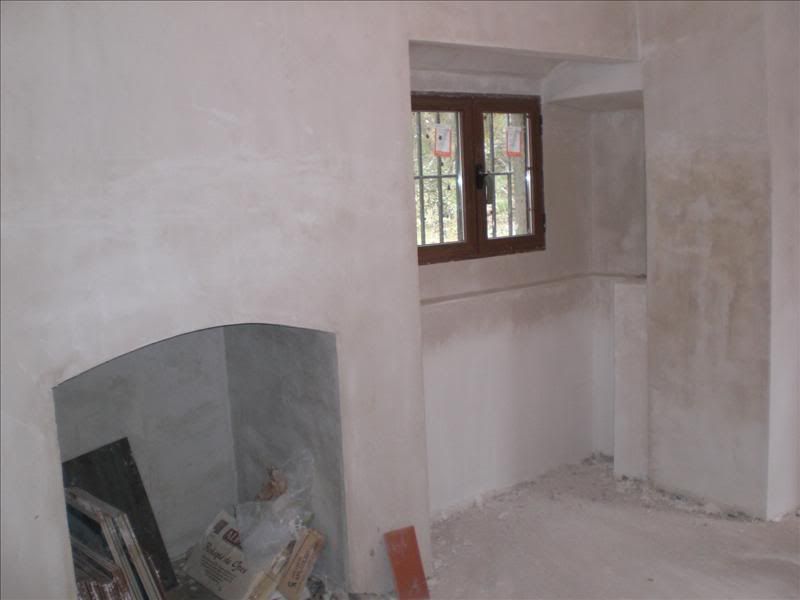  The kids decided they wanted the TV room on the middle floor at the side of the kitchen to be this colour (I’ll no doubt change it later) but it does have a floor in it – 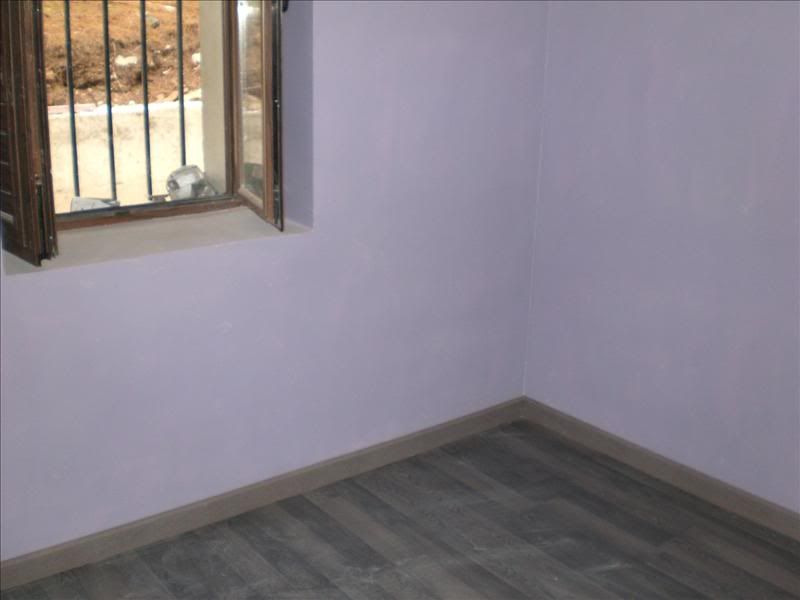 The kitchen is finished but looks a bit bare and rectangular. It needs all fitting out and a coat of paint. At the end by the window will be a pantry in the corner with a door on it – 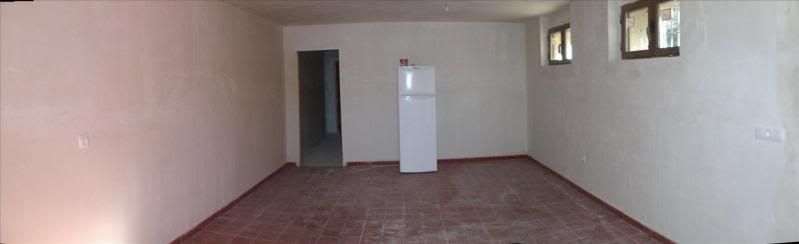 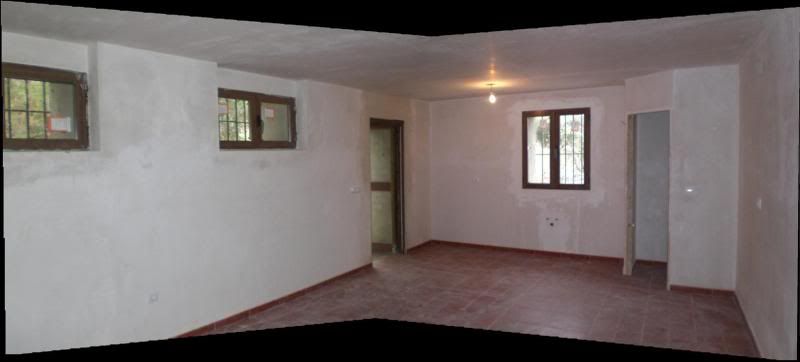 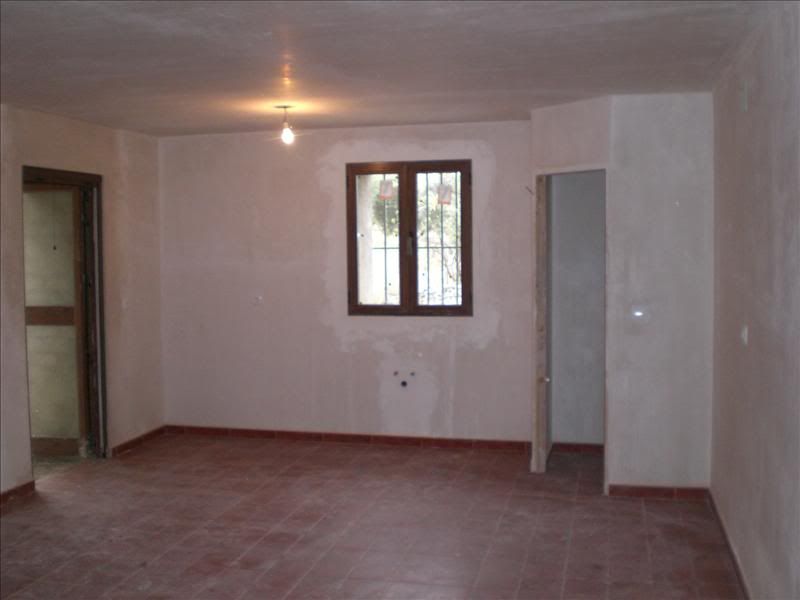 Our bedroom and bathroom is all but finished apart from, again, a coat of paint and a good clean – 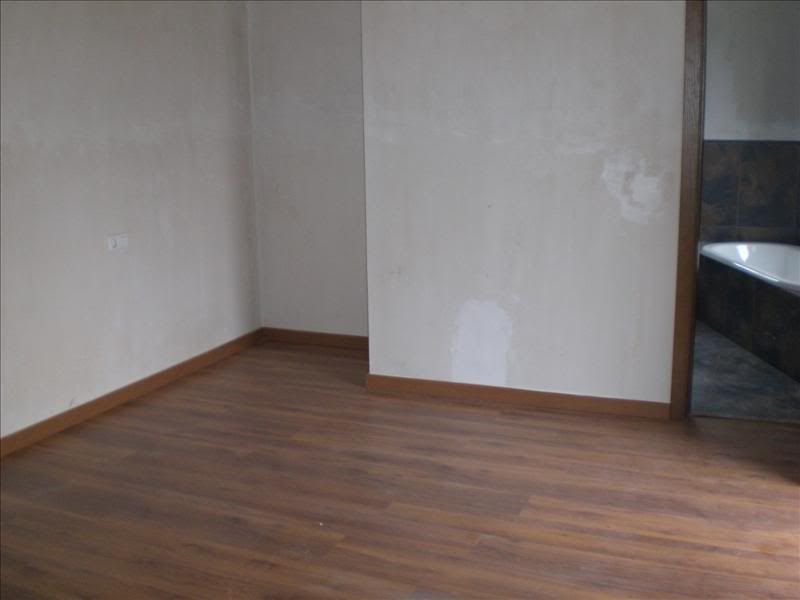 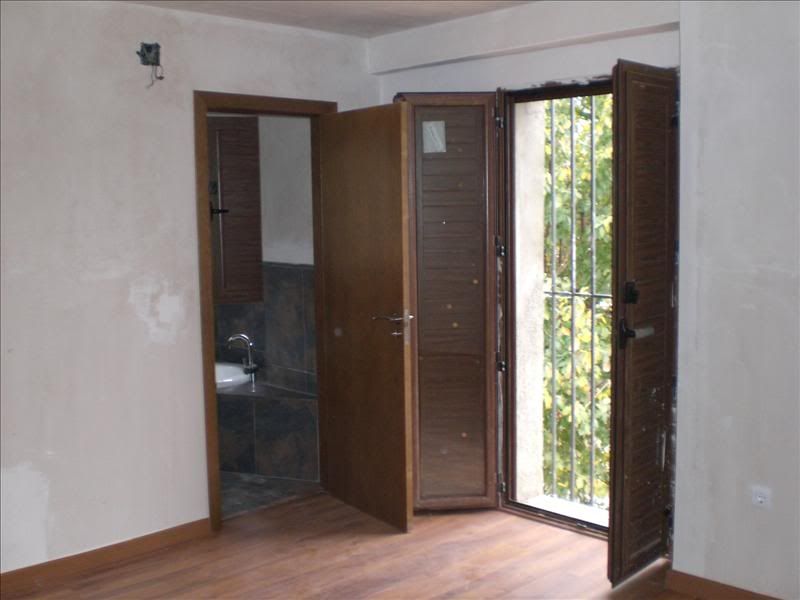 Our bathroom works well for me –   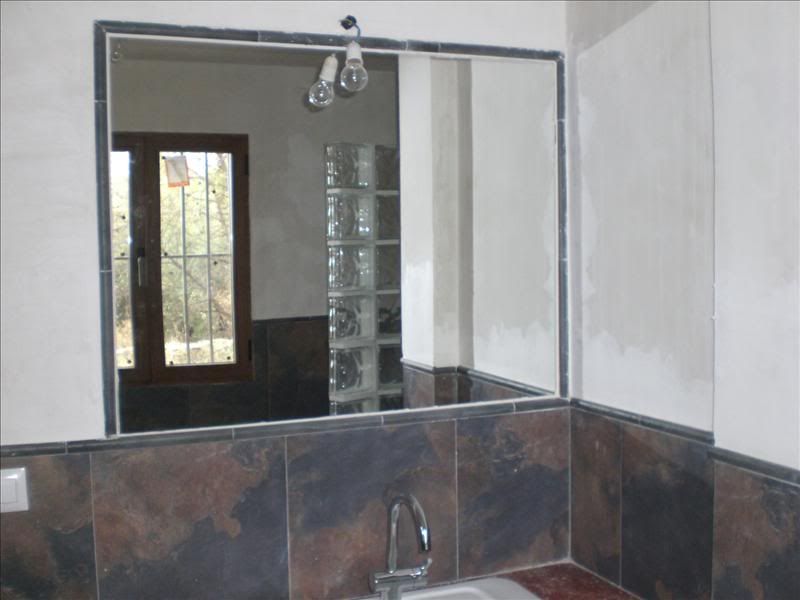 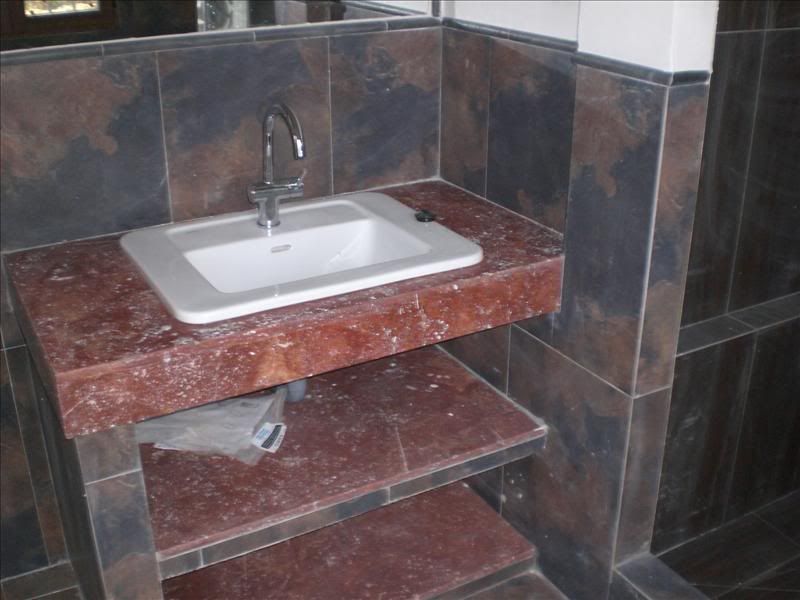 Going up the temporary stair to the top floor landing – 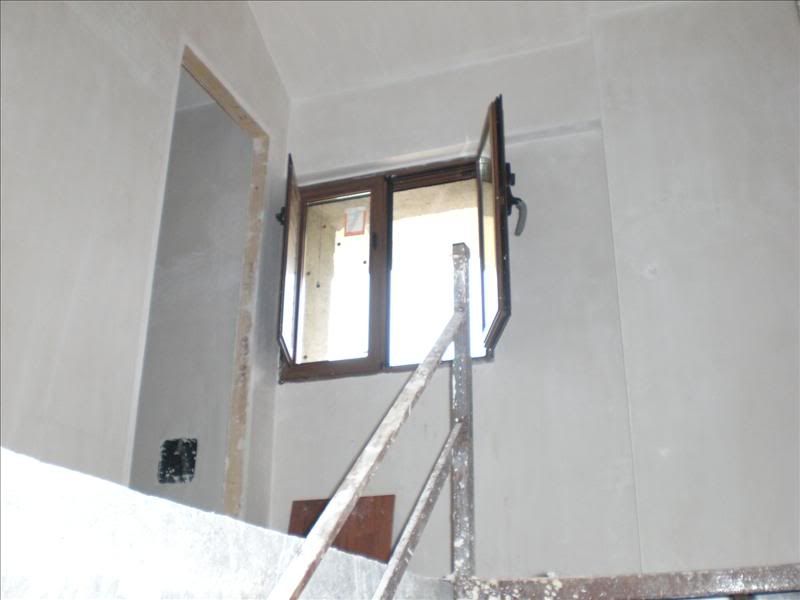 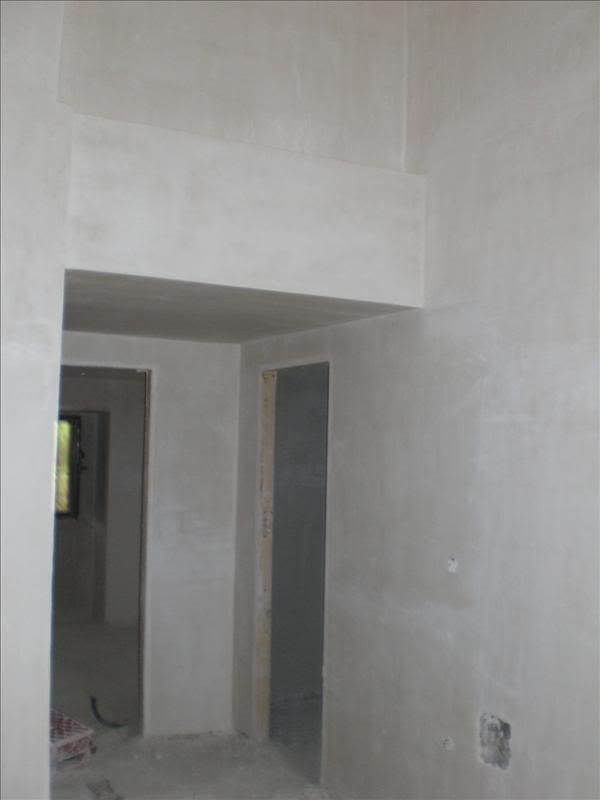 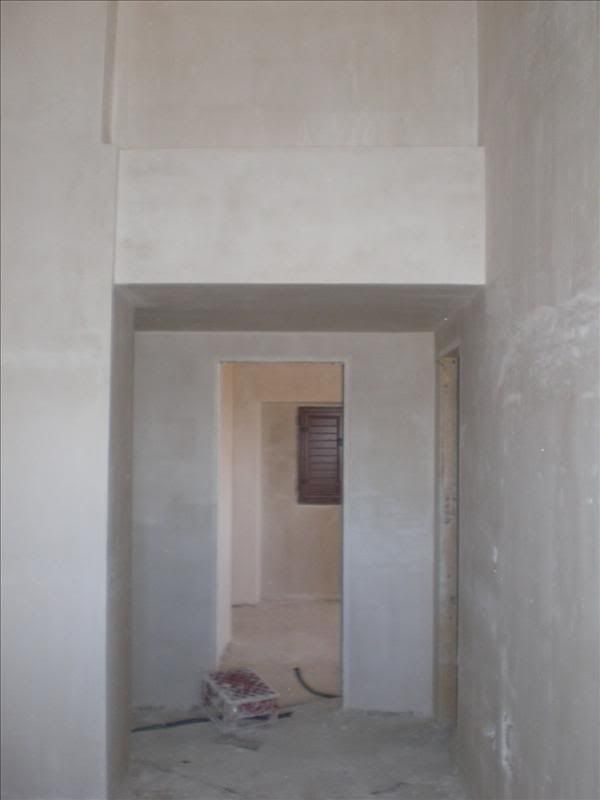 A couple of the rooms are finished upstairs apart from the floor and bathrooms need fitting out – 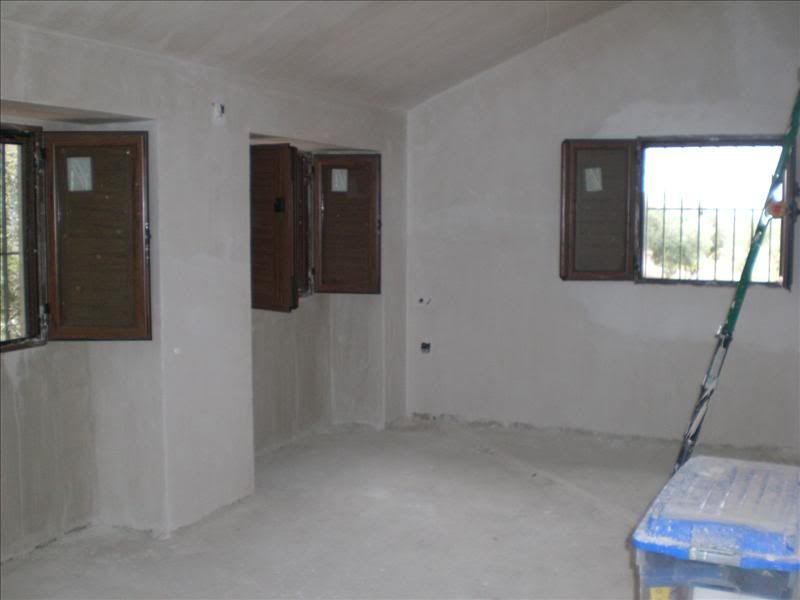 This will be one of the full height bedrooms, probably for my son, and we’ll set up the bed on top of the bathroom/store room for a bit of a change – 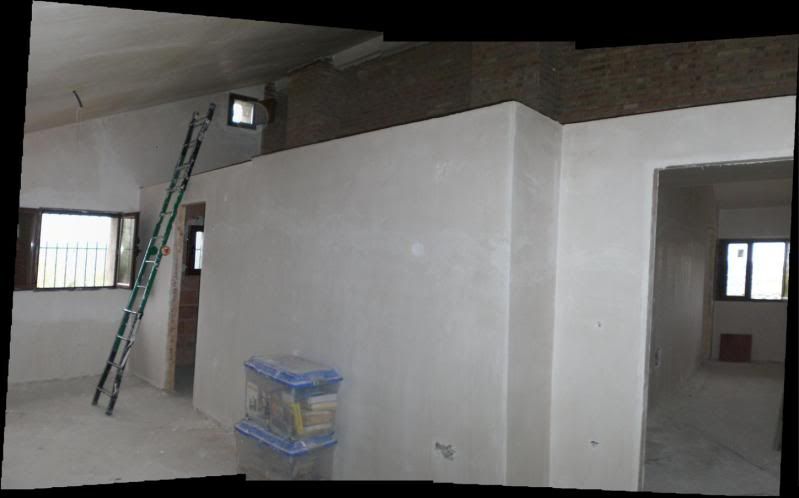 So that’s about it. Hopefully the rest of the inside can be done this year and we’ll start on the outside. The courtyard at the front will be easy enough, just wants tiles or slabs laying. We need though new walls around it and a proper gate for entrance. The main problem at the moment is that we’ve developed plans for where the swimming pool will be and the outside patios, but it seems one of our neighbours has dropped us a low ball – necessitating a re-think. He says that part of what we thought was our land, is his land, at the immediate side of the house. This was not unexpected as there are frequent boundary disputes in the countryside and we thought one or the other might try something. He is adamant about it and says he bought the land quite a few years ago and it runs up to our house wall on one side. Rumours have abounded about us for several years in the village, the main one is that as my wife is entitled to be called ‘Doctor’ they’ve understood her to be a medical doctor – which she isn’t, she has a Doctorate but not in medicine – we are going to open a hospital in the house. Other rumours are a little more weird in that it will be an orphanage or......... or........etc. Anyway, as regards the boundary, we have deeds showing it. These are registered as required and copies are at the local and area offices for such a thing. We’ve been to several of these offices to enquire as to the situation with their records. None have details of what he is saying, they only have on record ours. He states he’s done everything legally and has deeds and it is registered. We’ve told him there are no records of it at the proper offices. We’ve also told him that he needs to bring to us, or meet us somewhere, with his proper authenticated deeds (that do have a map on them as standard) so we can see them as at the moment they appear to be fictitious. This was last summer and we’re still waiting for him. The other point is that, without getting too complicated, the law in the area states that he would not be allowed to buy the piece of land he says he did because it is too small a parcel for the non urban area and not attached to his other land nearby. So we’ll see what happens. |
|
|
|
Post by auntieannie on Jan 11, 2012 13:47:53 GMT 2
my head spins now, Dr Only! I think I would have had a nervous breakdown much earlier in such a situation.
|
|
|
|
Post by OnlyMark on Jan 11, 2012 15:30:12 GMT 2
There were times when it was very frustrating for sure.
|
|
|
|
Post by Voy on Jan 11, 2012 16:29:00 GMT 2
amazing! It's great that you have this saga all written out. And in "your" version, I hope with even more photos!
please keep them coming, as the rooms really turn into rooms!
and ... do you really have to remove the arches on the front - to me they add a real element of charm.
well done Only!
|
|
|
|
Post by OnlyMark on Jan 11, 2012 16:54:56 GMT 2
Thanks Voy. The arch at the front is there to hold up the steps that will be removed. But the plan is probably to have a full set all the way across the front, but not so thick. So in effect it'll be put back.
|
|
|
|
Post by missalaska on Jan 11, 2012 17:06:33 GMT 2
Great stuff, mark. I hope you get the land dispute sorted this year!
Looking forward to the updates!
|
|
|
|
Post by auntieannie on Jan 11, 2012 18:47:43 GMT 2
fab anyway. and all power to you and yours!
|
|
|
|
Post by ninchursanga on Jan 11, 2012 19:50:27 GMT 2
Wow. This is fantastic!
|
|
|
|
Post by OnlyMark on Jan 11, 2012 20:00:58 GMT 2
Give it another year or so and we'll have a house warming pissup.
|
|
|
|
Post by Ethel Mertz on Jan 11, 2012 22:06:11 GMT 2
A most impressive show and tell, Mark. Thank you.
Ha! Wait'll the Potters start showing up ... we'll have the neighbors scratching their heads and gossiping under the olive branches, for sure.
|
|
|
|
Post by welle on Jan 12, 2012 23:14:57 GMT 2
Wow, this is impressive. I'll have to come back to this thread and read through it more closely when I have more time, how interesting!
|
|